The Breakdown
Pros
Cons
Getting to Grips with the Sena 10C Evo
As so many of us gear up for a new riding season, with related planning that goes with it, there is obviously a new or renewed appreciation for the ability to just get out and ride, whether alone or together, locally, or farther afield.
We all have our own reasons for riding and for many of us, remembering or capturing the rides is a big part of the overall experience, and so is the sharing! While the memories and talking about them can serve us well, some technology-based augmentation can be good.
This augmentation is easily now provided by stand-alone video or still cameras, or more likely today, a smart device of some form.
And another thing we like to do while riding is to talk, to communicate – whether one-on-one as rider & passenger, rider-to-rider, or in larger groups. And while phone-based connectivity is an option, it is more likely that most of us turn to shorter distance Bluetooth or MESH communications provided by a helmet-mounted system.
There is a wide selection of motorcycle and helmet-mounted video solutions and an even wider selection of personal helmet communication systems available; with a bit of time and $$$, finding and acquiring multiple products for video and/or camera use along with a system for connectivity and communications can satisfy requirements.
But there is another solution. Some years ago, Sena introduced a revolutionary Bluetooth-based product with an intercom and a high-resolution video camera, integrated into one small helmet-mounted system – the Sena 10C. It was then, and is now, in a product class of one. My colleague Jim has covered it in an excellent in-depth review.
The Sena 10C visually captures the way ahead with user narration or other multi-source audio added to video all while providing Bluetooth intercom communications, FM radio listening, and multi-device connectivity for multi-source audio including phone, music, and navigation; all at your fingertips and all in one integrated helmet-mounted package.
But first, some history.
Investments R-Us
Like Jim’s experience, some considerable personal investment over some years was made in the quest to find options for a rider-mounted action camera system to replace or augment three generations of Contour tube systems (remember these old things?) that worked so well on a helmet – great video and GPS data to boot.
The INNOVV C5, first reviewed in December 2017, provided a means to see if a lightweight sealed modular system intended for motorcycle mounted use could be adapted for helmet use – it could and was. And after INNOVV sent a USB adapter harness, it seemed that something new was in the cards; that being the INNOVV C5 Helmet Camera reviewed in September 2019.
During the same period that the INNOVV C5 systems were being used, a late version Garmin VIRB 1080p HD Action Camera got invested in. Expensive but nearly perfect for desired helmet or handlebar-mounted tasks – ruggedized, waterproof, with WiFi, BT and GPS, and its single-action almost instant-start-up On-Off control and outstanding video – a winner in my books.
It was used on lots of motorcycles, more than a few helmets, and it was well-traveled too. But one (sad) day, it just quit, even though the recording light still came on. And with warranty and support long discontinued, and after some initial electronics-based sleuthing, it was declared BER (beyond economical repair) – the battery was removed and the components recycled.
It could have been replaced with a later generation model and while more and more comparative products were coming to market at varying price points, the INNOVV C5 systems (motorcycle and helmet variants) and the INNOVV K2 dual-channel motorcycle-mounted systems filled most of my needs at the time – but the quest for a better system never really ended.
Shopping Now? We Recommend:
webBikeWorld works closely with Revzilla and Amazon to provide our testers with quality products to review. While we have an affiliate relationship and receive a commission from items purchased, this addition comes at no additional cost to you. It is the primary way we pay for our site and reviewers.
RevZilla
Free shipping on orders over $40
30-day no-nonsense return policy
Excellent selection of all major brands
Awesome pricing
Amazon
Free shipping (with Amazon Prime)
30-day return policy
Excellent selection
Competitive pricing
Sena and the 10C EVO
So, this brings us back to the one-of-a-kind Sena 10C and the newest iteration – the Sena 10C EVO, released in October 2019 but now updated and identified on the retail box as the 10C EVO-01. And yes, we are a bit late off the mark here.
Sena markets a number, of products under their Camera listings including the PRISM, the 10C series, and a GoPro BT Audio Pack, and wBW has done a lot of Sena product reviews over the years, including most of their camera products as well – Rick was on hand at the 2014 AIMExpo when the Sena 10C was first unveiled.
In his preview of the new product, Rick called said its form-factor represented “an electronic mashup” of the Sena SMH10 intercom and the Sena Prism action camera – that term was indeed a fair assessment. And in getting our hands on a pre-production unit, the Sena 10C Quick Look Review was done May 2015.
The dedicated camera products were not ignored either – a preview of the box-style Sena Prism was done in October 2014 with the hands-on review of the Sena Prism published in December that year.
As Sena continued to evolve their camera line, a review of the Sena Tube (now Prism) was subsequently done in June 2016 and Brandon Jackson revisited this tube-style product in his review of the PRISM Tube WiFi Action Camera in May 2019.
And almost a year after SENA released the updated 10C Pro in December 2018, Jim Pruner did an in-depth critical review of the newest SENA 10C Pro variant in October 2019.
Jim’s title for the SENA 10C Pro review was “Making Things Easy”, and from my perspective, I couldn’t agree with that title more. Jim also discovered that there are still some bumps in the road regarding the 10C’s function – all noted; we’ll see how the SENA 10C EVO performs for me.
The original 10C model units are still used, but there was hope for an opportunity to review the newer SENA 10C EVO or just make the personal investment. Call it karma but in early February this year, a package arrived from Sena (thanks Kasey) to dispel my winter blues. That package contained a SENA 10C EVO-01 kit, and here we are.
First Impressions
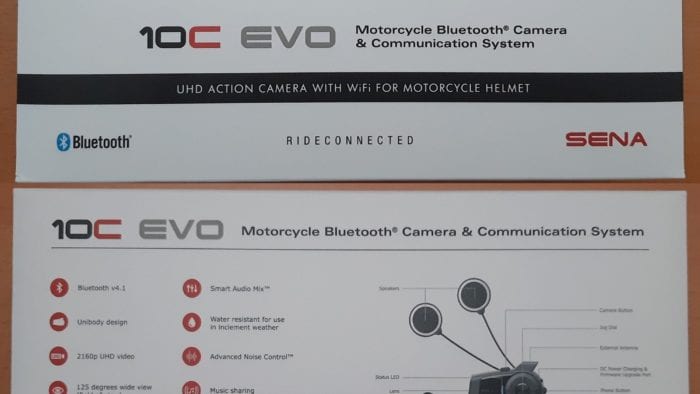
The Sena 10C EVO does not have the billet-like shaping and brick-like ruggedness of the Garmin VIRB, but the Sena 10C EVO still makes a great first impression when lifted out of the box. It features a compact, and sleek look with that best-solution-ever Jog Wheel, simple controls, and in scoping the box information, obvious enhancements over earlier versions.
A contemplative factor in this great first impression is that when holding the 10C EVO one needs to appreciate that one is holding a true one-of-a-kind product. SENA is the sole occupant of this market niche in providing a versatile product that is both a multi-mode UHD/FHD/HD Point of View camera system and a very functional BT-based helmet communications system.
Most noticeable is the new sleek housing – reshaped, with the camera lens housed inside for a flush-mounted layout; the original 30-degree rotating lens feature is now enabled by a small slider located below the lens on the front.
There are ways to mount/fit and connect multiple devices together to provide most of what the SENA 10C EVO provides in a single integrated package but at some cost (trust me) and in knowing what the original 10C and 10C Pro devices are capable of, I can only echo Jim’s very visible early statement in his review and that is, “Sena – Thank You”.
The Multi-Functional (Versatile) Sena 10C EVO
One could say that the Sena 10C EVO has multiple personalities with the personalities coexisting well together and complementing each other positively for extremely well-balanced versatile capability.
Ok, there are still some bumps along the way – most it seems, or I suspect, related to processing resources and switching but some are design and layout-related. As we dive into the SENA 10C EVO product we’ll try to cover everything discovered and assessed.
Sena 10C EVO Features & Functionality
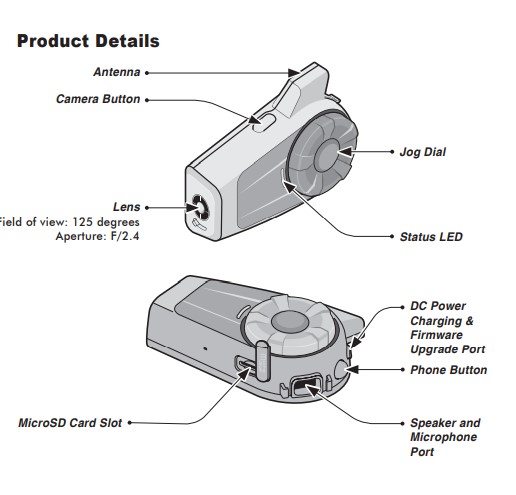
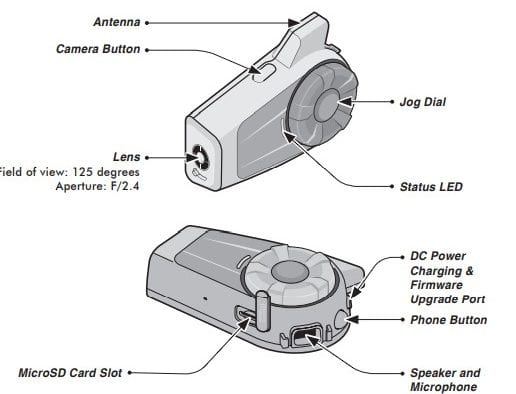
Camera Lens – the lens on the 10C EVO is flush-fitted, rather than projecting, for a cleaner design and for added protection of the lens itself. The field of view (FoV) is 125-degrees and the Aperture is f/2.4 (the 10C Pro had a 135-degree field of view and used an f/2.0 aperture).
The 125-degree FoV results in good wide-angle coverage with less distortion or curvature compared to the 10C Pro video/images and from other systems using a 135 degree or wider lens. Aperture-wise, the change from f/2.0 (10C Pro) to the current f/2.4 means there is less light going to the sensor, reducing low light condition performance.
Like the original 10C and 10C Pro with their projecting rotating lens bezels, the 10C EVO lens is adjustable over 30-degrees but as its lens now sits flush within the module a small slide adjuster resides below the lens on the outside so the just-right vertical framing or orientation can be done.
Observation – this new layout is aesthetically pleasing, more aerodynamic, makes the lens less conspicuous, and the flush-fitted lens easier to keep clean. But the adjuster is hard to access or use precisely even with the bare hand and almost impossible with gloves on – getting the framing right before starting off is the way to go. Still, function over form, right?
Camera Button – the multi-functional control sits on top of the module just ahead of the antenna housing. This control is used to turn the camera On and Off, start/stop recording, take a single photo or burst sequence, activate video tagging, and format the SD storage card.
Observation – this responsive multi-functional control is quite easy to access from the front and side but with medium or heavyweight gloves, some fumbling is likely and could cause a possible momentary blockage of video. Desirable options would be the management of the camera by Voice Commands (a missing feature from the 10C EVO) or by using a paired Sena Remote Control.
Jog Dial (Wheel) – one of the best controls ever put onto anything, the Jog Dial or Jog Wheel is perfectly sized and perfectly functional as fitted to the face of the module. The wheel and its functional center button are readily accessed and easily usable with light to medium weight gloves. Some practice when wearing heavy gloves is recommended.
With the helmet worn, rotating the wheel forward lowers system volume or that of the respective audio source; and rotating the wheel backward increases system volume or that of the respective audio source – settings are maintained even when the system is turned off.
Phone Button – the other standard control is the small round tactile-friendly Phone button found on the back edge of the module between the two USB-C ports.
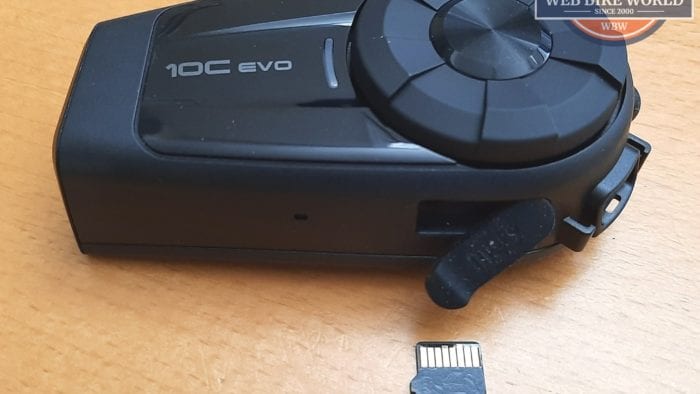
Ports – with a new housing comes a new port layout. The USB-C port for fast-charge/firmware/data connectivity, sealed with a pliable silicone cap now sits behind the top rear antenna housing. On the lower back edge is the recessed headset (Type B) connection port and on the bottom is found the microSD card slot covered by another pliable cap.
It is (very) important that the top and bottom ports be kept completely sealed when not in use to maintain elemental integrity. How well the top and bottom USB-C port sealed ports remain that way is to be determined.
Observation – the bottom media slot cap is already missing in action, validating the original concern regarding its longevity. Like the top port cover, this cap is only secured at one end by a pressure fit insert and not on a tether (the preferred solution), and despite it being fully seated, it is gone. For now, a small strip of (replaceable) Gorilla tape seals the opening fully.
Moving the primary external interface port to the top of the module from the bottom as it was on the original and 10C Pro models is an alternative to the bottom layout and it does angle the USB-C cable back somewhat and away from the rider when the cable is in use for mobile charging purposes.
Observation – design and layout constraints are possible dictates here and repositioning the USB-C port does have advantages but if the seal is compromised over the longer term, there could be moisture ingress consequences. With the bottom cap already gone, this pressure fit strategy is suspect and seemingly not up to early gentle use – this needs to be addressed.
Charging – in addition to the normal static charging options, the 10C EVO, as with other Sena systems, is usable while on the go. It can be connected to a portable power bank of some type or a 5.0V USB output like the ones fitted to all the home fleet motorcycles. But there are two functional conditions regarding use as identified below.
First, if the 10C EVO is connected to a power bank while the camera is ON, it will use the supply from the power bank for feature use, but not charge its onboard battery and secondly, if you connect the 10C EVO to the power bank while the camera is OFF, system access, including stored media, is provided and the onboard battery is charged from the power bank source.
If recording long videos or long-duration time-lapse events, connecting the 10C EVO to a power supply is the best overall option; this is basically the configuration used by this rider almost all the time unless the 10C EVO is only going to see limited or short-duration use.
And when taking a break or stopped for the day, being able to preview recorded video or photos and/or top up the battery is all good; both a 10,000 and newer 26800 mAh module that has a solar charging panel incorporated into its top are carried, used, and kept charged for augmentation or emergency power use for any of the devices- economical insurance of sort.
Installation Notes
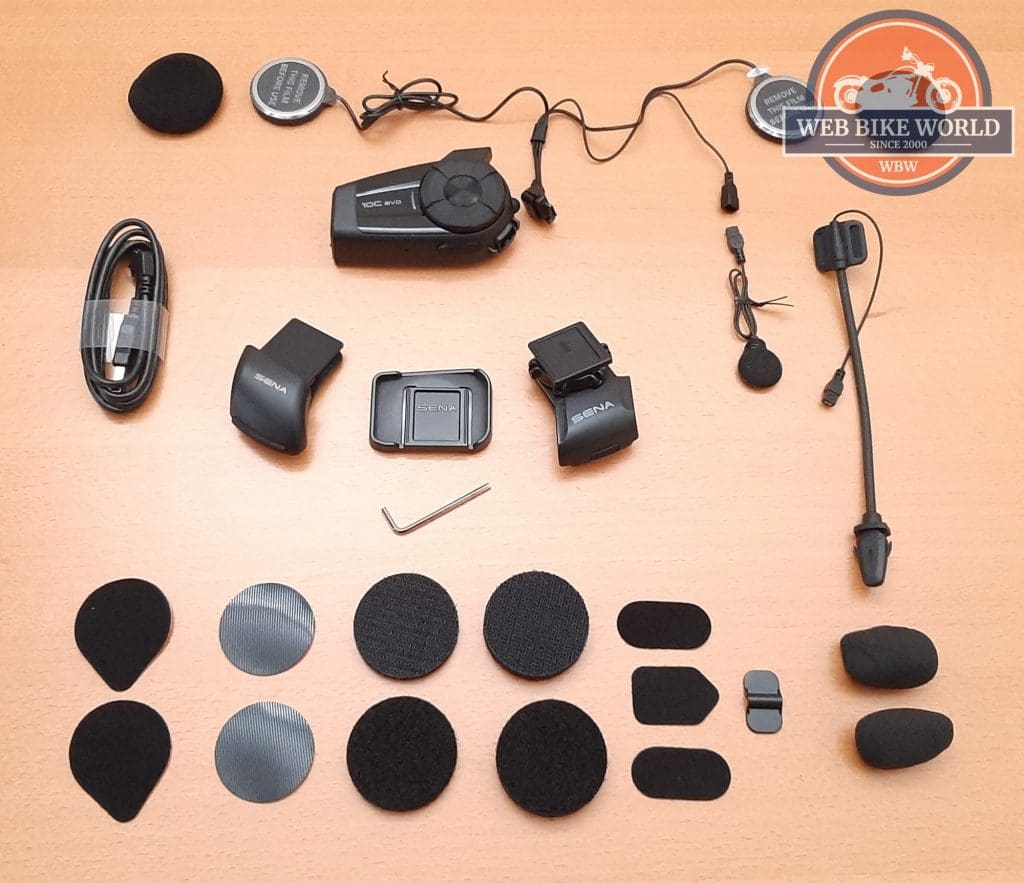
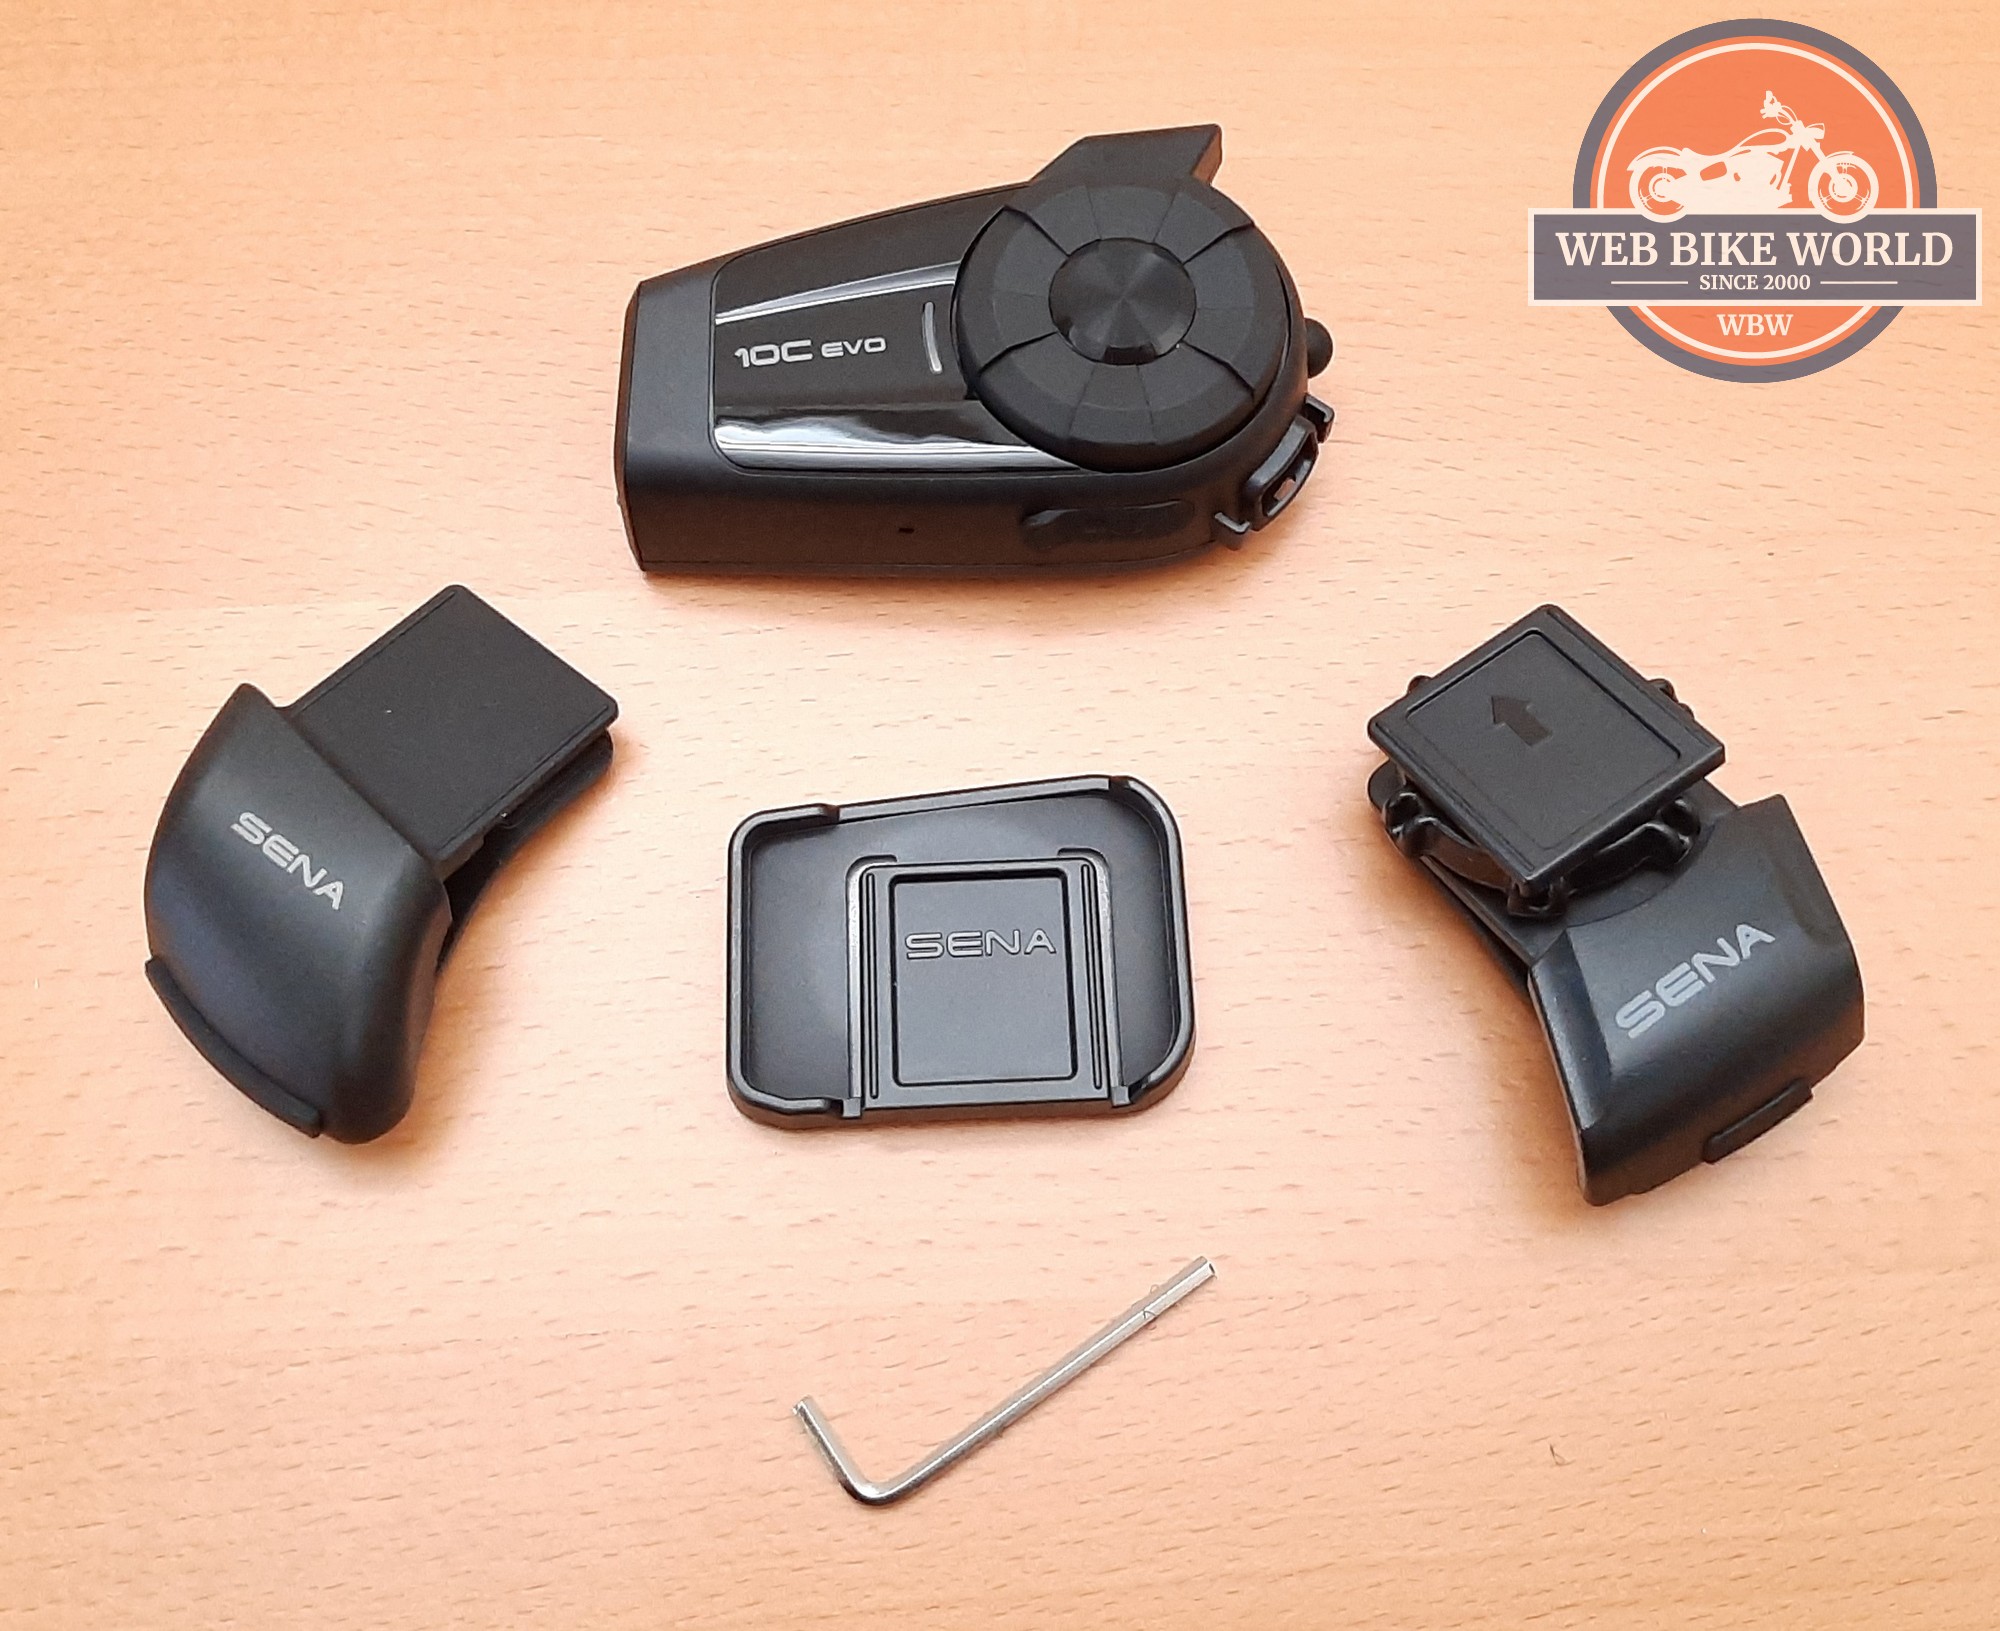
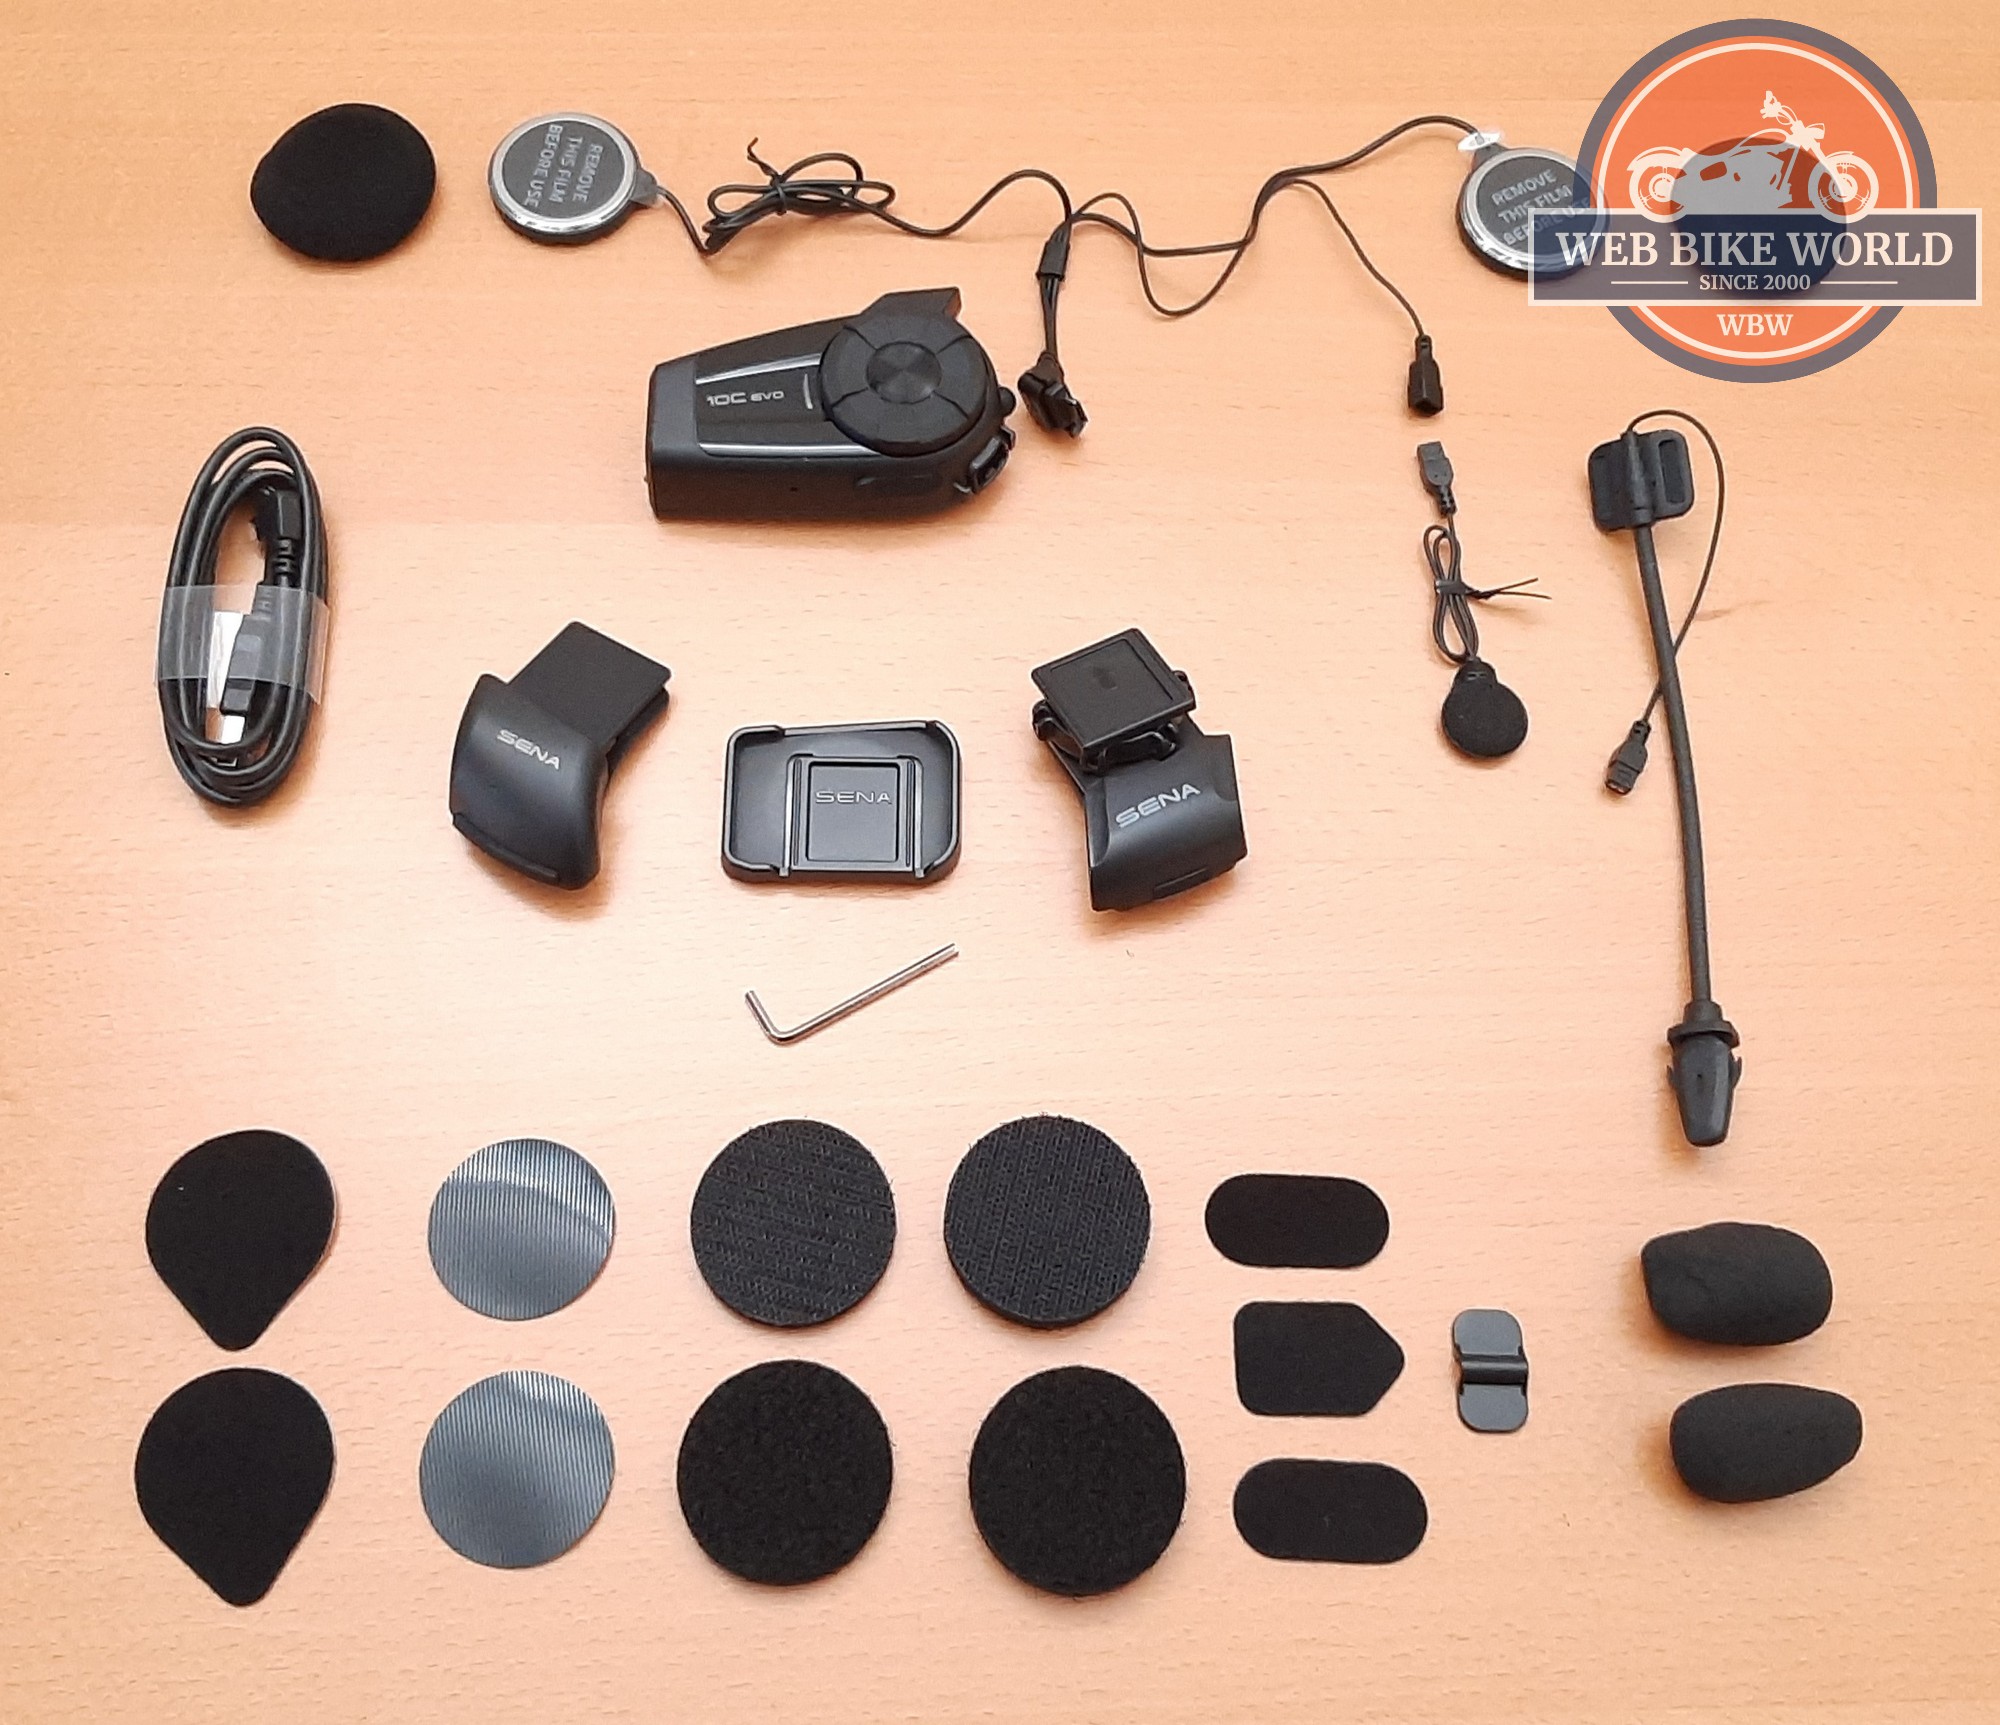
Mounting Components – the Sena 10C EVO comes with three mounting pieces to accommodate fitment to almost any full-face, modular, or three-quarter/Jet-style helmet. The three pieces are the gear clamp with a rotating bezel camera mount, a standard clamp mount, and an adhesive base mount.
These mounts used the simpler small lighter slide-on engagement layout found on the original SMH5, the newer Sena 5S, and of course the 10C series systems.
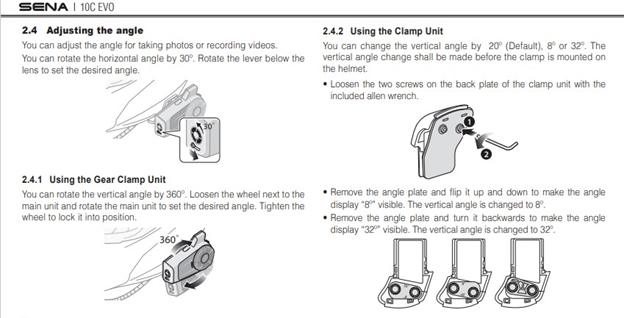
Gear Clamp Mount – this is the favorite for a clamp mount solution as it allows 360-degree rotation for quick precise vertical orientation of the 10C module for camera use no matter the focus point.
Clamp Mount – the non-adjustable clamp mount works well, thanks to its adaptive design ability, allowing change of the vertical angle by eight, 20 or 32 degrees based on the off-set or angled layout of the two mounting holes on the backplate and in changing the layout of the angle plate (angles marked on the plate).
Adhesive mount – a good option although once mounted to the helmet and the module fitted there is no adjustability and the mount itself has some permanency. Not that is it hard to remove with some light warming of the mount to soften the adhesive.
In not dismissing the adhesive mount, if a spare mount is at hand (from the Sena 5S kit), the option to make the adhesive plate a bit more versatile with less permanency is exercised. Warm and remove the adhesive, roll it off the plate, clean the plate with some Goo Gone, fit a custom-shaped 3M Dual Lock piece into place and let it cure for a few hours.
Result – another mounting plate option with great mounting strength once joined to its counterpart on the helmet and the module and (helmet) sections can be separated easily, minor adjustments made, and the pieces rejoined in seconds. No muss, little fuss.
Observation – Sena should provide the gear pivot mount for both clamp and adhesive options along with the standard clamp and adhesive slide-on pieces or make the layout more modular so the gear pivot could be used on any of the helmet mounting options. A re-design would also provide the opportunity to add an option to move the module further away from the helmet.
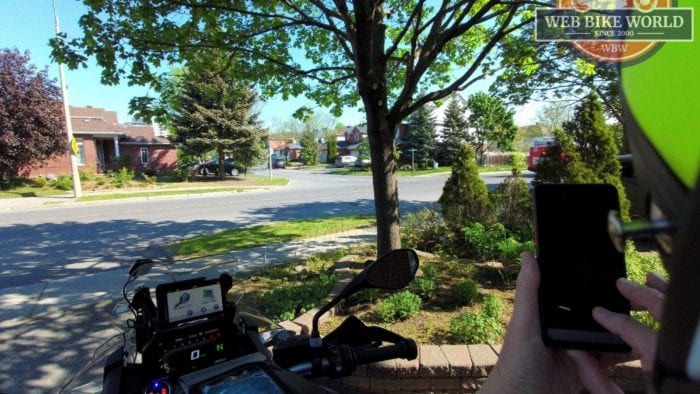
Full face, modular, and three-quarters style helmets are great candidates for the Sena 10C EVO although depending on shell size and shaping including many ADV-style helmets with extended chin-guard layouts some placement testing and use of the preview screen on the App is needed to achieve the optimal view; but even so, too much of the helmet is likely to be visible.
Observation – if the primary mounting piece was modified or perhaps an extension piece designed and added to the kit, allowing the module and thus camera lens to be moved away from the helmet by approximately 20 to 35mm (0.80 to 1.4in) – an offset that would pretty much eliminate the helmet from the view. A wider profile obviously but a worthy trade-off.
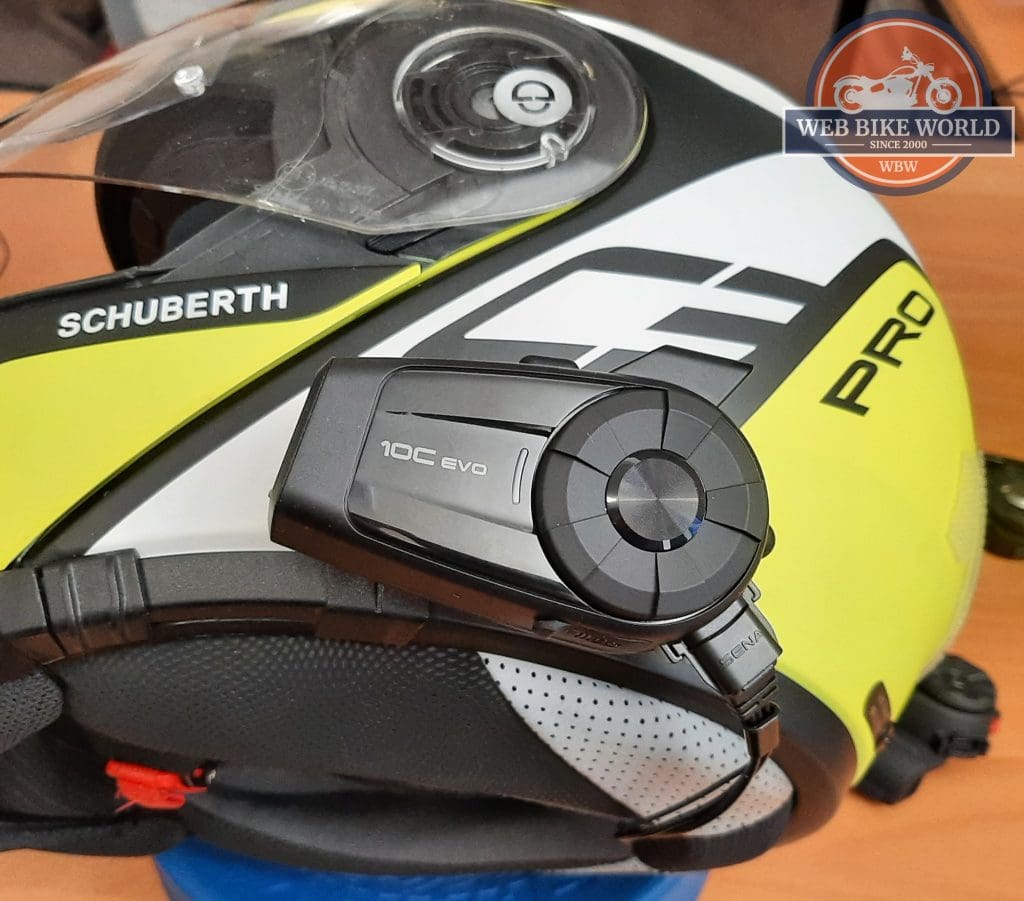
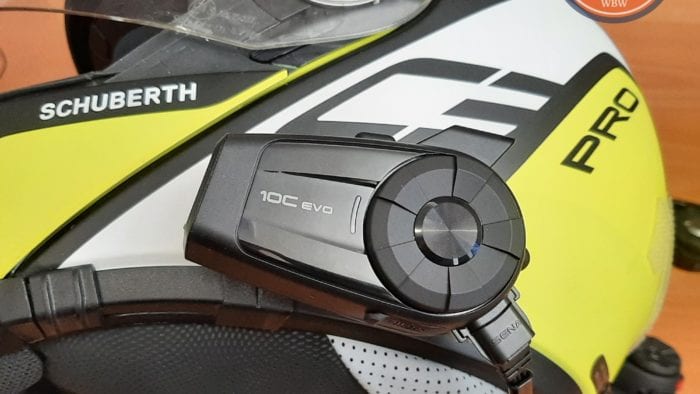
Schuberth C3 Pro Modular – with its 3M Dual Lock section mounted on the left lower side just above and slightly behind the sun-visor slider, the once-adhesive now 3M Dual Lock adorned mounting plate is snapped onto the helmet and as the Sena HD speakers are already in place thanks to the original Sena 50R installation this Schuberth C3 Pro Modular helmet is almost ready to go.
Once the boom microphone from the kit is fitted and connected, the 10C EVO module slid into place on the mounting plate and the angled headset connector aligned, pushed in, and the pivoting hasp in place that is that. Orientation fine-tuning is simplified by separating the pieces as needed, adjusting the angle of the module, and snapping the pieces together again.
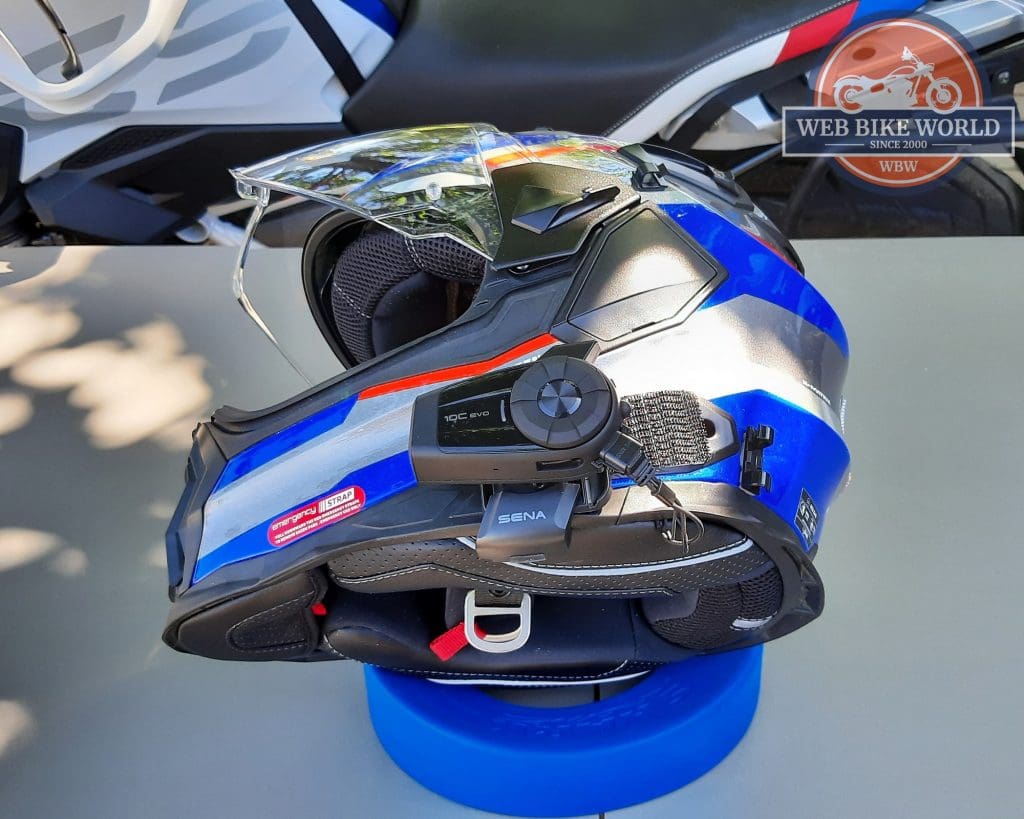
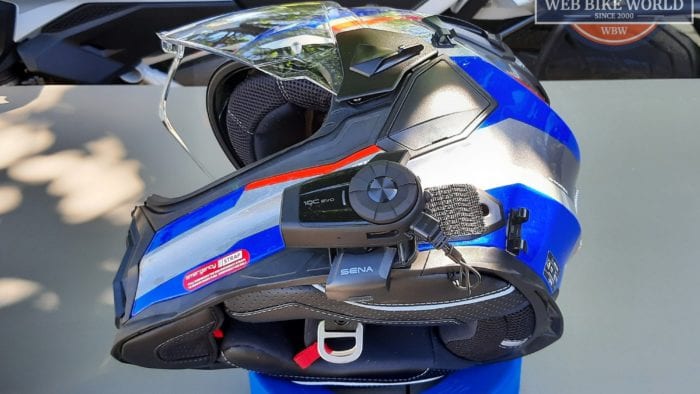
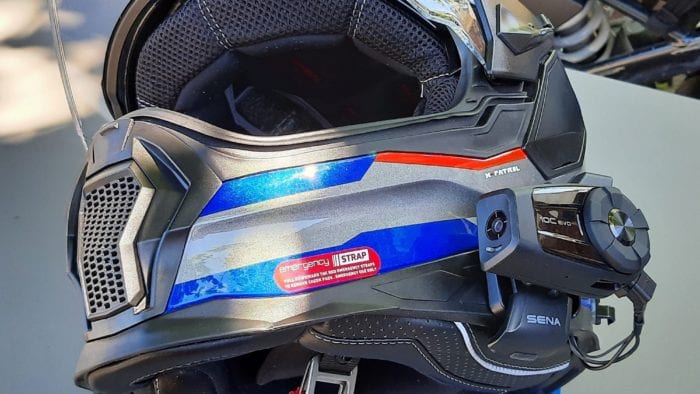
NEXX X-Patrol – with the UClear Motion Infinity system removed temporarily to facilitate installation of the (B) type SENA HD Speakers (reviewed), the thin-wire microphone from the kit is fitted into the helmet and with a 3M Dual Lock pad already in place the 10C EVO module is snapped onto the helmet and the orientation adjustments done as the first mounting option.
Field of view-wise, more of the helmet does show especially a portion of the elongated dual-sport chin-guard but that is not abnormal. But in wanting to see if this intrusion could be minimized, the pivoting gear clamp mount is brought into the mix.
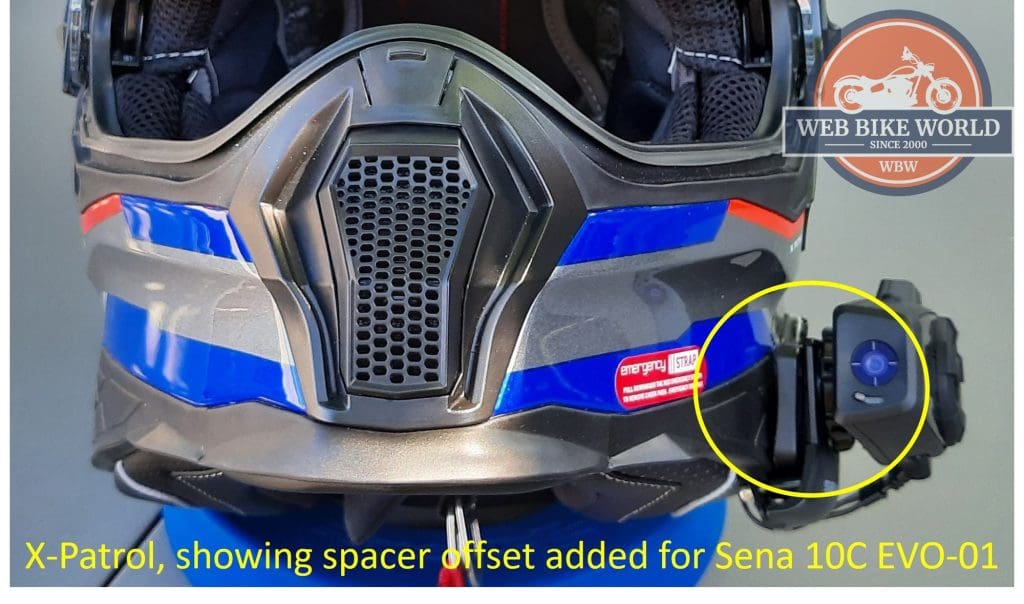
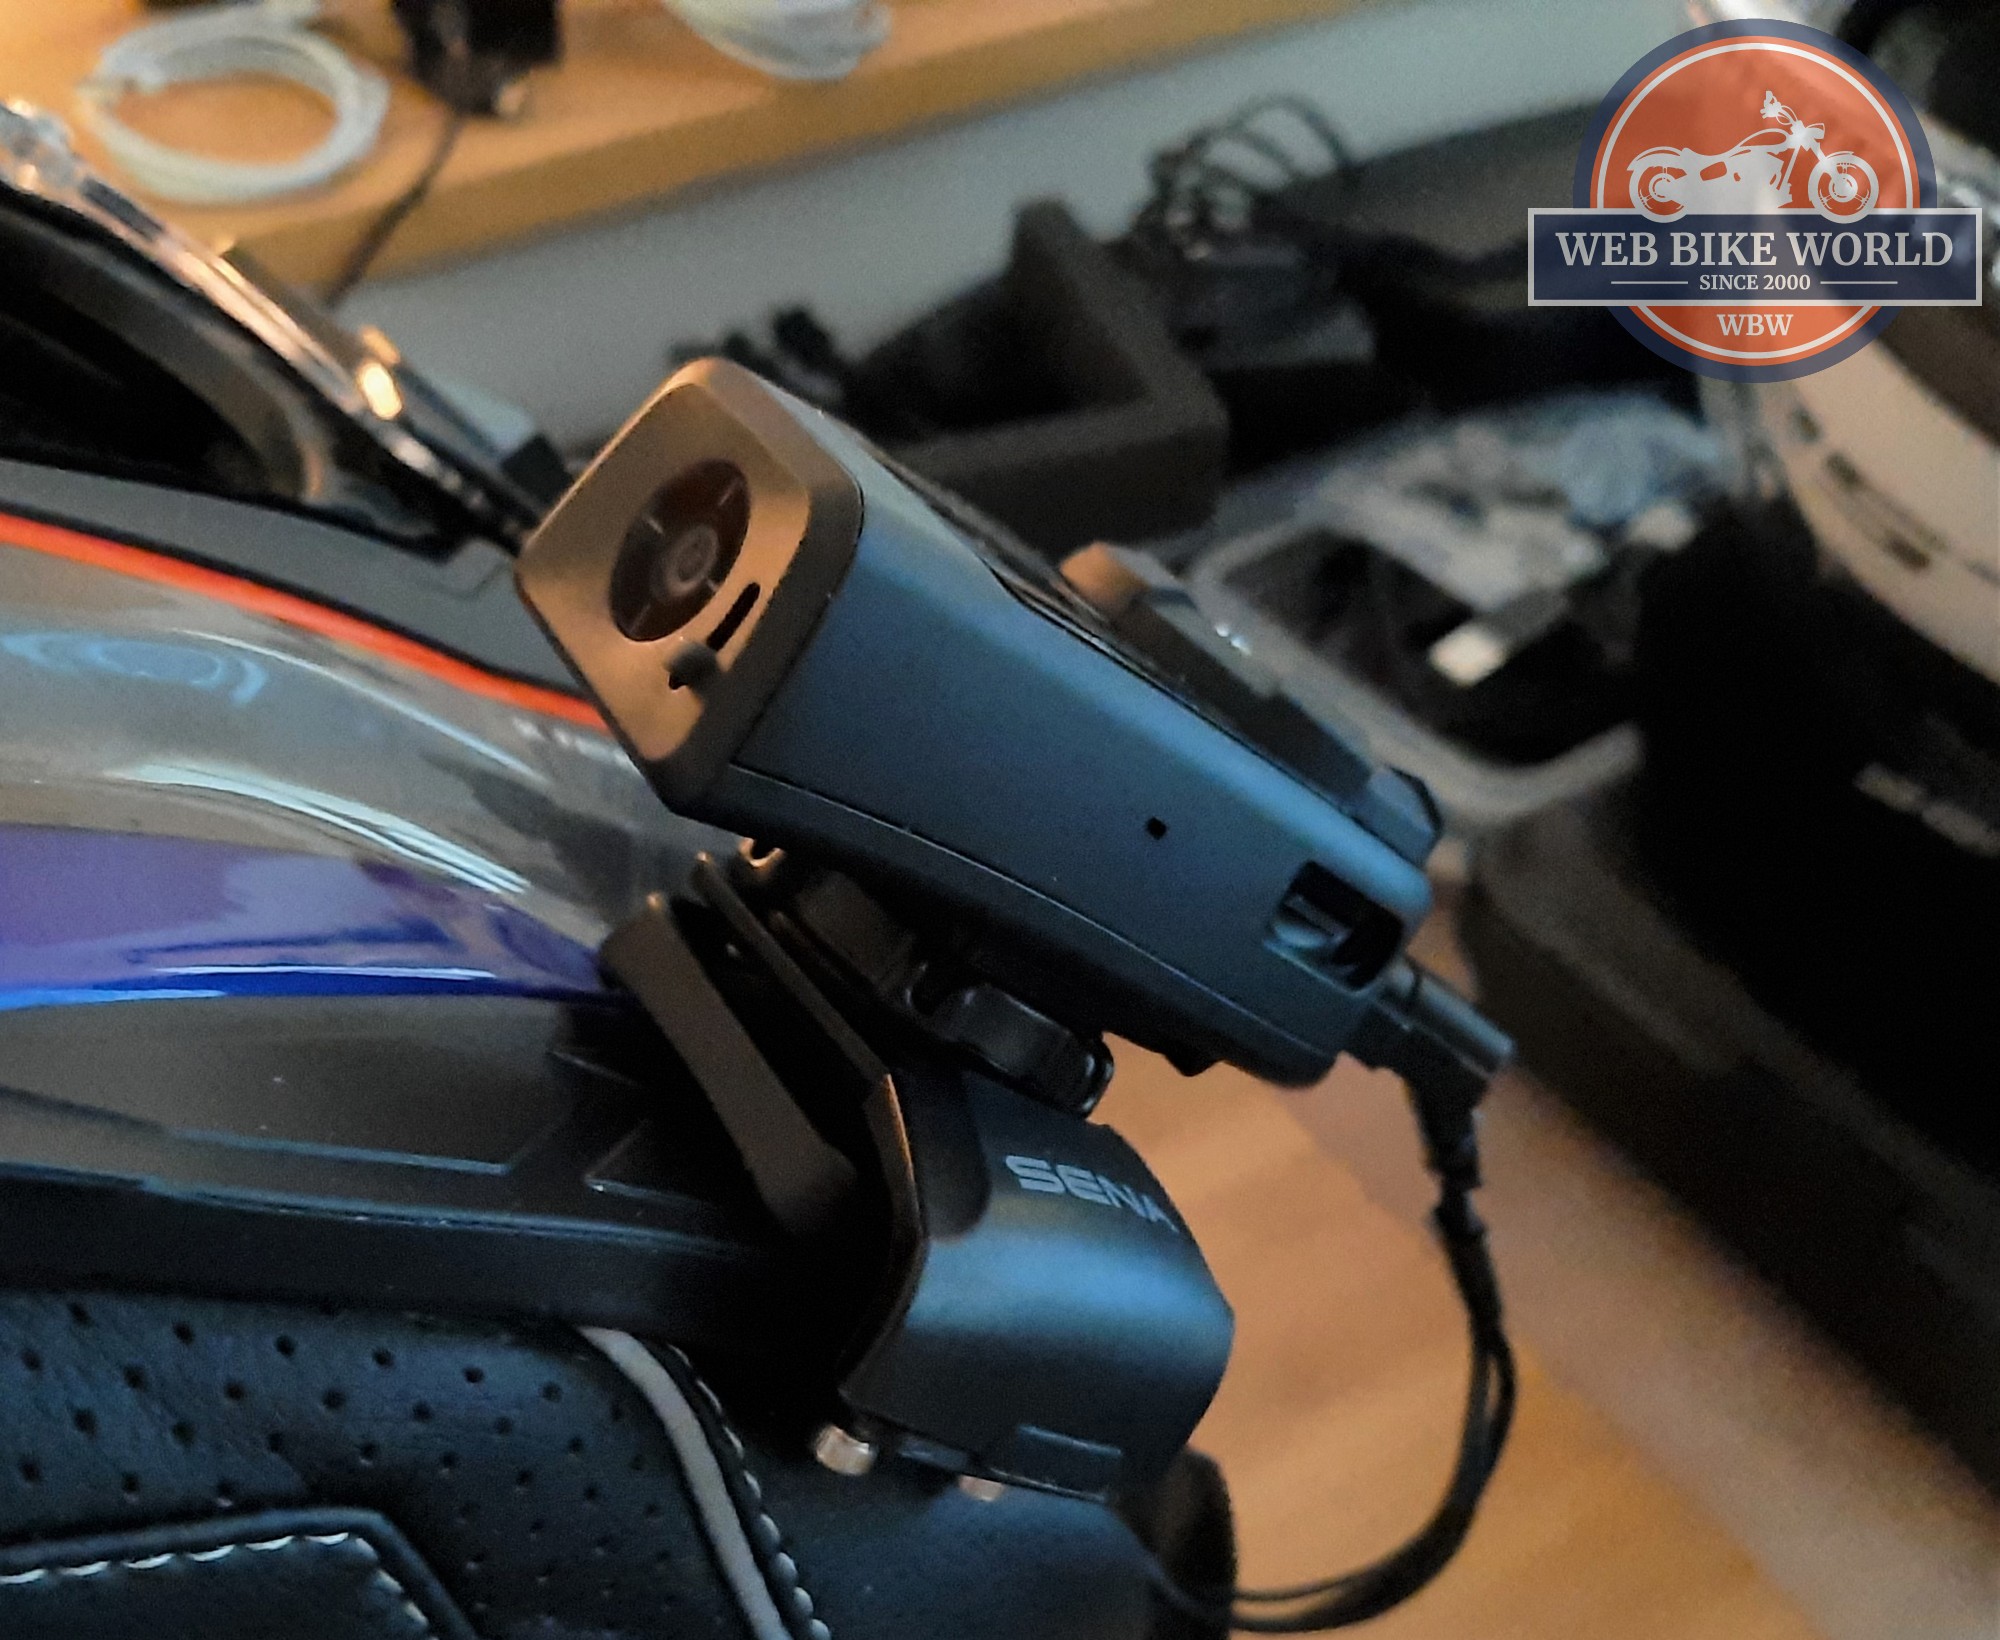
The NEXX X-Patrol has a different bottom layout than many full-face helmets and more tab engagement points between the inner lining and outer shell that can complicate getting a clamp mount inserted cleanly. But with an insert point found and the clamp mount screws backed off the piece is slowly wiggled onto the shell.
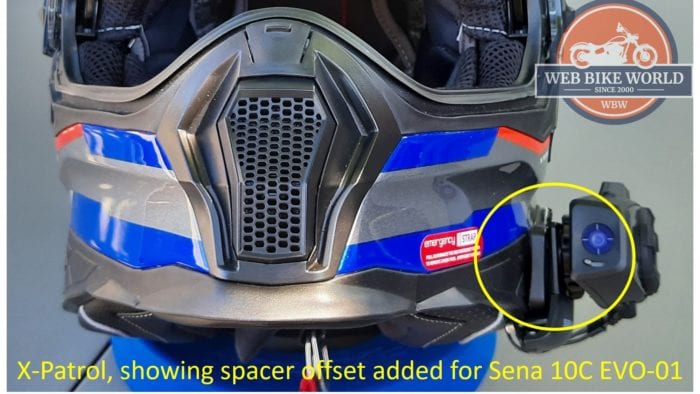
After some initial video collection revealed that much of the right field of view is still dominated by the helmet, the pivoting clamp mount is loosened off and a 15mm thick plastic plate (from another PoV kit) inserted between the helmet and clamp mount – as shown in the photo above.
With the screws tightened, it is a secure layout with less obstruction by the helmet. The pivot adjuster makes vertical alignment easy.
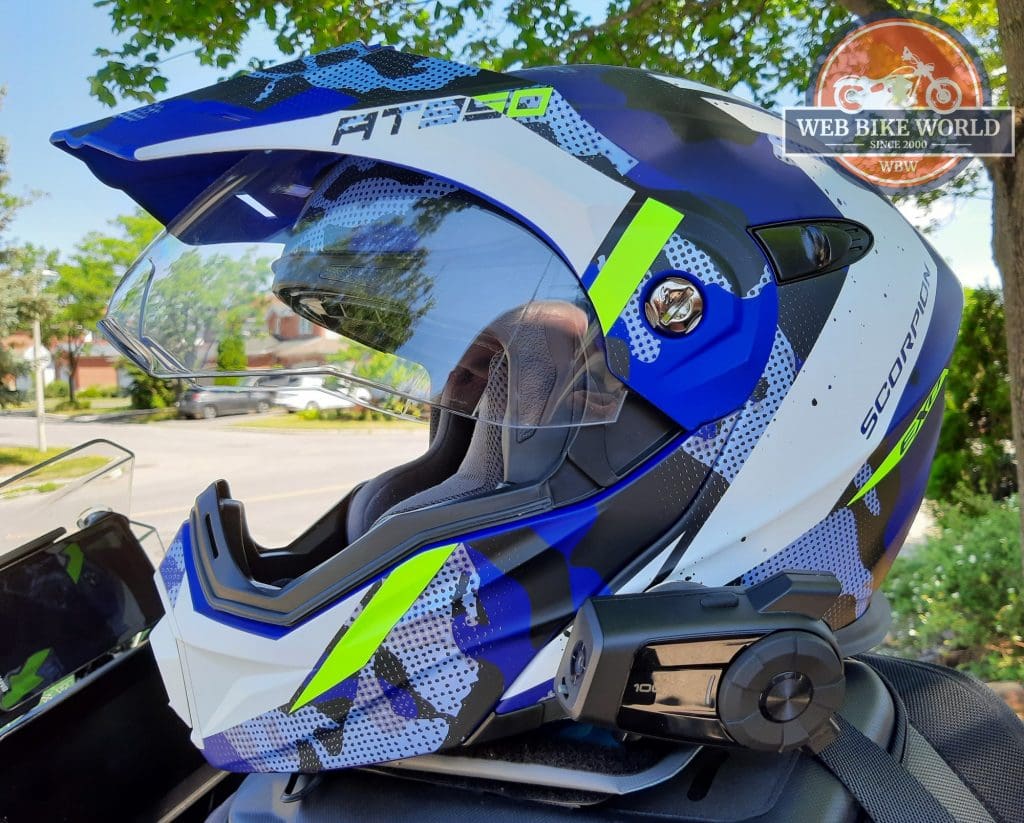
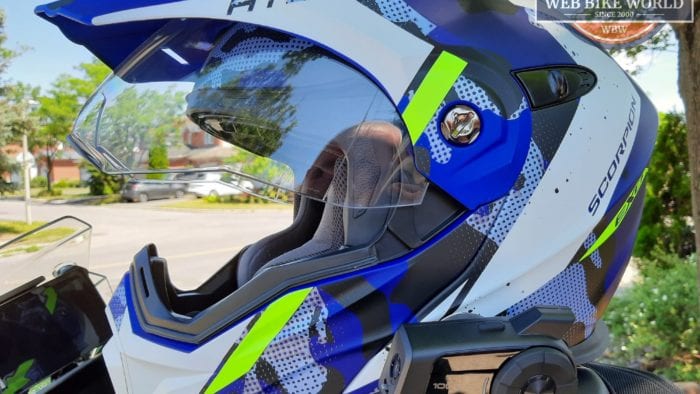
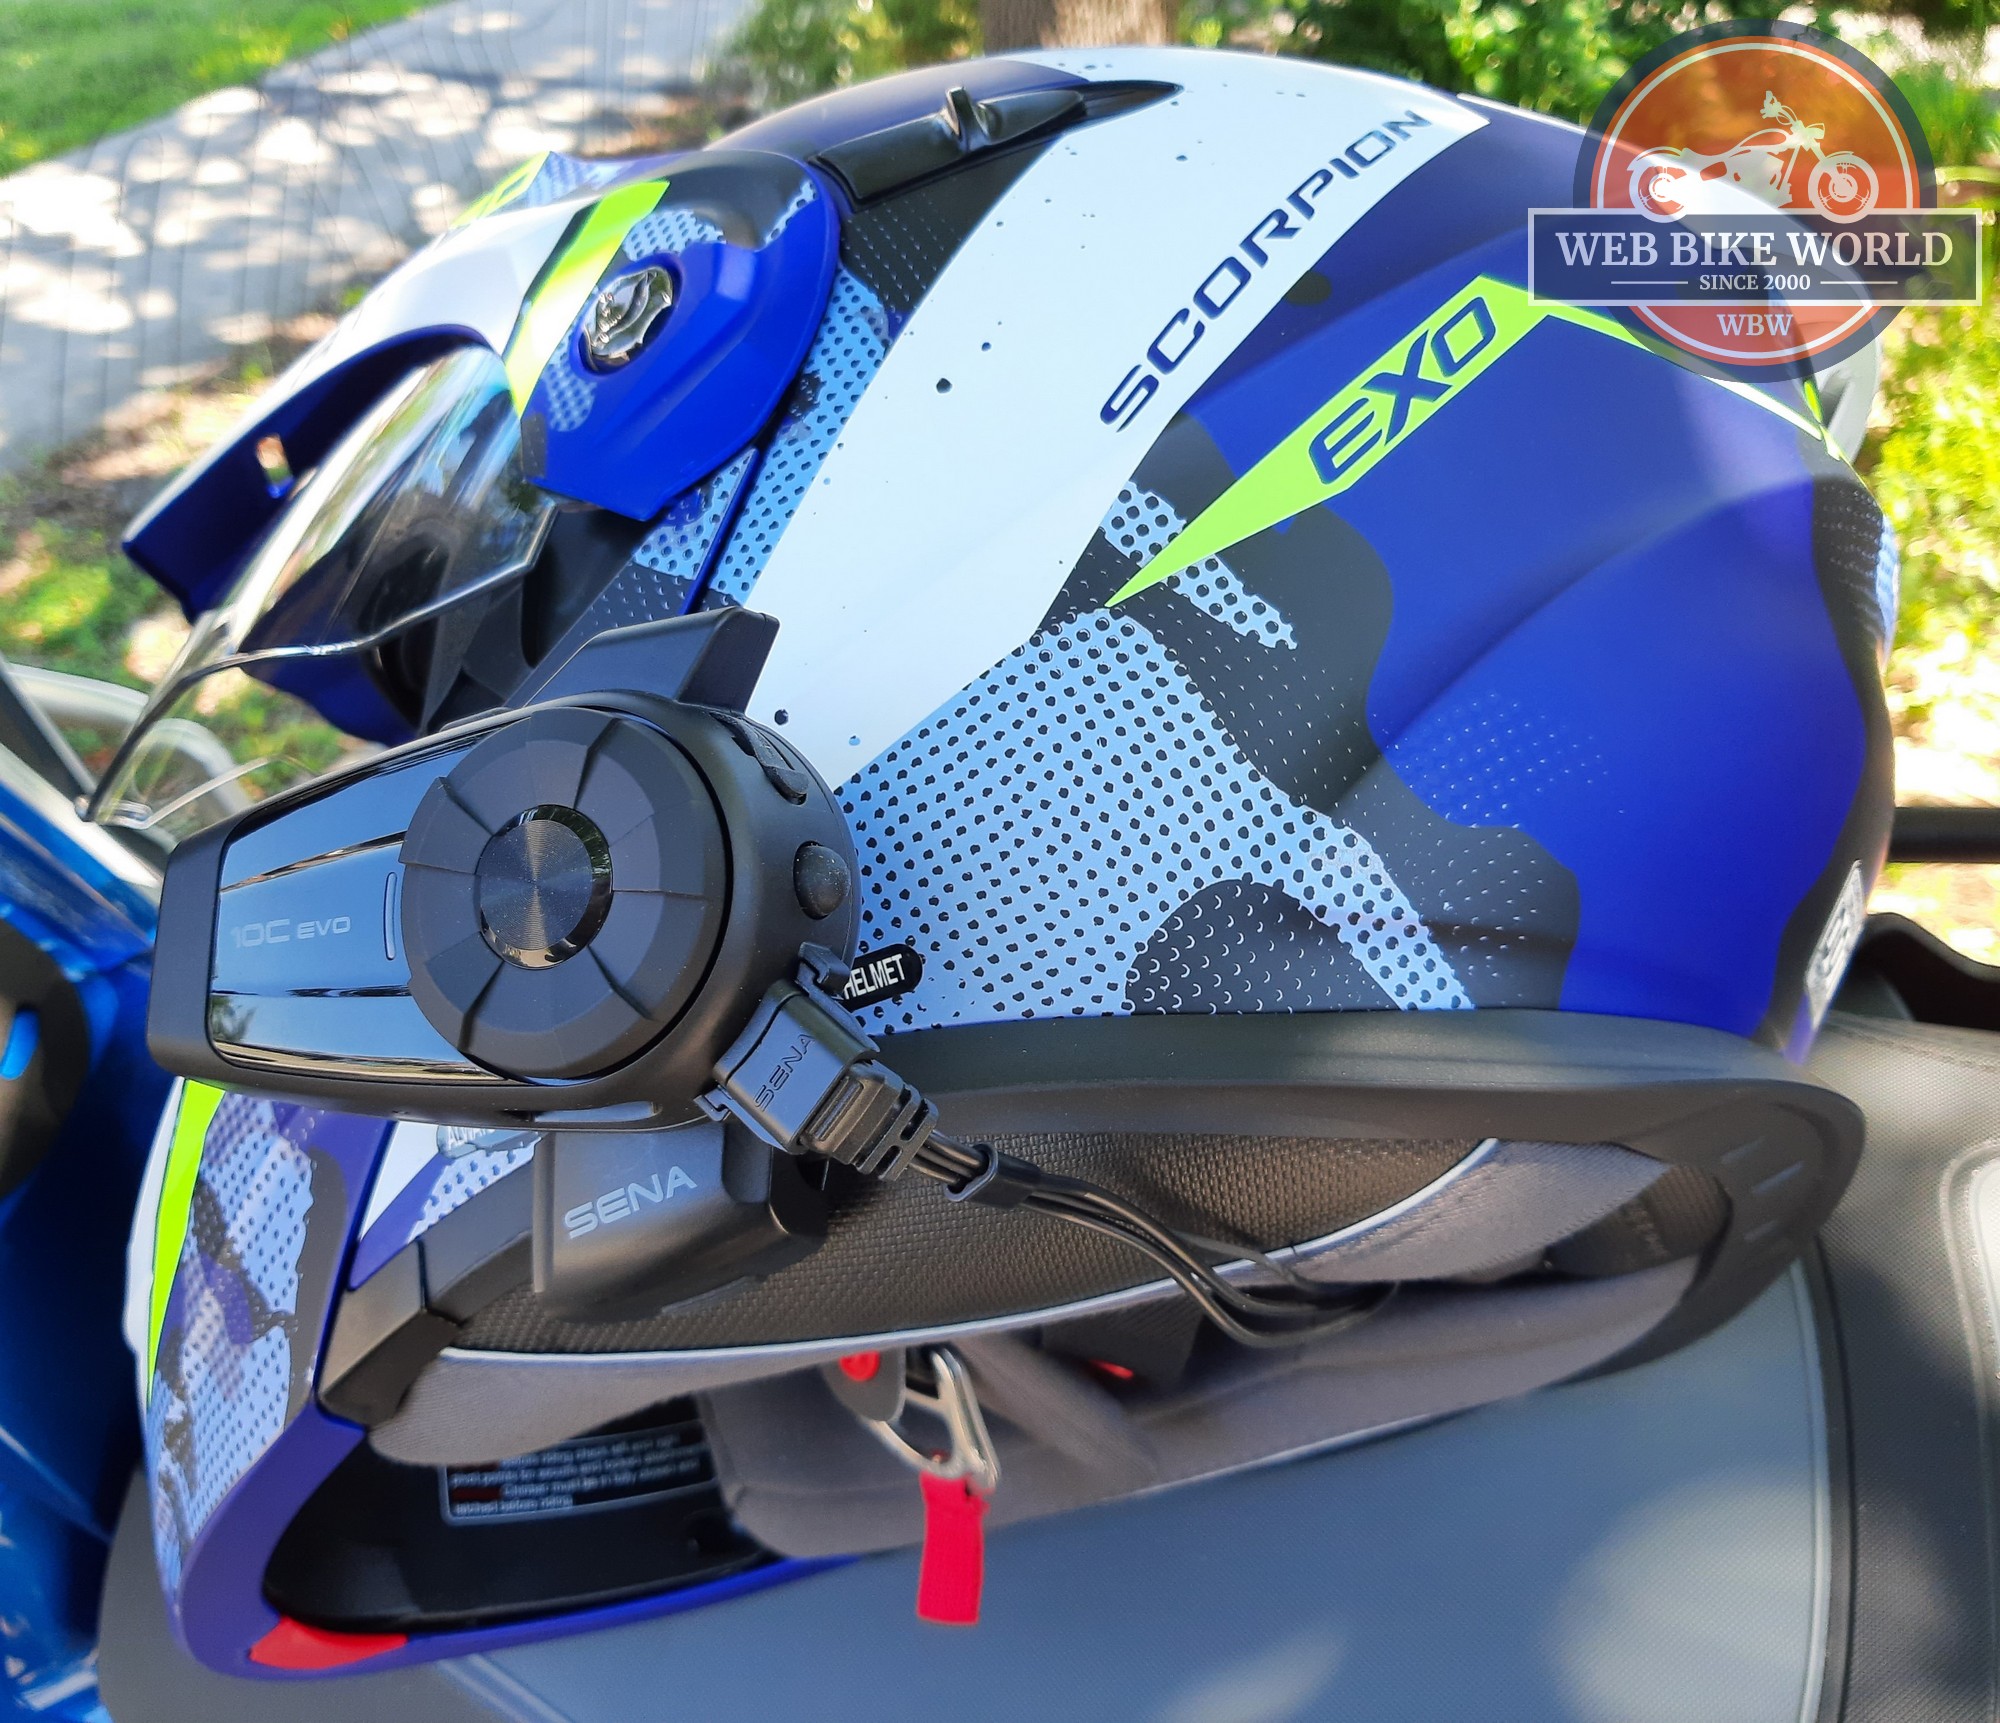
Scorpion EXO AT-950 Outrigger ADV Helmet – the newest helmet was a true opportunity buy. Having looked at it online and hoping that one might become available for a wBW review, opportunity knocked courtesy of a local reseller – one should not ignore opportunities; the Outrigger in Blue came home, is now in use and now added to the wBW helmet review line-up.
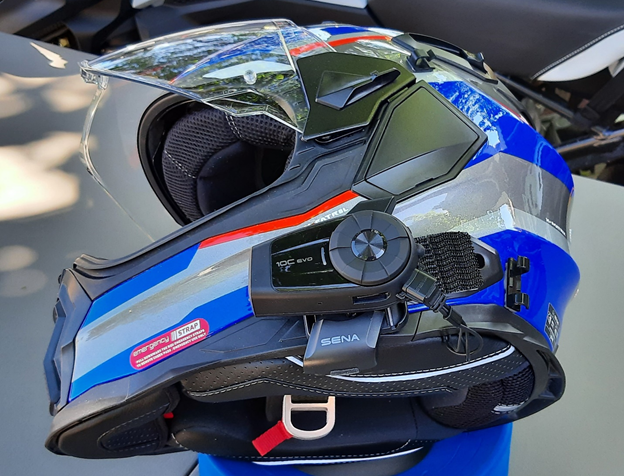
And a visual hunch is already paying (big) dividends – fitting the Sena 10C EVO to the AT-950 using the pivoting gear mount with a spacer layout as used for the NEXX X-Patrol and slipping in a set of (optional) HD speakers at the same time results in a most excellent visual and audio solution, with only a little bit of the helmet ending up in the 10C EVO’s field of view.
Three-quarter/Jet-Style – this installation is pending but the host options are either the LS2 VERSO or the more basic CKX Jet-Style helmet recently acquired for local wear and testing of helmet-mounted devices. Either the kit-supplied adhesive plate or the modified 3M Dual Lock plate will be used.
The BT Side – Setup & Use
Keeping the System Updated (is good)
The Sena Device Manager, installable on PC or Apple systems is the wired connection application serving all supported Sena devices (a long listing) and many collaborative systems provided by Sena; it is truly a one-stop spot for keeping system firmware update to date, configuring the system or, if needed, rolling back a firmware build.
Sena Utility App
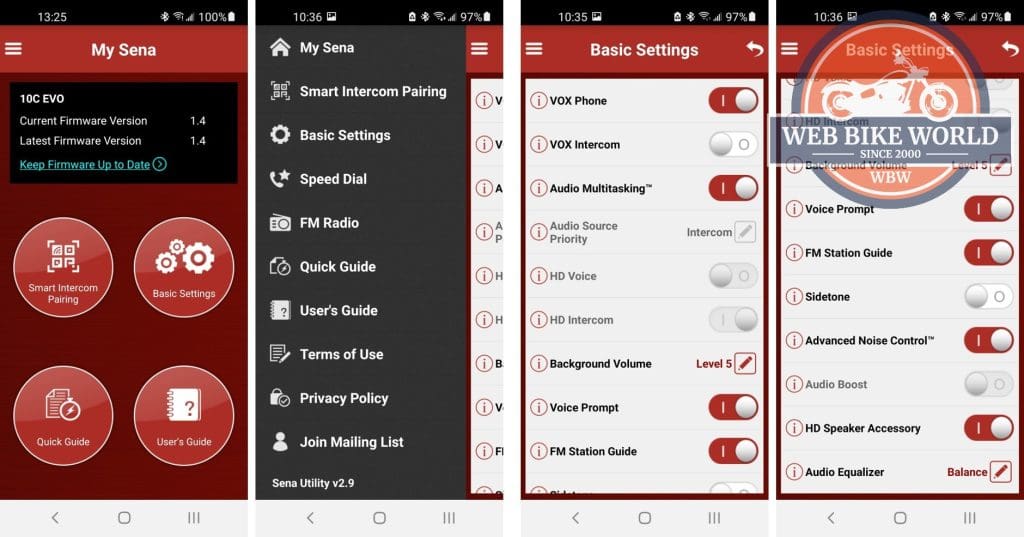
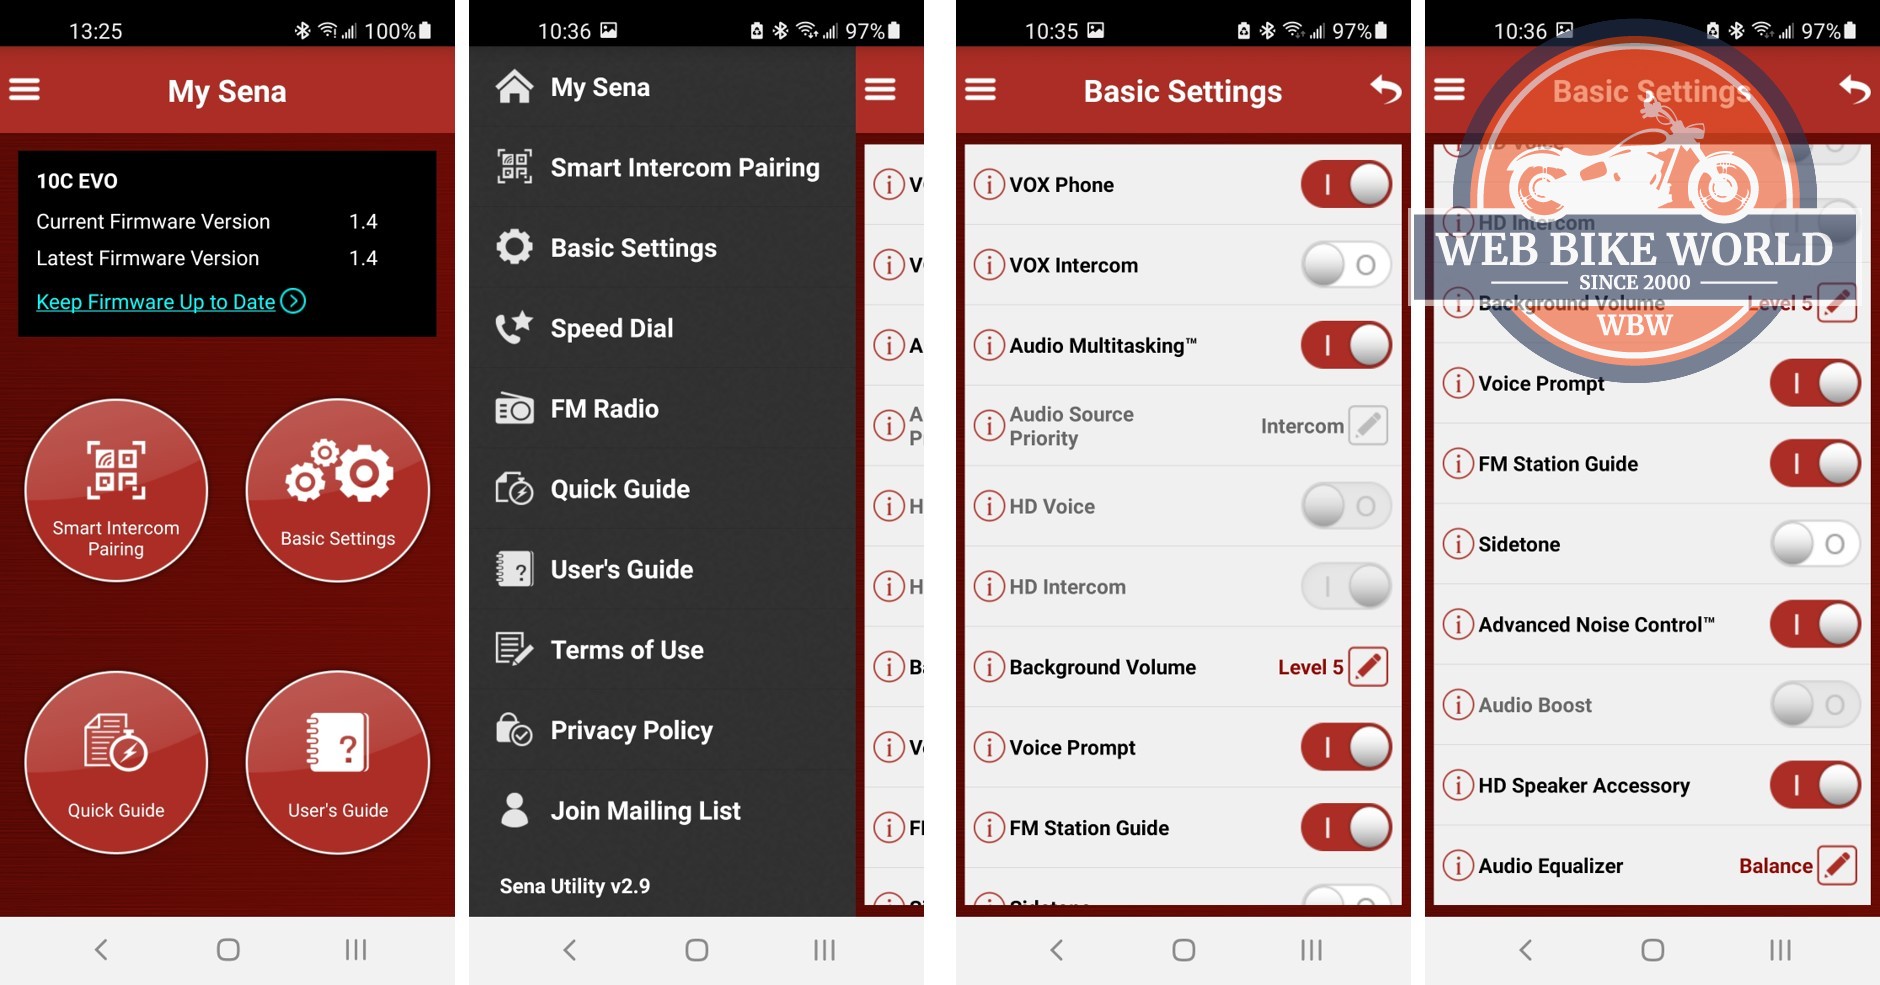
The ever-evolving Sena Utility App for Android or iOS devices is the wireless way to access any or all the Sena system features be it for initial configuration, dynamic management of system features or to view and download recorded media.
Device Pairing
Mature and system standardized firmware along with simple controls and audio voice prompts makes pairing the 10C EVO with smart devices, streaming players, GPS, expansion devices like the Sena SR10, or other compatible headsets for intercom use a one-word process – easy.
Press and hold the back Phone button for five seconds, wait for the “Phone pairing” prompt along with the familiar Red/Blue flashing of the LED. Activate search on the device to be paired or wait for the 10C-EVO listing to appear, select it, and within seconds all should be good.
A second mobile device, GPS or Sena SR10, or whatever, is pairable using the Jog Dial and the Phone button. For custom configurations, the Advanced Selective Pairing options allow the headset to separate the A2DP (music streaming service) and Hands-Free (phone service) between two devices. There are many pairing and streaming options available.
Intercom Pairing
The Sena 10C EVO headset is pairable with up to three other compatible headsets for Bluetooth Intercom communications. Pairing is, as per the basic BT process, a one-to-one or serial activity. Press and hold the Jog Dial until the LED flashes Red and with the other headset in its pairing mode, TAP the Jog Dial, wait until the LEDs go Blue and the connection is live.
Other intercom options like Multi-Way (three or four-party), Group, and Univeral Intercom configurations along with a Three-Way Conference Phone Call (caller, user, and an intercom participant) are possible.
And like all Sena systems, pairing the Sena 10C EVO to a Sena +MESH provides access to the larger mixed-mode BT and MESH communication environment.
FM Radio
Another often overlooked feature is the integrated FM Radio – a capability that this user appreciates and uses especially while traveling. When not connected via a data service and if between WiFi service spots having ongoing access to radio services for regional travel and weather-related information is or can be critical.
Setting up local or known stations is easy using the Sena Device Manager connection or from the Sena Utility App, along with selecting the global listening area for refining the tuning band, etc. Up to ten stations can be tuned and saved off to memory for subsequent station selection.
To turn the FM Radio ON or OFF, press and hold the Phone Button for one (1) second. All the functionality of and inputs for the FM Radio are covered fully in the Sena 10C EVO User Guide.
Music Streaming & Audio Sharing
With the applicable music player or service launched on the device and a cut selected, Press and Hold the Jog Dial for one (1) second until a double beep is heard – music streaming should start. To adjust the volume, rotate the Jog Wheel forward (VOL down) or backward (VOL up).
To utilize the Remote Control or AVRCP feature, press and rotate the Jog Wheel forward to track forward or backward to trackback.
Music sharing is possible if initiated during an intercom session although this will interrupt the intercom communications until music sharing is ended. To start or stop music sharing, press, and hold the Jog Wheel for one (1) second until a double beep is heard – the music stream should now be heard in the other headset.
FM Radio audio is also shareable as well during an intercom session although only with those Sena headsets (currently) supporting this feature. To Start or Stop this feature, press, and hold the Phone button for one (1) second.
For multi-device configurations, using the Advanced Selective Pairing options detailed in the User Guide works and another important ingredient regards the use of either the Audio Source Priority or Audio Multitasking setting.
If music streaming and sharing of music or FM radio audio will be done users should familiarize themselves with the respective sections in the User’s Guide or when using the Sena Utility App by reading the insight information contained in the pop-ups when the user touches the ‘Information Symbol’ icon on the left of each menu item.
Shopping Now? We Recommend:
webBikeWorld works closely with Revzilla and Amazon to provide our testers with quality products to review. While we have an affiliate relationship and receive a commission from items purchased, this addition comes at no additional cost to you. It is the primary way we pay for our site and reviewers.
RevZilla
Free shipping on orders over $40
30-day no-nonsense return policy
Excellent selection of all major brands
Awesome pricing
Amazon
Free shipping (with Amazon Prime)
30-day return policy
Excellent selection
Competitive pricing
The Video Side – Setup & Use
WiFi Connectivity
When the camera feature is turned on (see below) the WiFi automatically powers up in its default 5GHz mode and if the host device has its WiFi turned on and connection screen open the ‘10C EVO-xxxxxx’ ID should appear in 10 to 20s (or sooner) and if not set for automatic connectivity, select the listing and a status message is displayed once the connection is made.
Note – remember this is a local WiFi network just between the 10C EVO and the host device, the “not connected to the internet” can be ignored. Lower speed connections should work as well.
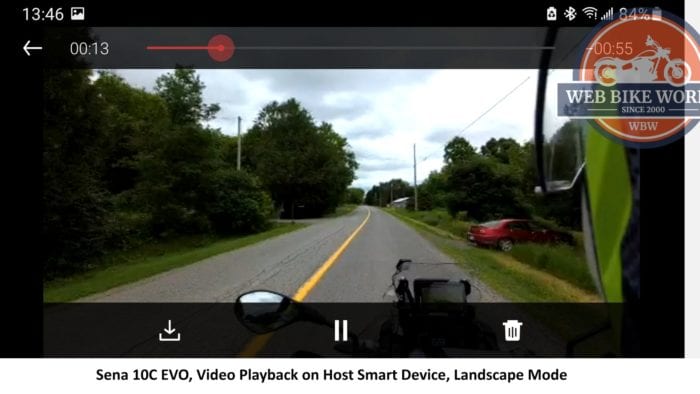
With the WiFi connected, the Camera App can be launched and utilized as described in the following section, including using the preview (live) view screen to make sure the desired orientation and desired resolution is set or setting changes made using the crossed-tools icon on the lower bar of the preview screen.
SENA Camera App
The Sena Camera App is quite basic and in understanding and appreciating wireless BT and WiFi use and switching issues, I keep wondering why this simple interface has not (after some years) been integrated into (a) the evolving Sena Utility App or (b) a new interface created to provide a single interactive experience – maybe, hopefully, for the next iteration?
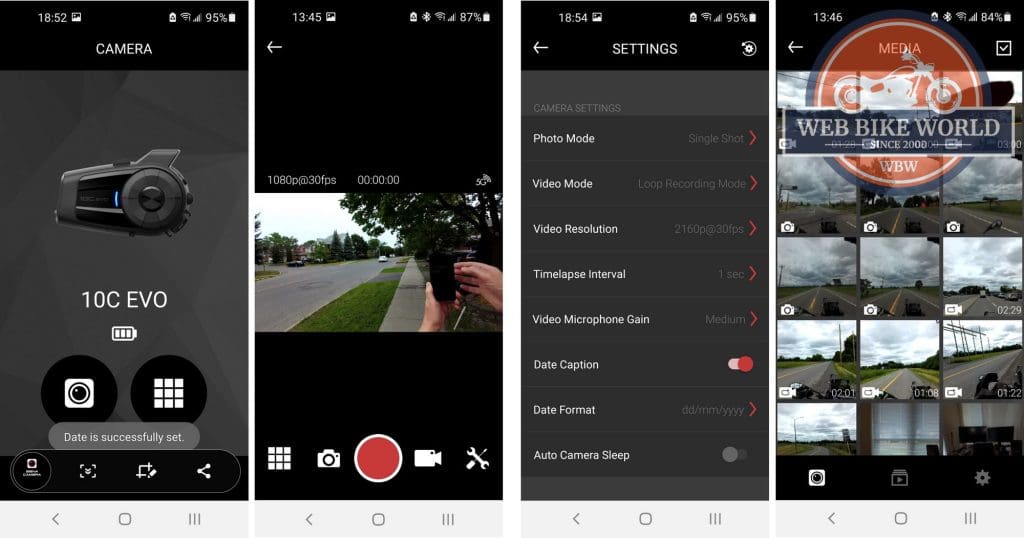
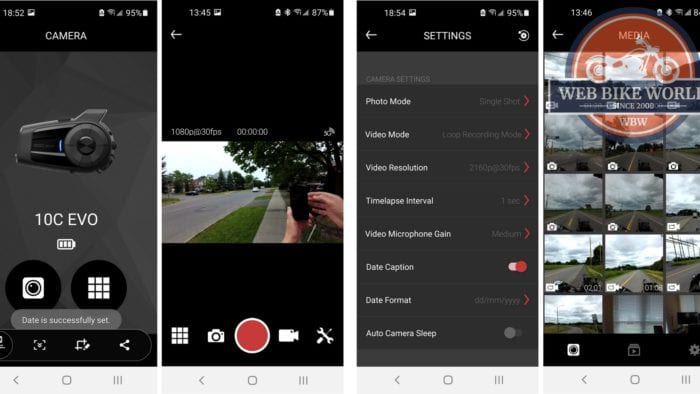
With the WiFi connection made, at which time the camera is synchronized for time and date from the host device and the Camera App launched, to activate the left lower camera icon from the main screen to bring up the Preview screen – truncated when in portrait mode but fuller in landscape mode.
Displayed above this screen, L to R, is the current resolution and frame settings, an H:M:S timer, and the network connection (default is 5G). Along the bottom of the device screen is the layout bar and viewing L to R, the 9-block icon representing files, still camera, large RED shutter, video camera, and cross-tools selection tiles.
Selecting the settings tile brings up the camera settings menu, listed vertically: Photo Mode, Video Mode, Video Resolution, Timelapse Interval, Video Microphone Gain, Data Caption, Date Format, Auto Camera Sleep, WiFi Settings, Format SD Card and, Camera Firmware Version.
Resolution Settings – working through the settings reveals the default settings that can be left or modified; some of the settings are On or Off choices while others have selectable options for tailoring by the user, as shown below.
- Photo Mode (Single Shot or Burst Shot)
- Video Mode (Normal Recording or continuous, Timelapse, 3min Loop Recording)
- Video Resolution (2160p@30fps, 1440p@30fps, 1080p@60fps, 1080p@30fps)
- Timelapse Interval (1s, 2s, 5s or 10s)
- Video Microphone Gain (Low, Medium, High)
- Data Caption (mm/dd/yyyy, dd/mm/yyyy, yyyy/mm/dd)
- Auto Camera Sleep (Off or On)
- WiFi Settings (Camera Name & Password, changeable)
- Format SD Card (select to format the media), and
- Camera Firmware Version (listed)
When a setting is changed, the wheel spins for a second or so while the camera settings are updated and then the App shows the changes; no hiccups or warning messages have been observed – all quite seamless, quick, and reliable.
Remember the Memory (Storage Media)
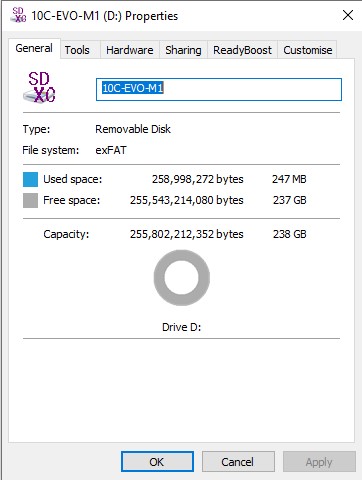
The SENA 10C EVO uses microSD (Secure Digital) storage media, with a stated capacity limitation of 128GB although media ranging from 16GB up to 256GB works with the camera without issue (so far). No matter the capacity of the media though, make sure it is up to the task (see below) – the visual results will or should tell the tale…
The slot and internal spring-loaded hold and release mechanism for the SD media remain located on the bottom edge under the pliable weather cap. To install a media card in, orient it contact side up, push it in gently until it clicks (locks) into place; make sure to reseal the port.
Removing the media just takes a light push on the card – the spring-loaded lock pushes the card out for relatively easy removal, although the recessed layout can make it tricky to grasp.
Media Performance – it is well known and well proven that many memory cards on the market only perform at 50 to 75 percent of (their) listed or advertised speeds and, most of the time these speeds are based on ‘read’ (access/playback) not the more critical initial ‘write’ activity (in which buffering plays an important role – see comment above).
The storage media used with the EVO 10C-01 used so far is listed here:
- SanDisk Ultra, 32GB, 64GB and 128GB
- Kingston, SDXC, 128GB, U3, V30
- SanDisk, SDXC, 200GB, UHS-I, C10, U1, A1
- SanDisk, Extreme, SDXC, 128GB, UHS-I, V30, U3, A2
- SanDisk, Extreme PRO, SDXC, 256GB, UHS-I, V30, U3, A2
The above-mentioned media works well with the camera in the lower 1080p (60 or 30fps) modes but when the 2K and 4K settings are used, the higher performance (A2, V30, U3) media is clearly better for both Write and Read functions.
To format media – turn the system ON, then the camera, and after “Camera On’” is heard, press the camera button for five (5) seconds until “Format SD card” is heard, then push the Phone button to initiate formatting. The LED flashes Blue for a couple of seconds and formatting is confirmed by “Format SD card completed”.
Alternatively, with the smart device connected, launch the SENA Camera App, and once the menu interface is live select ‘Format SD Card’ from the Settings Menu to complete media formatting. The system’s “Format SD card completed” should be heard.
Camera Orientation
The aim here (pardon the expression) is to get the optimal start point or framing before the wheels are put in motion and the camera recording; getting it right or close the first time can reduce frustrations and result in better videos or photos.
A sophisticated technology-based auto-framing solution would be great (although expensive) but for now, the manual approach works using the horizontal adjustability of the lens along with infinite vertical rotation from the gear clamp or three stepped settings from the off-set mount or just fixed in place – with the ongoing assessment provided by the Camera App’s live view screen.
Camera Function
The user has three standard video recording modes, a video tagging capability, and two still camera mode settings available with the Sena 10C EVO. All the modes and related settings are selectable under the Settings menu of the Sena Camera App.
Normal Mode – with recording started, continuous video is recorded until stopped, the 4GB file limit is reached in which case a new file is started, the system stops recording due to a low battery or the storage media reaches capacity.
Timelapse Mode – if set under the Sena Camera App menu and recording has started a series of photos at the selected interval (1, 2, 5, or 10s) is taken, and when recording is stopped or the maximum file size of 4GB is reached a timelapse video is created.
Loop Mode – with this mode selected and recording started, three (3) minute videos are created and saved off as separate files. In this mode, both a set resolution and reduced resolution file is created as identified earlier.
In Loop Mode, if media storage space is needed, then the oldest files in the root DCIM folder are automatically deleted to create space. Note – Video Tagged files (see below) stored in the EVENT folder are not deleted.
The Sena 10C EVO must be in Loop Mode for the Video Tagging feature to be active and for this user, except when using Timelapse mode for specific activities Loop Mode is the default mode used.
Video Tagging – provides the means to save important events as a generated file. And to clarify information found or viewed about the Sena 10C EVO on many sites – based on the latest User Guide and this reviewer’s experience with this 10C EVO-01 variant provided by Sena, the Video Tagging feature is only usable when the camera is in the Loop Recording Mode…
Using the Loop Recording Mode for this feature makes perfect sense as the video camera is already writing video in three-minute segments, so the triggered ‘tagged’ event is readily captured using three segments representing 3min past, 3min present, and 3min future providing nine (9) minutes of video coverage of an event.
This segmentation means that Video Tagging MUST be started at least three (3) minutes after Loop Recording Starts so the necessary timeline segments are creatable as identified above. The resultant Video Tagging files are stored in the EVENT folder.
To initiate Video Tagging, press and hold the Camera button for three (3) seconds, “Video tagging” is heard. When Video Tagging is completed, “Tagging complete” is heard.
Video Recording – with the camera feature ON, press and hold the Camera button for one (1) second to start video recording – a beep and “Recording” is heard and (the Green LED flashes). To stop recording press and hold the Camera button for one (1) second, a beep and “Recording Stopped” is heard.
If the recording is stopped and if the Auto Camera Sleep is turned on under the Camera App Settings menu, the camera automatically powers off after five (5) minutes to conserve the battery.
As this Sena 10C EVO is usually powered from a portable power bank or motorcycle source the Auto Camera Sleep feature is kept turned off under the Camera App Settings; in not allowing the camera to ‘sleep’ it is ready to start recording almost instantly when the Camera button is pushed for one second. But this is a good power-saving feature available for use.
This ‘stay awake’ status is a sure way to overcome the 2 to 3-second lag experienced in attempting to turn the camera on first and then capture an opportunity – as it passes by.’ It’s not (usually) possible to foresee and capture everything desired, but this can help.
The following table, grabbed from the Sena 10C User Guide identifies approximate recording time using different capacity media relative to resolution and frame settings.
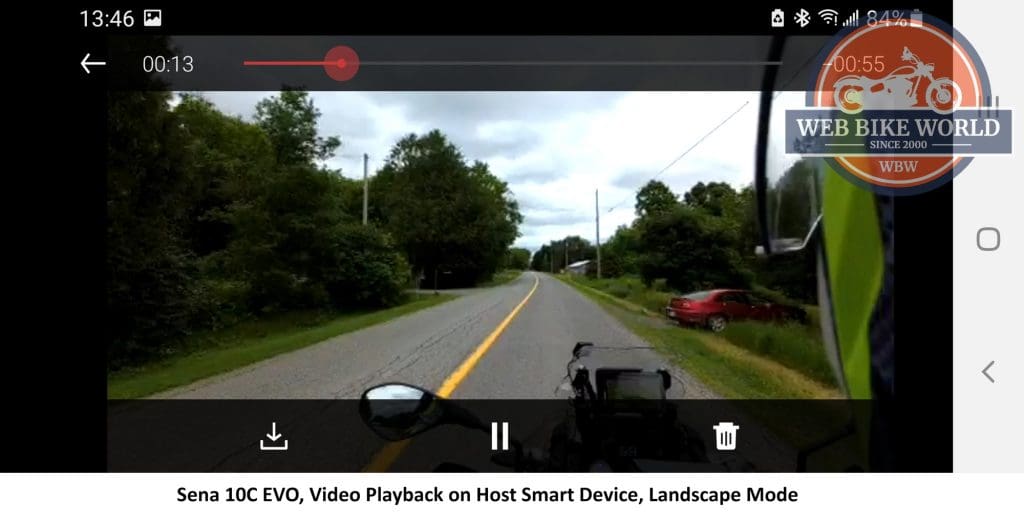
Note – when recording video, the Sena EVO 10C creates two files. The primary video, marked as (A) in the file name is generated based on the resolution settings; but a second adjunct video at a fixed 560×340 resolution is also created with (B) in the file name – this lower resolution smaller file is perfect for mobile platform preview/viewing and quick downloading. I’m not sure if it’s a feature unique to the 10C but it sure is appreciated by this user.
Fot example, a three-minute video done at the highest setting (4K) generates a file size of around 1,331,200 KB whereas the adjunct video is 61,400 KB – a big difference. This does increase overall storage size per video set (A & B), but it is not a big bite overall.
Recording Limitations – when the storage media is full (if not in the loop recording mode) or if the battery becomes low, the camera provides a verbal warning and automatically stops recording.
Another recording limitation is file size-related – the maximum size per video is 4GB, so when any recording reaches this limit, it is saved off and a new video created for continuance. This limitation is not reached if using the three (3) minute loop mode.
Camera Modes – selecting single or burst mode is done from Camera App/Photo Mode. For single-shot mode, TAP the Camera button once to take a photo – a shutter sound is heard (the Green LED flashes once). If the camera is set for burst shot mode, a TAP on the Camera button has eight photos taken rapidly with multiple shutter sounds (Green LED flashes rapidly).
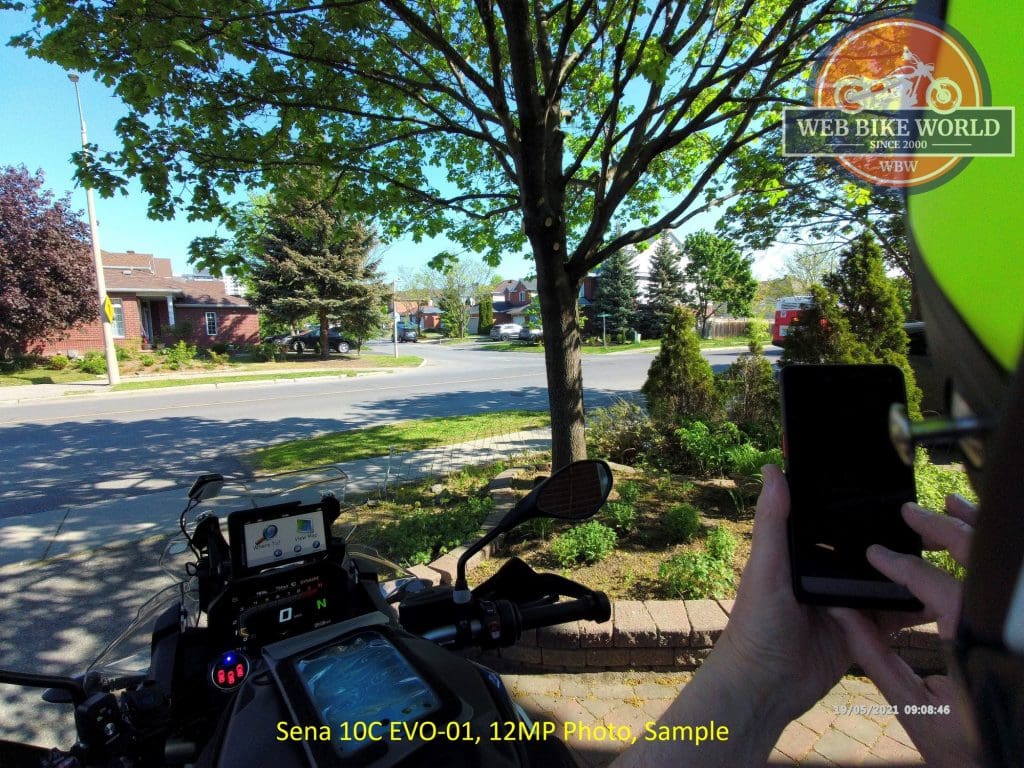
Note – if the camera is recording at its highest setting (2160p at 30fps), a photo or burst photo sequence cannot be taken. But at any other video capture setting a photo can be taken with a resolution of 8.3MP. If photos are taken without the video being recorded, camera resolution is a fixed 12MP with a 4:3 (full screen) aspect.
Audio Input – this is where the interplay between the BT and Video personalities of the Sena 10C EVO becomes very productive, thanks to the Smart Audio Mix (Always On) feature allowing recording of everything heard through the headset speakers – except for a phone conversation.
Additional intercom or other audio source audio can really liven up the travelogue or also clag it up – the choice is yours.
Other Sena camera products, including the Sena Momentum PRO, used a version of the Camera App and it had a ‘Speaker Sound Recording’ setting, but it isn’t present nor are there any listings for the Smart Audio Mix feature under the Sena Utility App either.
Observation – the only audio setting provided is the Video Microphone Gain settings – Low, Medium, and High, under the Sena Camera App Settings and, the Smart Audio Mix feature is identified as ‘Always On’ rather than allowing selection of discrete audio sources as was once possible. Appreciating possible privacy concerns, this change to always-on mode is disappointing. More questions for Sena.
Media Management
Wired Connection – if wanting to leave the storage media undisturbed in the camera, the USB-C connectivity is needed, the system turned on (that will result in the USB connection being recognized, but only for charging); now turn the Camera ON and after a 4 or 5 count, the data connection is recognized and the media root folder opens on the big screen.
Note – when the camera is turned ON and the data connection made, the small back status LED (Red while charging and Blue when charged) goes out as the battery is not charged in this media access setting. When the camera is turned OFF, the battery is now being charged and the back LED is Red (or Blue if fully charged).
Wireless Connection – selecting and downloading media files from the 10C EVO to the paired smart device using the 5G WiFi connection is slow, at least compared to the timings recorded in downloading 4K and 2K video from the INNOVV K5 to the same smart device using the INNOVV 5G (5.8GHz) connection.
A three-minute, 4K video file stored on the media card in the 10C EVO took 6.5min to download – almost three times longer than it takes with the K5 and smart device connection – ouch.
Media Offloading – despite the wired connection working well and the need to have the camera feature ON and generating lots of heat (although not as much as when it is recording), the simplest solution for this user is to remove the media, put it in the high-speed multi-slot memory card reader connected to the USB-C port on the desktop and offload the files, quickly.
Overall Performance Observations
Preparation and planning, along with system familiarization can make the difference between a positive or negative first experience with the SENA 10C EVO, especially when it provides both BT helmet system functionality and the ability to record video with audio and take single or burst-sequence photos.
Once the Sena 10C EVO is oriented or framed vis-à-vis the host helmet and when appreciating that the seating position and overall cockpit environment can impact helmet positioning, life with the 10C EVO is very satisfying and kind of mundane – in a positive sense.
Battery life is or can be an issue – in 4K video recording mode and with the BT intercom in use, the system usually terminates recording after 65 to 70 minutes while allowing comms to continue; less than the claimed 1.5hours recording time but in appreciating other usage factors it is understandable; which is why the 10C EVO is typically powered externally.
Once turned on the 10C EVO makes the BT connection to the smart device in one or two seconds and in turning on the Camera feature, the local 5G connection is also done within ten seconds or so. If this WiFi connectivity is not needed, it is ignored in knowing that if it isn’t used after three minutes, it shuts itself off, minimizing system power consumption.
And yes, when the camera is on and in use, the front housing area does become warm but not hot; although we’ll see how warm/hot it actually gets once the 35 to 40C temps become the norm. But it’s enough to warm the fingers through a light glove.
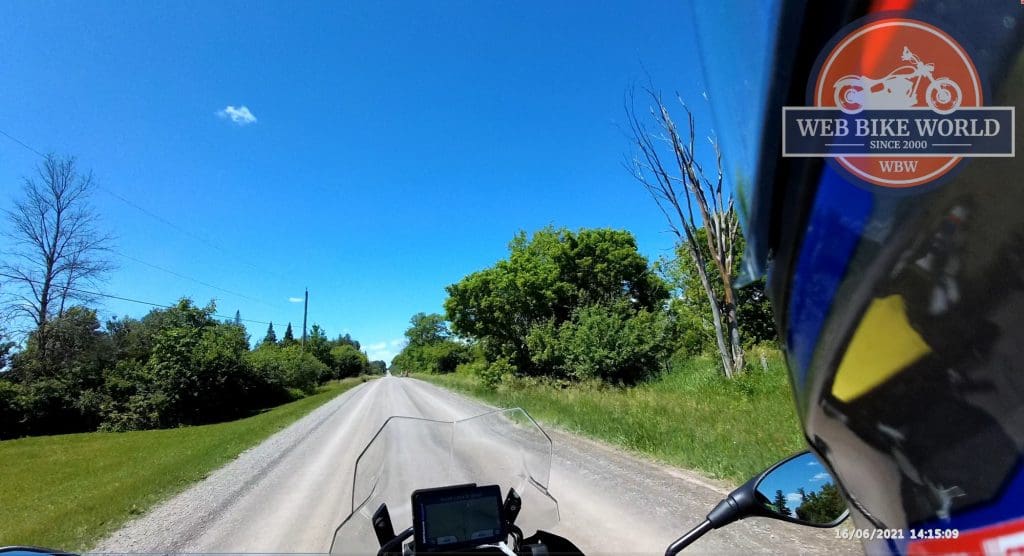
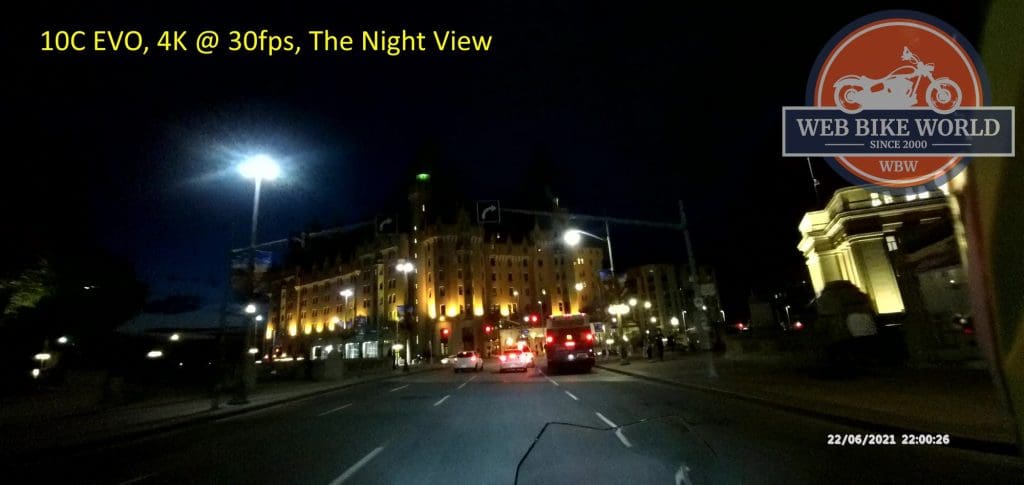
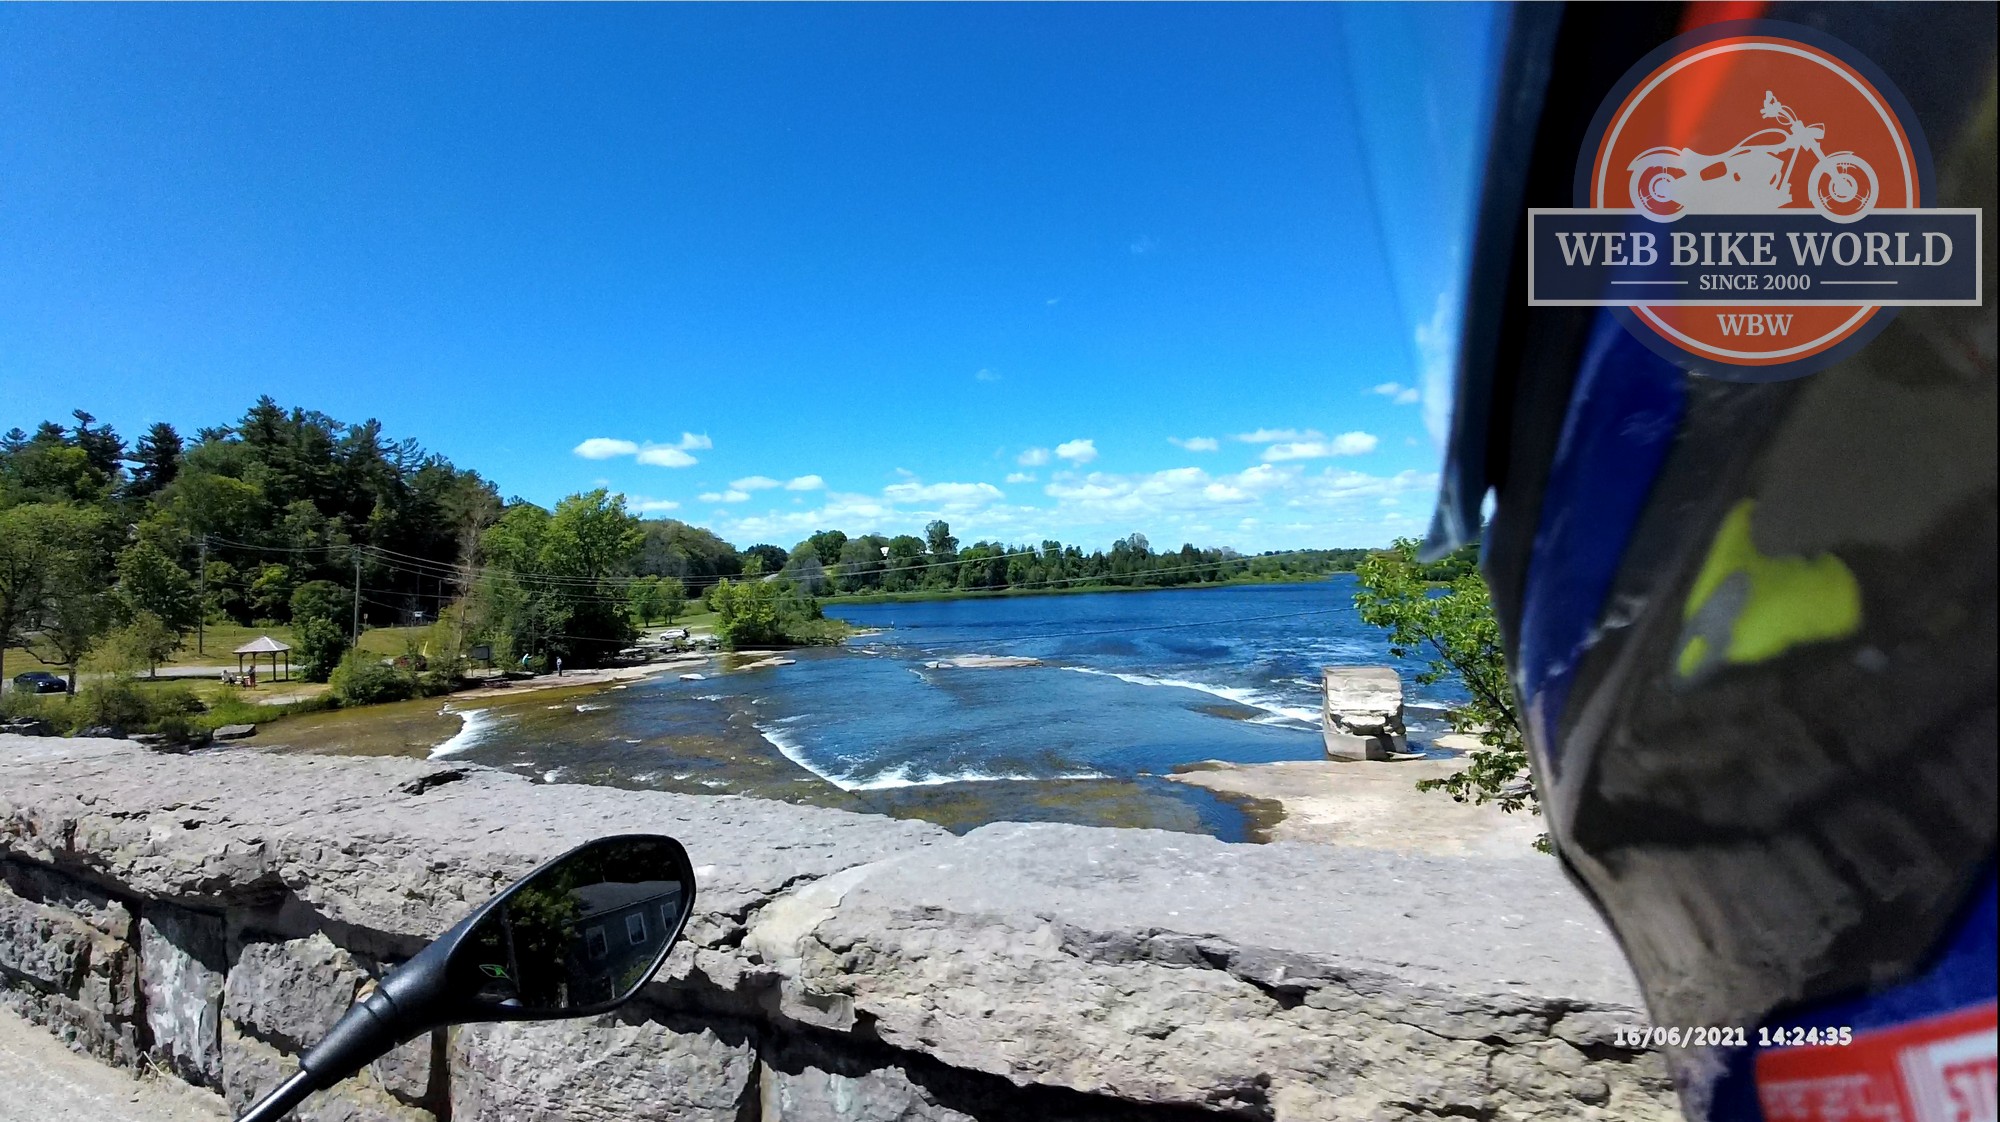
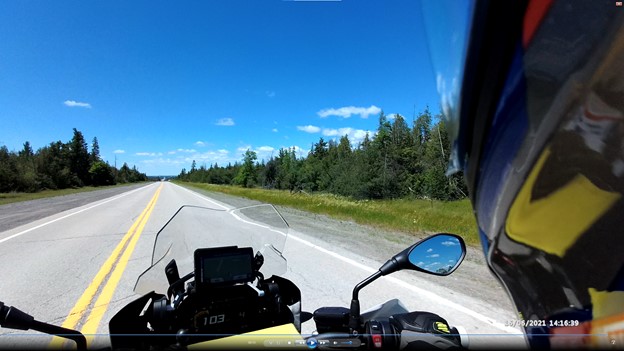
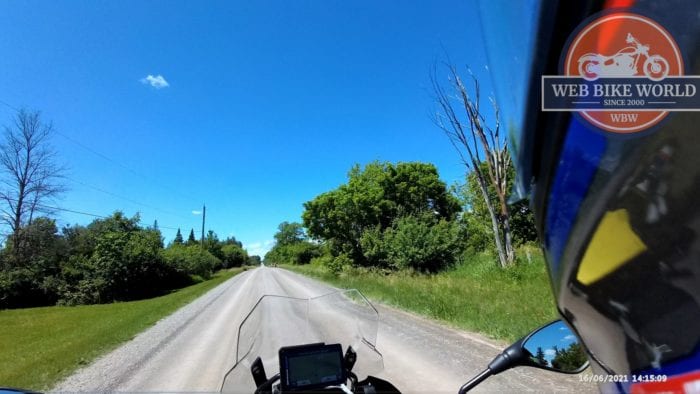
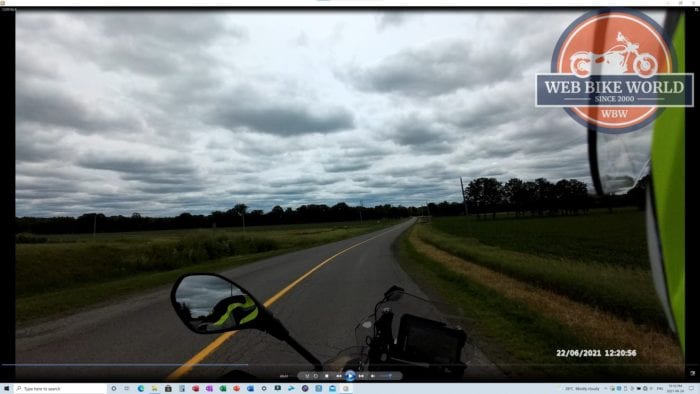
No matter the resolution or frame rate, sunrise, daytime, and twilight video quality ranges from excellent to outstanding with any of the resolution settings generating some of the best video seen from multiple 4K and 2K capable camera systems used.
Although truly subjective in nature, the Sena 10C EVO camera provides a richness or quality to the video that is (comparatively) as good or better than samples from other systems. But the Sena 10C EVO-01 does like to have good light conditions.
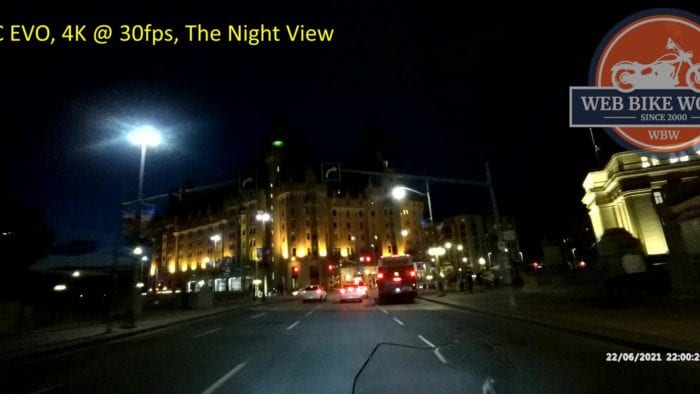
In using the Sena 10C EVO at varying settings for low-light and night-time runs within varied conditions – urban or rural, cloudy or clear, no moon, little moon, or full moon, there are discernible differences between EVO-01 video and video captured by the INNOVV C5, K2, K3, and K5 systems, the original Sena 10C and the VIOFO MT1.
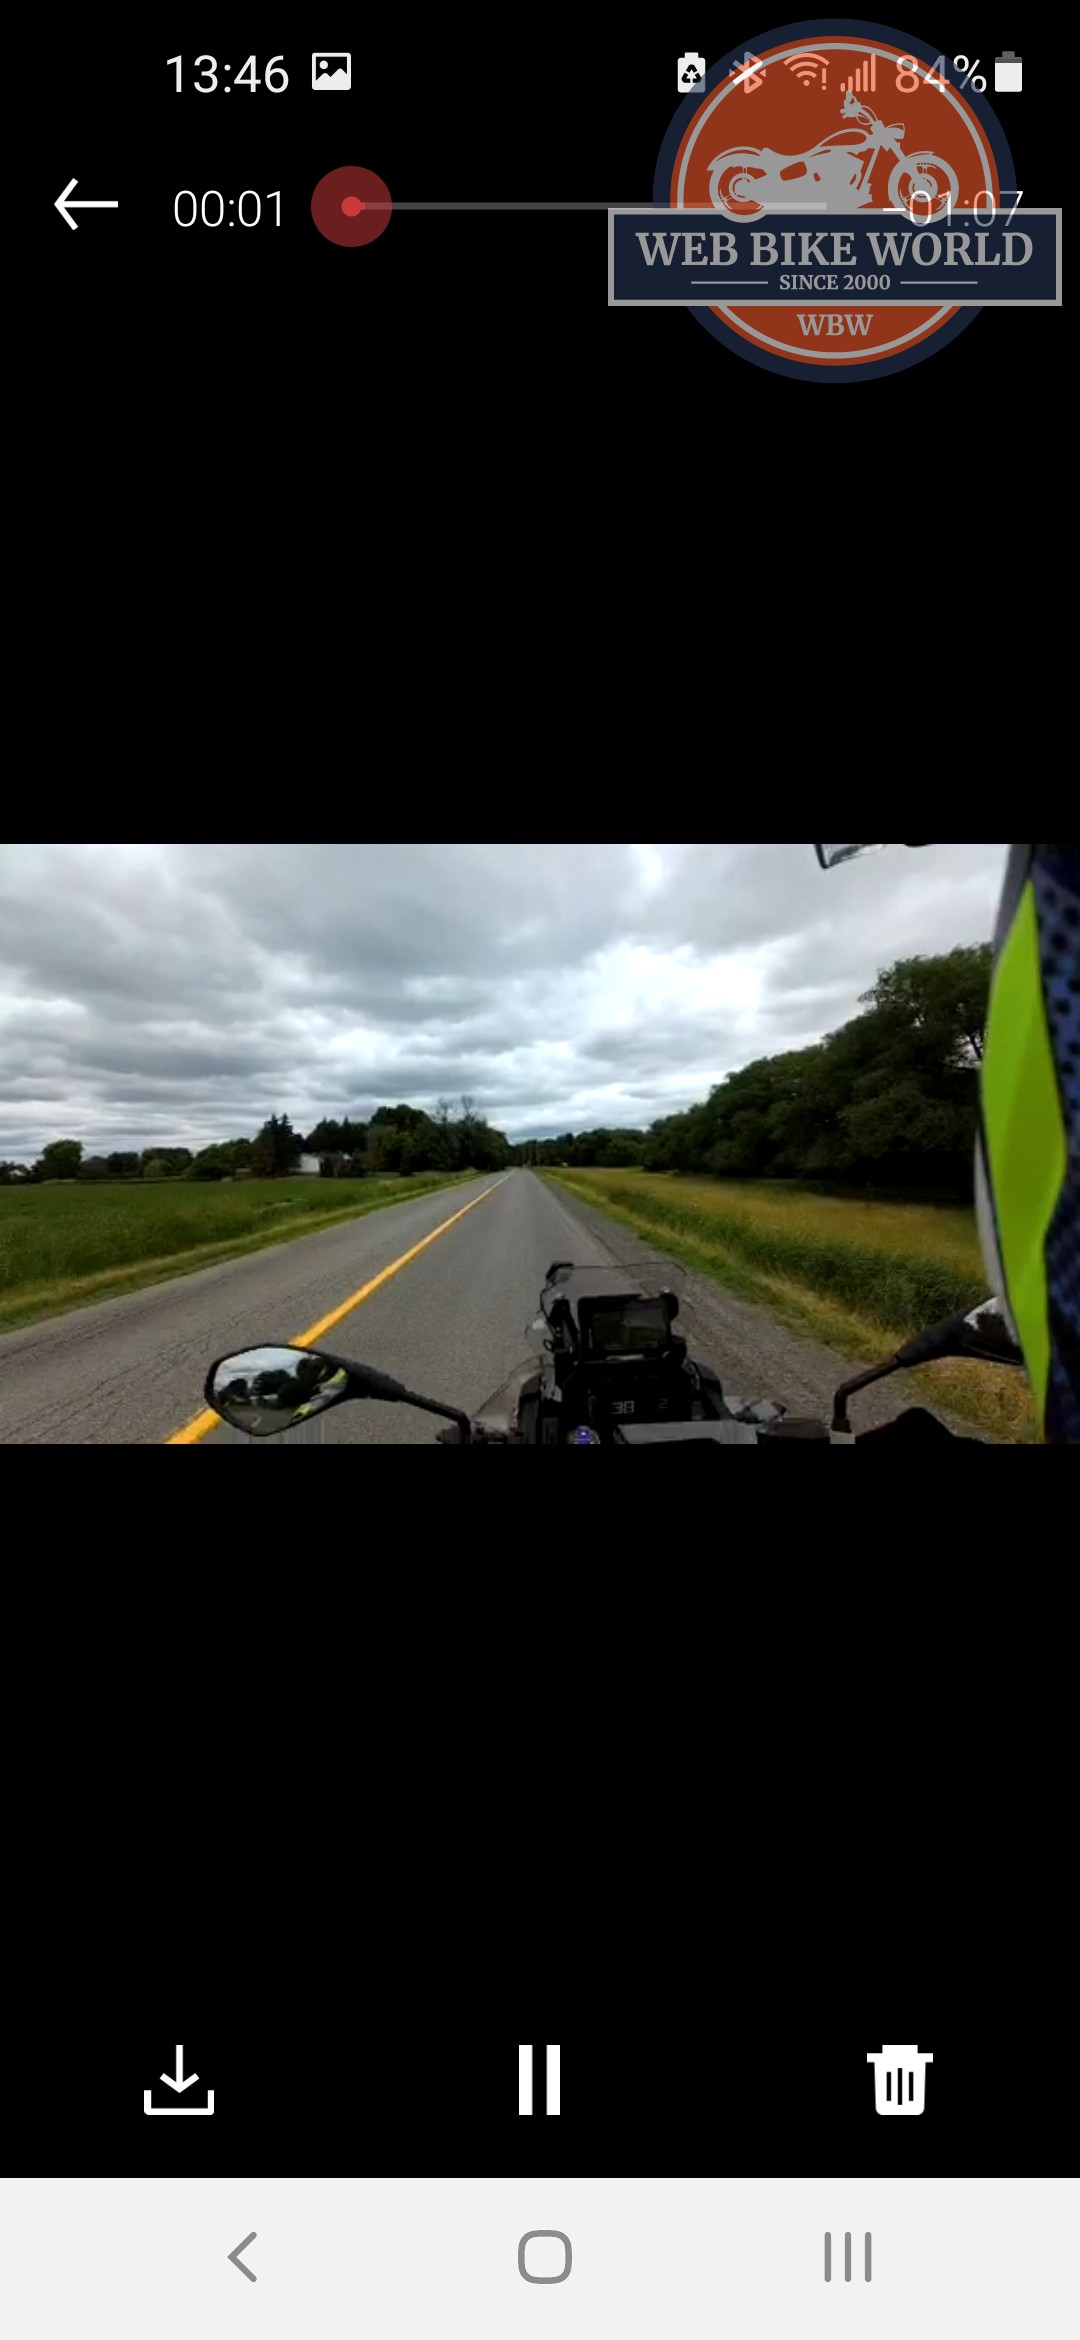
Observation – the obvious light-related changes between bright, overcast, and low-light or night-time conditions are pronounced. Is this a result of the change from the f/2.0 (10C Pro) to the current f/2.4 that has less light going to the sensor for potentially poorer low-light performance? It seems likely.
Motion Stability – video from what is the more expensive but most popular standalone action camera, set to the resolution and frame rate, over the same ground and lighting conditions is indeed better.
But in closely examining the video samples, some of the differences are due to the superb image stabilization feature of the more expensive product – you pay for this capability, but it is a proven one.
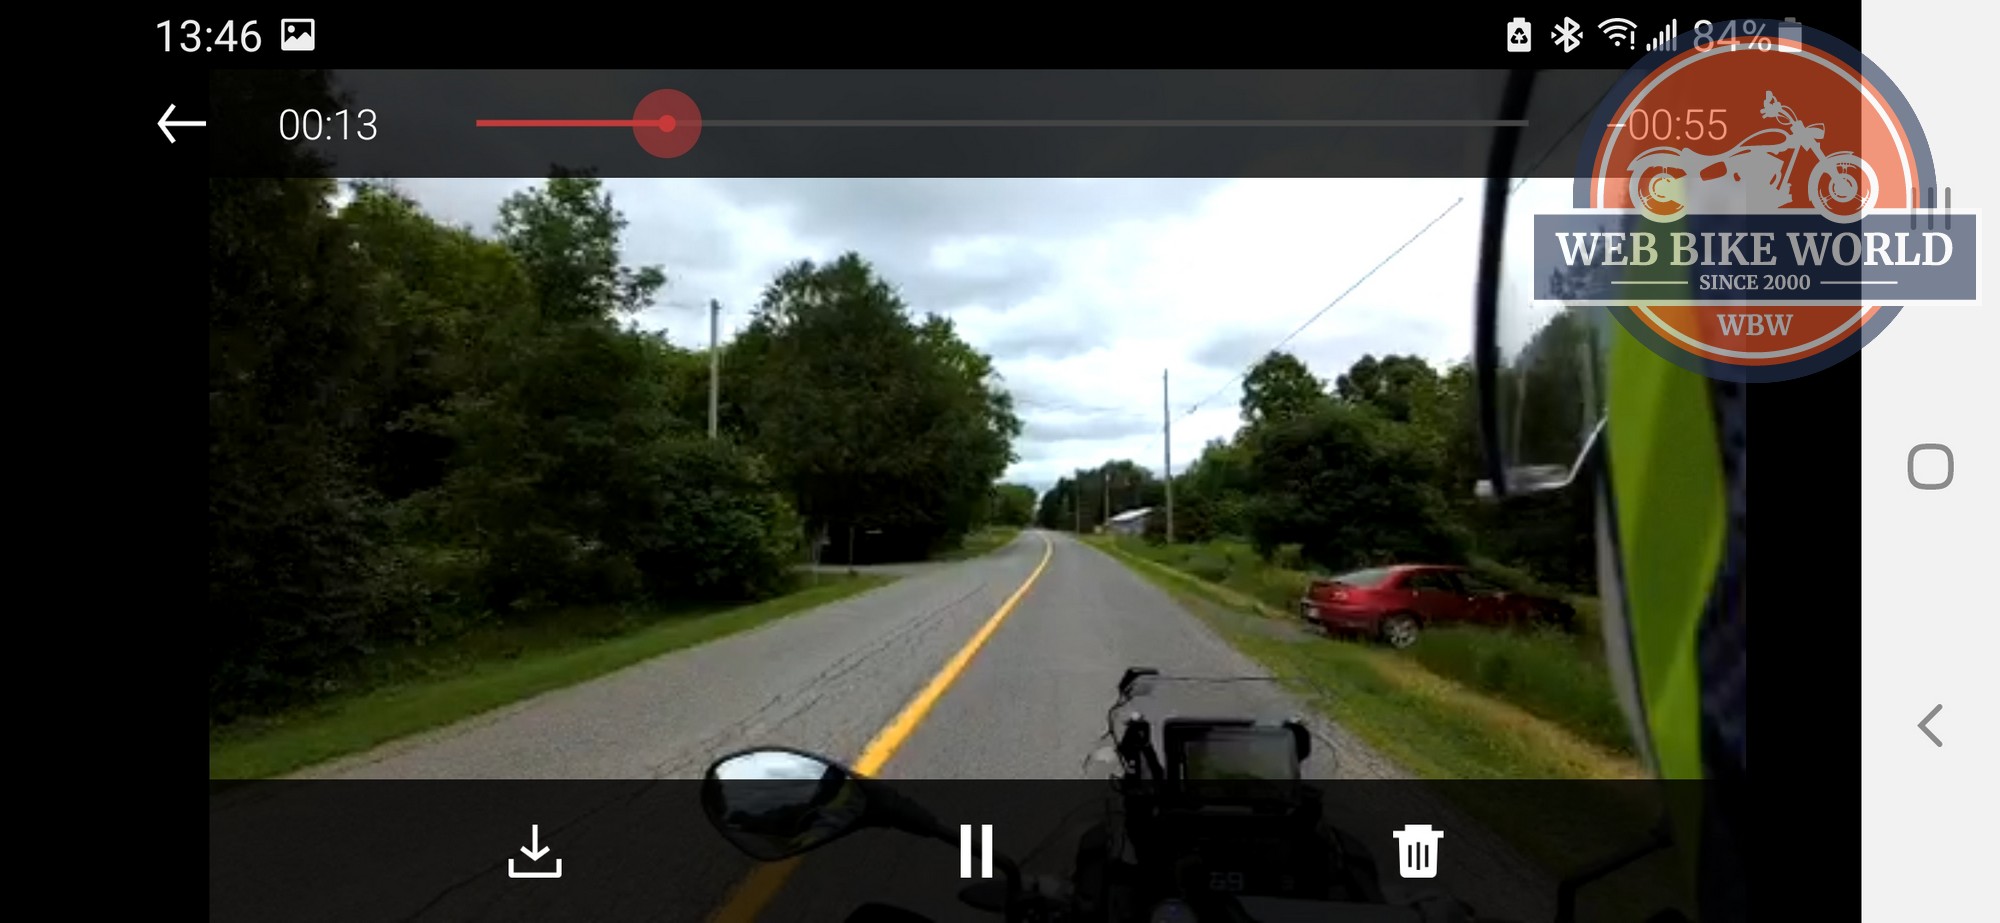
Adjunct Video – the secondary or adjunct video, recorded at a fixed 560 x 340 resolution is ideal for small screen viewing, for providing quick playback of files on the small screen, or for downloading a smaller lower resolution file when desired and well worth the extra storage space.
Audio Quality
Audio on Video – audio from the user, other connected intercom parties, or other enabled sources (Audio Multitasking) is managed by the ‘Always On’ Smart Audio Mix and unlike earlier 10C versions or the video and audio equipped Momentum Smart Helmets, there are no user-selectable input settings, so the user may need to manage discrete audio level inputs.
Quality of audio from the intercom or other sources is very good in being filtered through the BT system and in working between the Low, Med and High microphone settings under the Camera App and for this rider and motorcycle environment, the Low or Medium settings work the best and (seem) to reduce noise levels.
The external (pickup) can really add to the noise levels though especially in a noisy cockpit environment and it can intrude on voice or music audio. In typically only doing sporadic rider narration, this isn’t a big issue, and needed audio track adjustments can be made if doing any subsequent editing.
All to say that some fine-tuning between the Sena Utility App and the Camera App settings may be needed to get the optimal audio experience related to video with audio playback, but I’m not convinced that the Smart Audio Mix ‘Always On’ solution is the best one…
Observation – the audio versatility points could be largely addressed with a more comprehensive Sena 10C setup profile under the Sena Device Manager and by integrating the Sena Utility App and the Camera App; or, by drawing up a new one-stop-management interface providing finer-grain management of video and particularly, audio and audio source settings.
Headset Audio – the standard speakers provided with the Sena 10C EVO-01 kit are very good, but if using the Sena 50 series HD speakers and subsequently installing the (supplied) optional Sena HD Speaker Kits in other helmets including the helmets hosting the 10C EVO, one is a tad spoiled.
So, once the 10C EVO kit speakers are tested with the hosting helmets, the audio pieces are swapped out for the (Type B) HD kit headsets.
And with system firmware updated and the latest App version installed the user gets to experience everything intended by Sena – better output (quality and volume) as well as the tunability provided by the Audio Equalizer settings under the Sena Utility App for audio personalization and help optimize the helmet audio experience.
Sena Warranty & Support
The Sena 10C EVO-01 is covered by a two-year warranty, and the full warranty guide provides all the essential information needed regarding warranty coverage, returns, and service support.
Support-wise, Sena provides ongoing warranty and product support through direct contact and various forums, including their own Community access.
SENA 10C EVO Accessories
- HD Speakers, Type B, PN SC-A0326
- 10C Earbud Adapter Splitter Cable, PN 10C-A0101
- 10C EVO Helmet Clamp Kit, PN 10C-EVO-A0311
- 10C Microphone Foam Covers, 5-pack, PN 10C-10109
- RC4, 4-button Remote Control, PN SC-4B-01
- RC3, 3-button Remote Control, PN SC-3B-01, and
- Wristband Remote Control, SC-WR-01
In Summary
If there are verdicts to be rendered here, one is that the Sena 10C series of products remain (absolutely) unique and secondly that the Sena 10C EVO-01 is evolving in a most positive manner.
The Sena camera products have always provided great video, almost identical in coloration, richness, and detail as that experienced from the now-departed Garmin VIRB; and as video performance yardsticks keep getting moved Sena has done a good thing in bringing 4K performance to this latest version in the 10C series.
But just because it is unique and a positive step forward from its predecessor the Sena 10C EVO-01 doesn’t get a free ride, as readers will surmise from the observations, issues, and wishes scattered throughout this review. We know Sena is addressing things and evolving the 10C, but couldn’t they do it a bit faster? And add a GPS feature while at it?
And at the risk of repeating oneself, the need to have two Apps running so both capabilities can be dynamically managed is lamentable, although many users won’t need or want to keep both Apps available for use; as such, it is perhaps a minor lament compared to the multitude of positives provided by this product…but still.
Some of the layout and details changes between the 10C Pro and this newer 10C EVO-01 do raise some observations – mainly as to how well they will hold up over time, but so far, so good and the only thing ‘broke’ per se is the gone-missing weather cap over the media slot.
And coming back around to the multi-personae capabilities of the Sena 10C EVO-01 brings us to what is, or could be, an important end statement – whether familiar with Sena systems and Sena’s standardized firmware or not, it always helps to read (and use) the User Guide or App-based information, preferably before installing and using the system…
The Bottom Line – my assessment and position regarding the Sena 10C EVO-01 is close to what Jim expressed in his final statements about the Sena 10C Pro. The 10C series systems, whether the original or this newest iteration continue to provide multiple capabilities in one helmet-mounted system – it is a unique product, and having everything it does in one small package is, for so many riders (and powersport enthusiasts in general) a near-perfect blending of multiple important requirements regarding rider enjoyment and rider safety. My advice to Sena – add MESH, keep moving video performance forward and, (possibly) add GPS. I’m totally along for the ride on this one.
Pros
- Only integrated helmet-mounted 4K camera and BT comms system on the market
- Small compact housing with flush-mounted lens
- 125-degree wide-angle field of view
- UHD (4K), FHD (2K), and HD (60/30fps) video resolutions
- Three recording modes and Video Tagging for critical events
- Unique dual file creation (full & reduced resolutions) for playback & storage efficiencies
- Multi-source audio on videos
- Excellent video quality at any setting
- Working BT Intercom range of up to 1.6km (1.0mi) confirmed
- Compatible with Sena +MESH to expand communication environment
- Very good audio with supplied speakers; excellent audio with Sena HD speaker kit
- Good battery life, fast recharging, system chargeable while in use
- Easy installation on virtually any full, modular, or three-quarter/Jet-style helmet
- Easy firmware updating using Sena Device Manager
- A most worthwhile investment given features & capabilities.
Cons
- Horizontal adjustment slider for the lens not as user-friendly as the previous rotating lens
- No simple voice commands for using the camera
- Smart Audio Mix features precludes the discrete selection of audio inputs (as done previously)
- Need to use two Apps rather than one integrated UI for this integrated system
- No image stabilization feature
Shopping Now? We Recommend:
webBikeWorld works closely with Revzilla and Amazon to provide our testers with quality products to review. While we have an affiliate relationship and receive a commission from items purchased, this addition comes at no additional cost to you. It is the primary way we pay for our site and reviewers.
RevZilla
Free shipping on orders over $40
30-day no-nonsense return policy
Excellent selection of all major brands
Awesome pricing
Amazon
Free shipping (with Amazon Prime)
30-day return policy
Excellent selection
Competitive pricing









No Comment