The Breakdown
Pros
Cons
Introduction
Up front, we need to identify that this review is based on a pre-release version of the coming-to-market INNOVV K5 that is identified as a Dash Cam, but in reality, should be called an “Action Cam” as it designed for and is specifically focused on the powersports market.
wBW has, over the years, reviewed virtually everything marketed by INNOVV and I have been fortunate enough to do many of them, including the original INNOVV K1, its replacement the K2, the single channel C5 system and the Power Hub variants.
Relatedly, during some spring into summer period email correspondence regarding the ongoing development of the INNOVV ThirdEYE, in having an early or pre-release version of it here undergoing testing (and a pending wBW review), some insight into the next dual channel system under development was provided.
And of course, to this professed electronics geek, the only question was – when can I get one to play with? Soon as it turned out and just before mid-October, the anticipated package arrived. And since then the INNOVV Team has been making sure that information regarding hardware and firmware enhancements along with user interface APP updates is passed along.
This is all good, especially regarding new products as it provides an early opportunity to do either a first look or full review for our readers and, offer up the (always) constructive and (always) objective feedback on form, fit, and function to the manufacturer -particularly for those products not yet formally released.
The INNOVV team is also working on developing some specific bracket options that will provide even more adaptation and fitment options regarding the installation of this new dual-channel camera system on motorcycles and other powersport platforms.
So, in appreciating the ongoing activities all the changes identified by the INNOVV K5 Team, either implemented or planned for the release version are clearly identified where applicable in the appropriate sections along with a Change Summary Section at the end of this submission.
We hope you enjoy this early look.
INNOVV and the K5 “Action Cam”
INNOVV is currently updating and evolving their powersports/motorcycle focused camera line and the INNOVV K5 (Dash Cam) Dual Channel Powersports System with its 4K front and 1080P rear cameras is the first in a series of pending product updates and new releases; hopefully, wBW will be able to do reviews on them all.
The single channel multi-purpose and very adaptable C5 in two variants and the dual channel K2 systems have been the flagship video products from INNOVV for a couple of years now. But ‘INNOVV’ is derived from ‘Innovate’ so it was only logical that evolution of one or both flagship systems would occur or, something new is in the works.
There is no doubt that the K5 is innovative and it is obviously different, at least when compared to the current INNOVV K2 product, and not just because it uses a 4K front camera but also because the 4K front lens is actually integrated with the DVR module.
One could ask: (a) does a ‘dash cam’ really need this video resolution; and, (b) is the larger form-factor integration going to be as easily installable compared to the typical small lens component as used for the K2 and C5.
The first question is easily answered – a product like the INNOVV K5 might wear the ‘dash cam’ label, but in reality, these systems provide an excellent return on the investment as they have so many useful (and valuable) applications whether capturing the traffic/road environment, providing a hi-resolution (almost 360) video travelogue or anything in between – “Action Cam” is a much better moniker…
But the second question regarding form factor and integration, along with other questions were mentally posed and stored away, although a couple turned into email queries to the K5 team. However, the questions were all moot until the pre-release kit was sitting here for real…
With the pre-release INNOVV K5 here and after almost three months of poking, prodding, installing, and use, many of the original questions are now answered, either formally or from use. And many original observations, all fed back via email, are also resolved or are being addressed by the K5 team.
And so far, using the pre-release INNOVV K5 system remains a positive experience and it seems the INNOVV team is well along the way in finalizing the K5 and readying it for a formal release.
Camera Resolution Settings
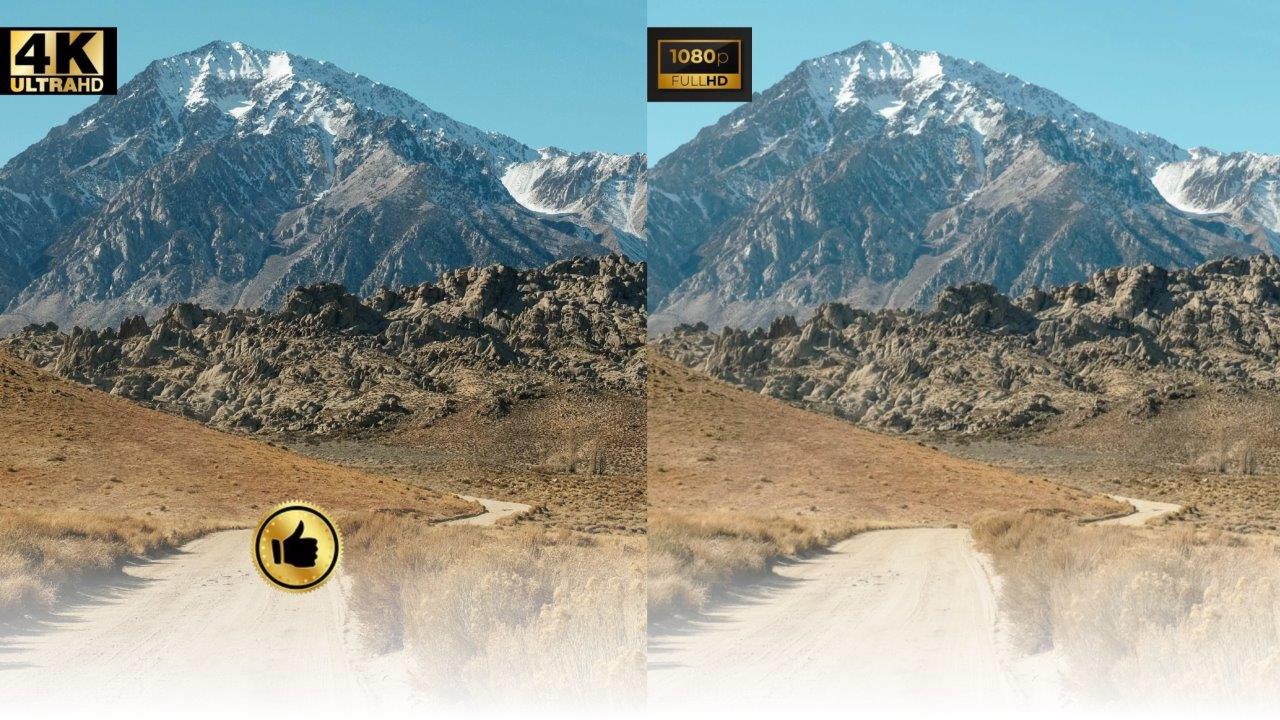
‘Camera Agility’ could be a good term to use regarding the video capture capabilities of the INNOVV K5 system. It provides a total of eight (8) combination options for resolution settings between the front and back cameras, listed in the table below.
All the resolution combinations have been tested, but overall, the 2K @ 60FPS front and 1080P @ 30FPS rear combination (No 3) is preferred for traffic, highway, or paved and unpaved back roads and trails travel.
INNOVV K5 Camera Resolution Settings (wBW Table)
| Combination | Front Camera | Rear Camera |
| 1 | 4K @ 30FPS | 1080P @ 30FPS |
| 2 | 4K @ 30FPS | 720P @ 30FPS |
| 3 | 2K @ 60FPS | 1080P @ 30FPS |
| 4 | 2K @ 60 FPS | 720P @ 30FPS |
| 5 | 1080P @ 96FPS | 1080P @ 30FPS |
| 6 | 1080P @ 96FPS | 720P @ 60FPS |
| 7 | 720P @ 96FPS | 1080P @ 30FPS |
| 8 | 720P @ 96FPS | 720P @ 60FPS |
INNOVV K5 Recording Modes
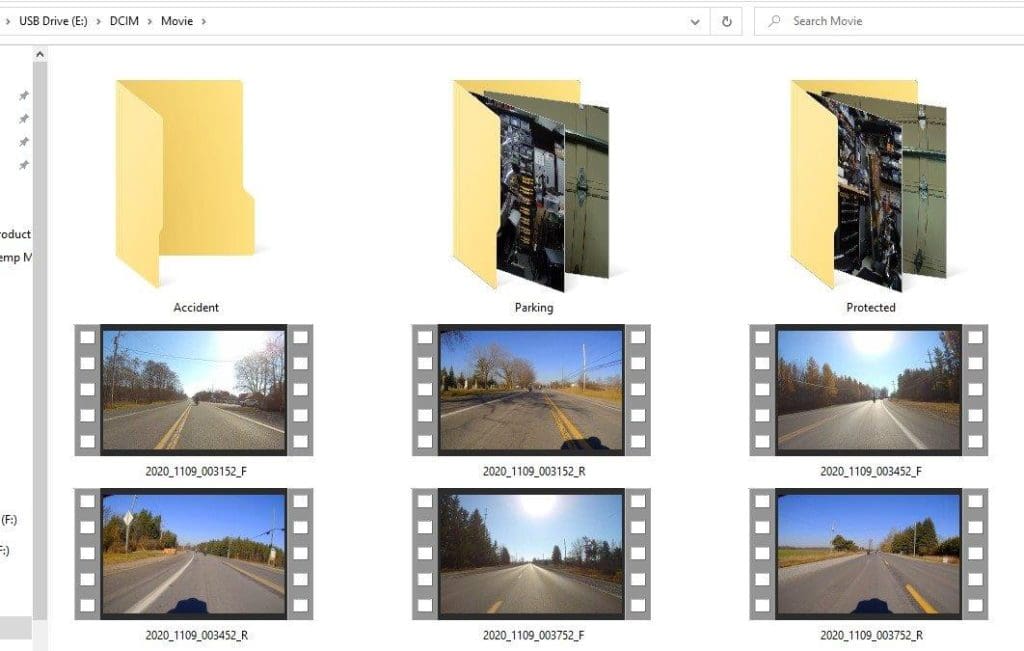
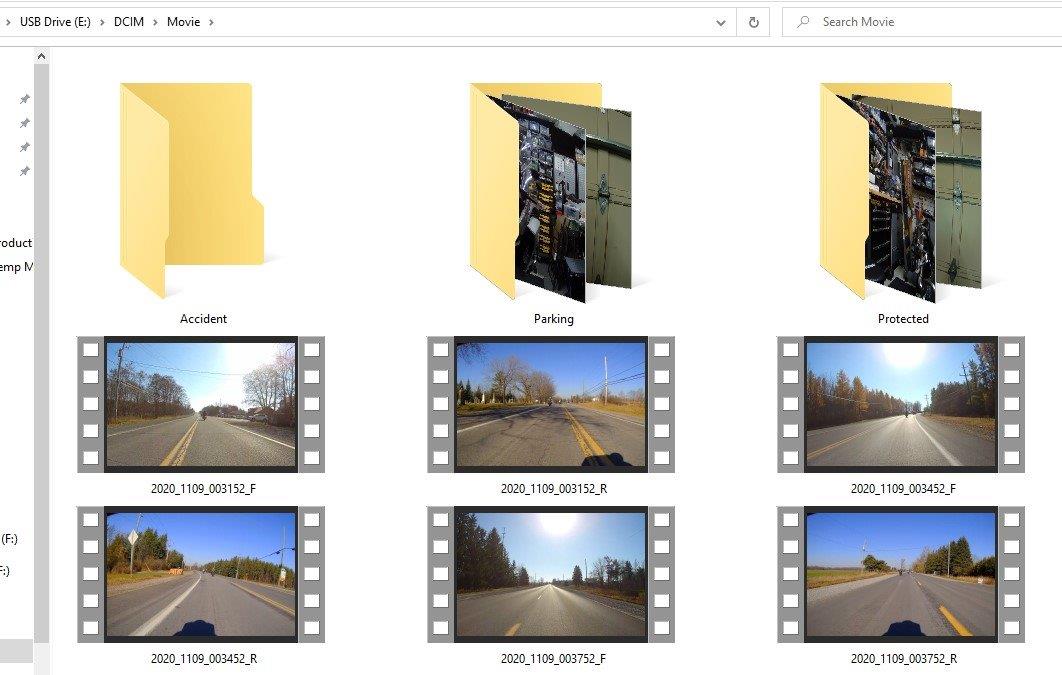
Continuous – this is the normal or default recording mode that is activated when the system is powered up with front and back video recorded per the default or user-selected resolution combination (of eight) and default or user-selected time loop.
This video is saved to the DCIM/Movie Folder with the letters ‘F’ and ‘R’ used in the file name to identify front and rear media files. Media stored in this folder is not protected, meaning that the oldest files will be overwritten as space is required for ongoing video recordings.
Parking- when the motorcycle is stationary and if the Parking Mode ON and a median setting for the G-Sensor sliding scale has been done, a bump/push/vibration falling within the sensitivity parameters activates the system with ten (10) seconds of video (front and back) recorded and saved to the Parking Video folder.
Media in this folder is protected and identifiable by a ‘P’ added to the ‘F’ or ‘R’ identifier in the file name. This media is not overwritten by any Continuous loop recording.
Accident – during normal use of the K5 system and if a median setting for the G-Sensor sliding scale has been done, a significant fall or impact as might occur during an accident of some sort activates this mode with ongoing loop video saved to the Accident Folder. Media in this folder is protected and identifiable by the letter ‘G’ added to the ‘F’ and ‘R’ identifier in the file name. Media in this folder is protected and cannot be overwritten by any Continuous loop recording.
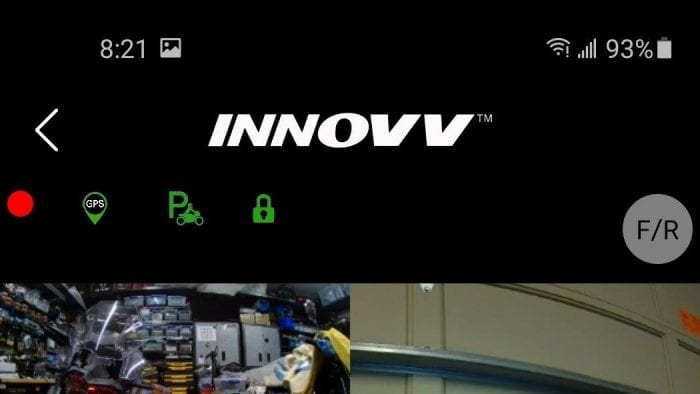
Protected (User Intervention) – if the user pushes the Function Button on the remote control during normal use of the K5 system, the ongoing loop video is saved to the Protected Folder and a small Green stylized ‘P’ icon appears on the live view screen indicating that this mode is active and the Camera LED goes into a double-flash mode.
As this media is saved off, a small Green ‘Lock’ icon also appears to identify this as Locked media. Media in this folder is identified by the letter ‘K’ added to the ‘F’ or ‘R’ identifier in the file name. Media in this folder is not overwritten by any Continuous loop recording.
Features & Specifications
Features (Compilation)
- DVR module with integrated front 4K camera, sealed access port and mounting block
- Rear camera is a ruggedized sealed module, as used for current C5 and K2 models
- Maximum resolution of rear camera is 1080P @ 30FPS (HD)
- Eight front/rear camera combination settings (see Feature Description below)
- Dual band (2.4/5.8GHz) WiFi for higher quality, faster downloads, and better stability
- Media is downloadable to smart device or saved off from the removable storage media
- Supports removable TF/micro-SD compatible storage media of up to 512GB
- Integrated G-Sensor for motion/impact sensing
- Intelligent DC converter for power and activity sensing protects device components
- Faster processing with A53 dual-core processor
- Offers standard H.264 or newer H.265 video coding scheme for better efficiencies
- Aerospace aluminum alloys used for less weight, better heat dissipation and better anti-electromagnetic interference capability
- Certified with an IP67 Code rating (dust tight & immersion), totally weather resistant
- Micro-USB interface port and TF/micro-SD storage slot under sealed access port
- Sealed access port (cover with screws and inner gasket seal)
- GPS feature supports 5Hz tracking in addition to the default 1Hz (1s) tracking
Specifications
- Side or front mounted DVR module
- DVR/Front Camera (Length x Width x Height): 52 x 48 x 25mm (2.0 x 1.9 x 0.98in)
- Rear Lens (Diameter x Length): 25mm x 52mm (0.98 x 2.04in)
- Weight: not listed
- Waterproof Rating: IP67
- Working Temperature: -30C to +70C (-22F to 158F)
- Input Voltage: 9 to 18V
- ACC (SW): Input; 9 to 18V, Output; 5.0V ±0.2V
- Voltage Output : 5.3V ±0.2V
- Max Current : 2A
Component Cable Lengths
- DVR Module, flying lead connections = 17.5 to 18.5cm (6.8 to 7.2in)
- Power Supply, main cable = 148cm (58.2in) plus 54cm (21.25in) for Red/Black/Yellow wires
- Power Supply, ignition (SW) = 73cm (28.7in) for Yellow wire
- External Microphone = 201.5cm (79.3in)
- GPS = 202.5cm (79.7in)
- Remote Control = 152.5cm (60in)
- Rear Lens = 249.5cm (98.2in)
Note – see Change Summary Section at end of this submission for an update on those cable lengths that have been increased or have an (additional) extension available.
INNOVV K5 Components
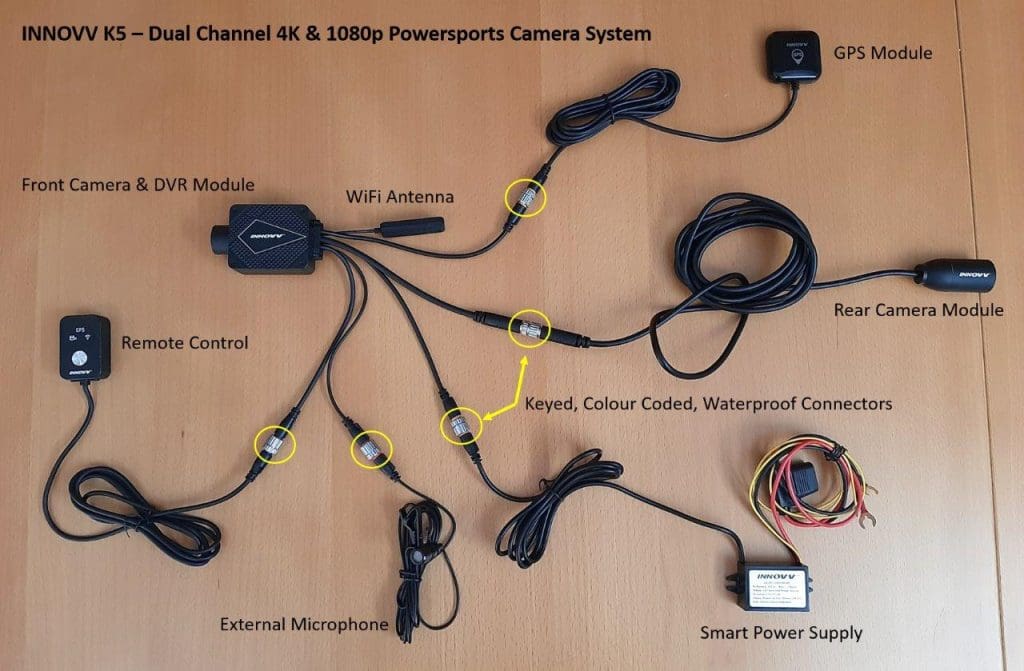
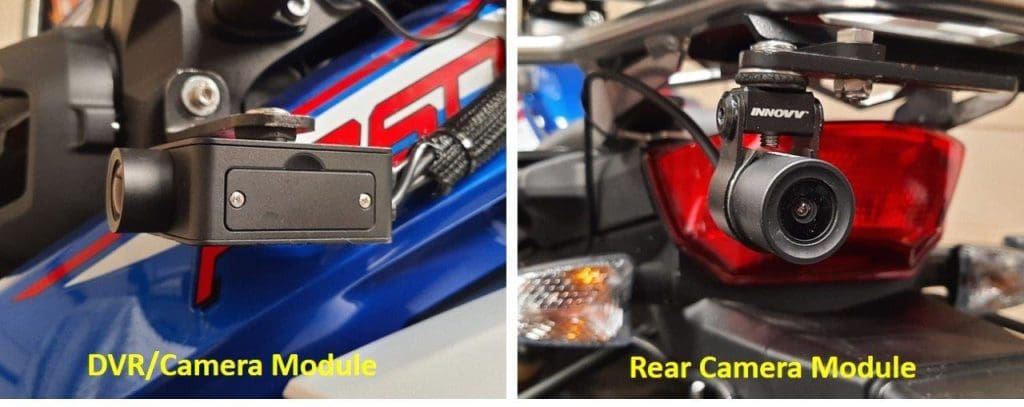
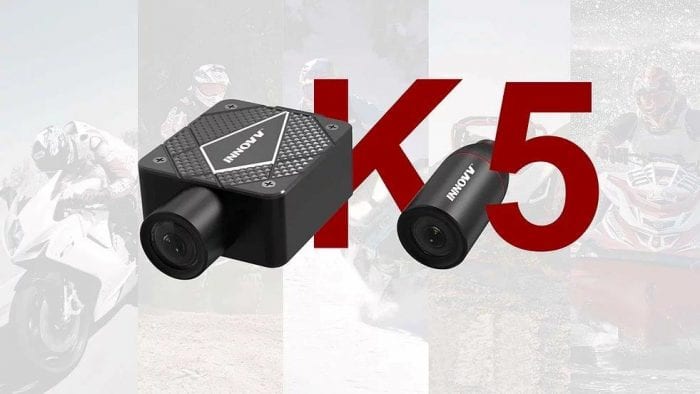
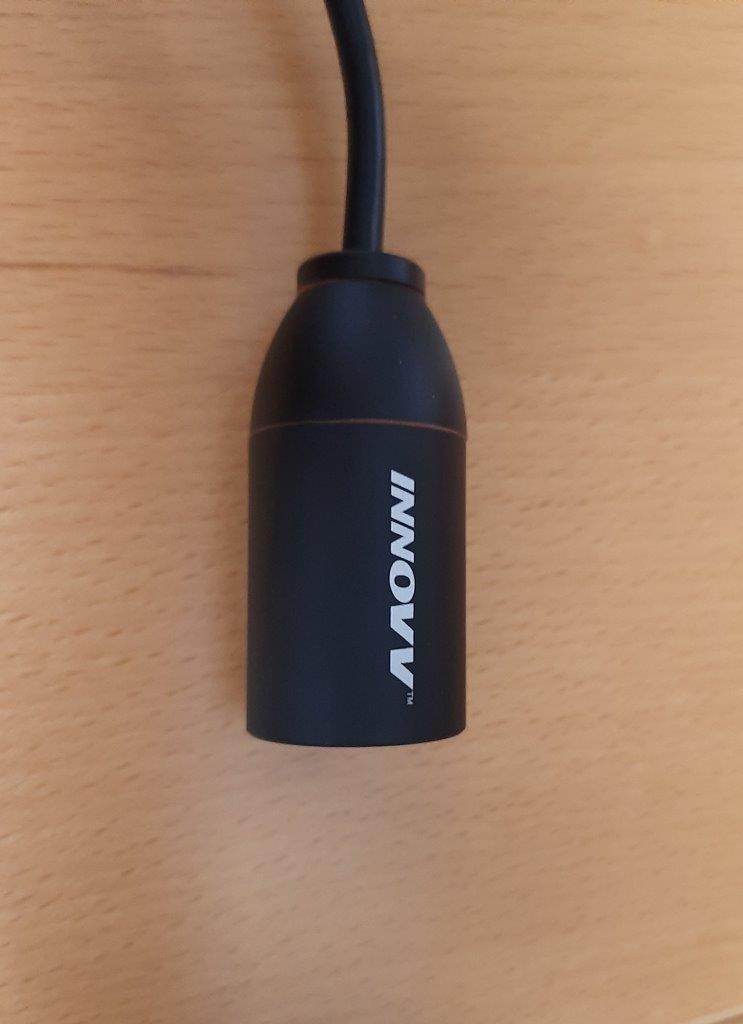
DVR Module/Front Lens – the front lens or camera is integrated into the front of the DVR module housing. The lens is not rotatable, but orientation can be flipped 180 degrees using the ‘Settings’ access on the INNOVV App to accommodate module placement and orientation.
Maximum resolution of the front lens is 4K @ 30FPS, with a 120-degree field of view, 7-Glass +1IR and a F1.8 aperture.
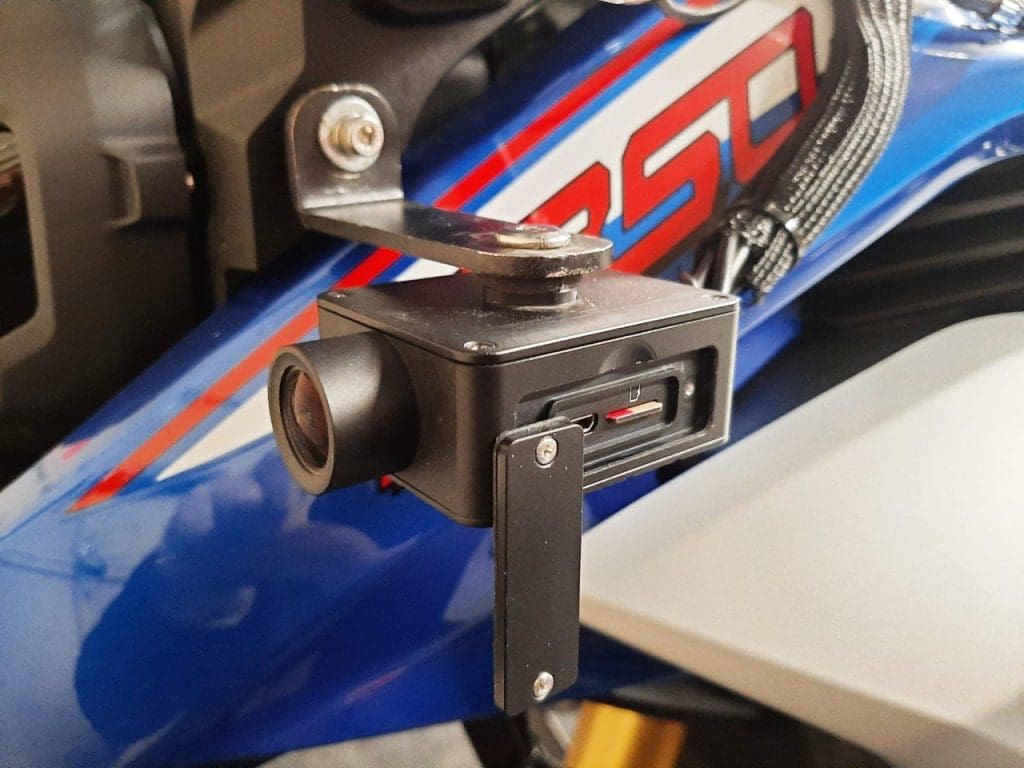
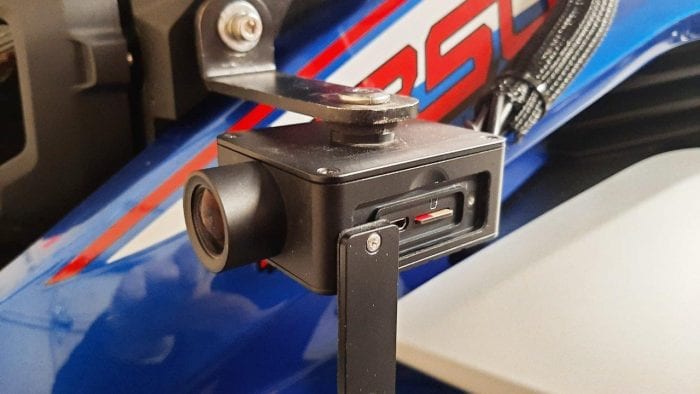
With the camera module facing forward and the top fitted or logo side up, the access port is on the right side; and if mounted upside down, the access port is then on the left side – this can be important depending on left or right-hand traffic, preferred installation side (road or curb) and of course, access to the port under which the micro-USB port and storage media card reside…
On the pre-release modules, the top or logo side is set into the frame and sealed with screws but the updated module to be used with the release version is now one piece for an even stronger housing and even less chance of any moisture egress at any point. The bottom has a raised mounting block with a 6mm threaded insert (see Installation Section).
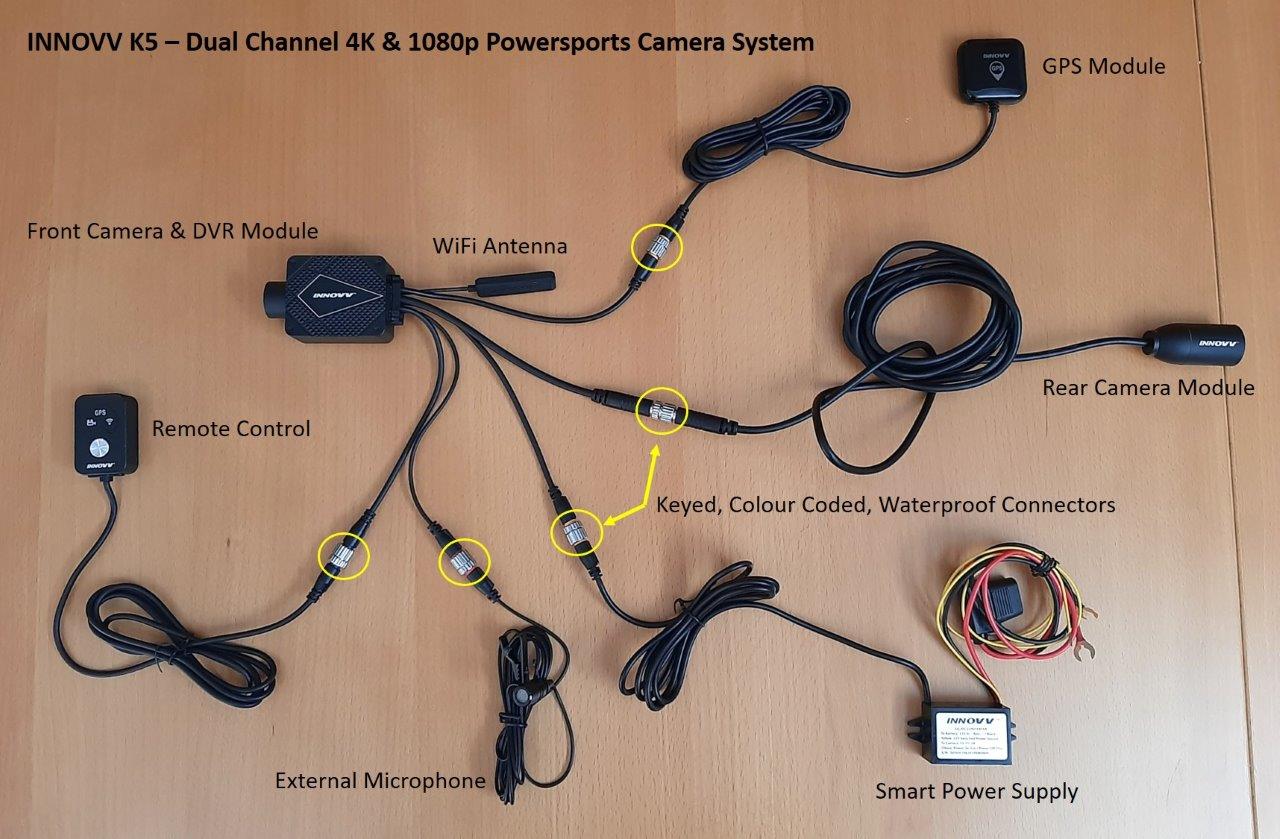
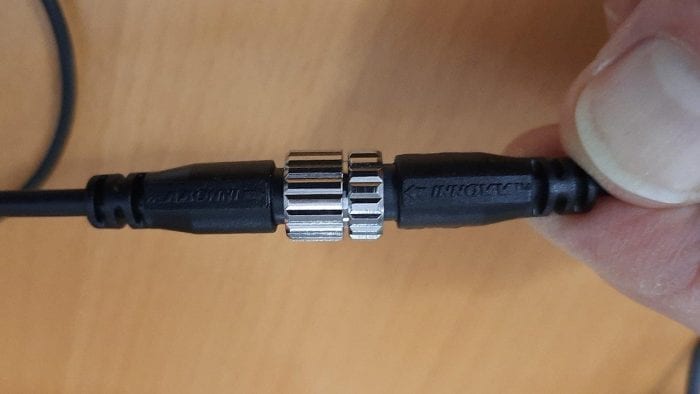
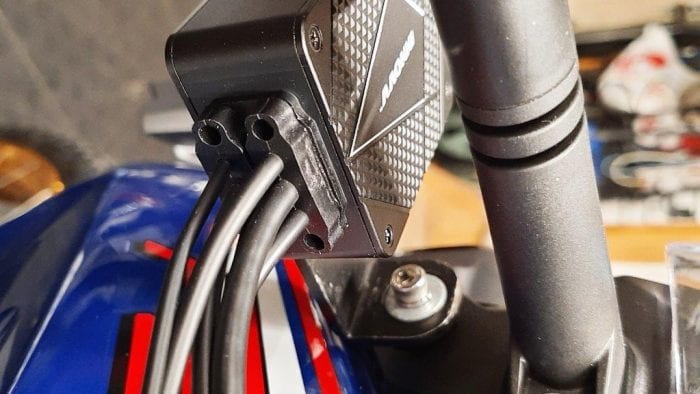
There are five long(ish) and one short flying leads integrated into the back of the DVR module. The five long ones are colour-coded with keyed multi-pin waterproof connectors on them for component connectivity. The short one is a thin cable with the sealed WiFi antenna housing at the end; handle this piece with some care.
The WiFi cable itself needs to longer and stronger for better resistance to flexing (this observation was one of the first passed back to the K5 team). Note – the Installation Guide specifically identifies that the WiFi antenna (cable) should not be bent sharply or placed in a kinked position.
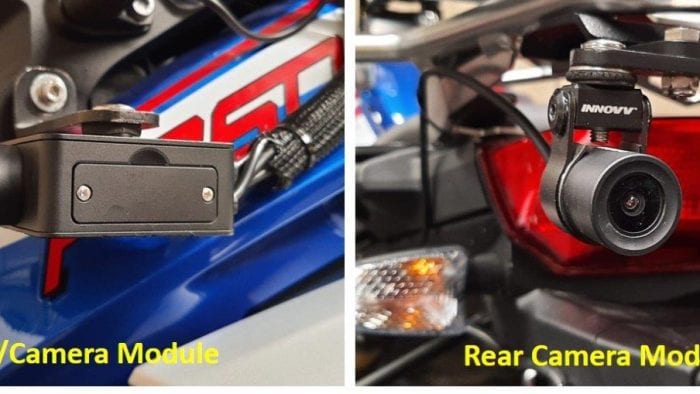
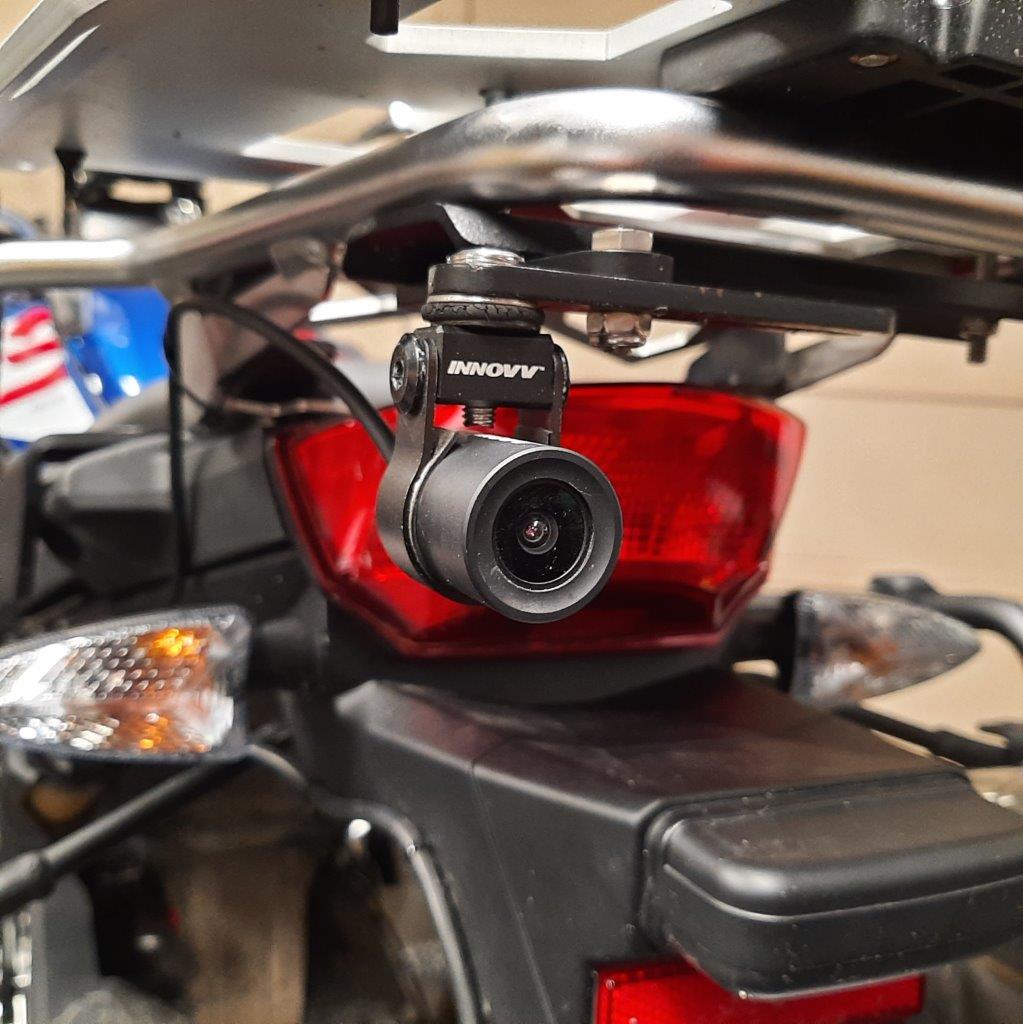
Rear Lens/Camera – a separate component, like the ones used with the current C5 and K2 systems and featuring a ruggedized waterproof housing with sealed lens and integrated connection cable with 6-pin (F) waterproof connector.
Maximum resolution of the rear camera is 1080P @ 30FPS, with a viewing angle of 120-degrees, a structure of 6-G +1IR and a F1.8 aperture. The 25mm diameter rear lens is mounted using a housing clamp, spacer block and the brackets and hardware supplied in the Rear Camera mounting kit (see Installation Section).
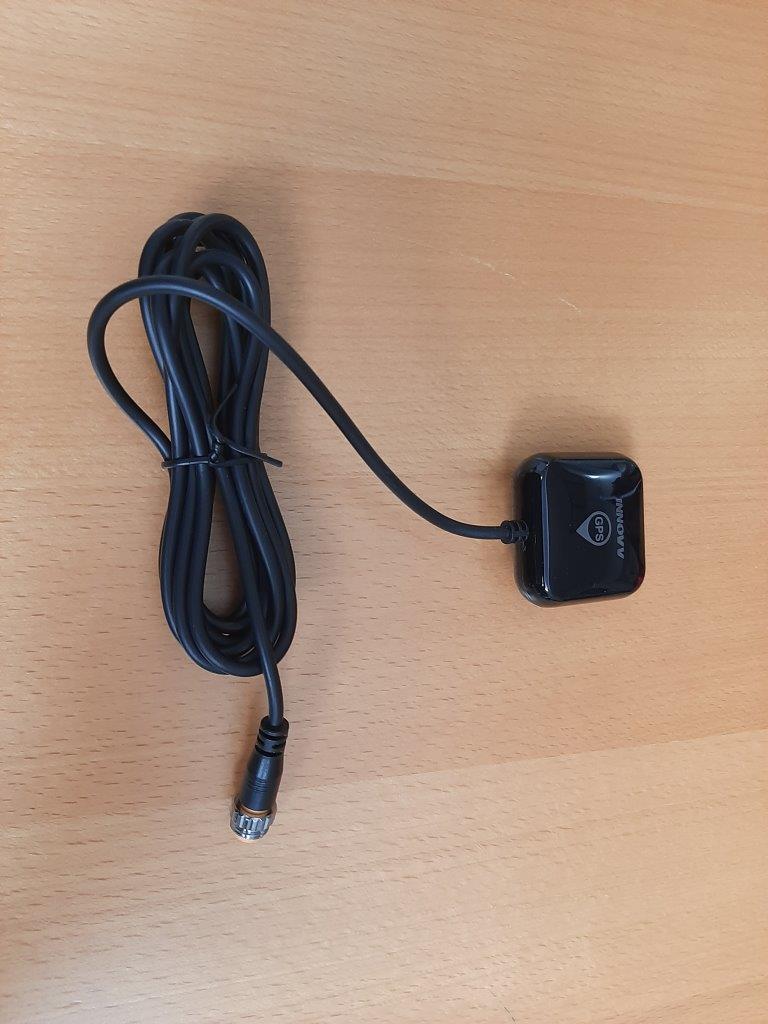
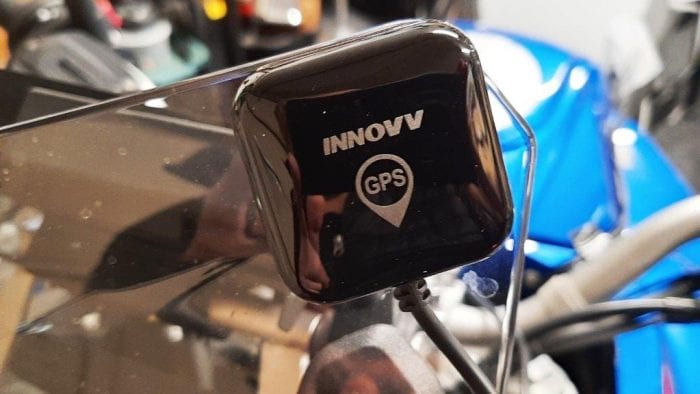
GPS Module – a sealed housing (42 x 42 x 14mm or 1.65 x 1.65 x 0.55in) with cable and 3-pin (M) waterproof connector. The pre-release unit provides 1Hz (once/sec sampling), but the new module to be used for the K5 Release kits will have 1 to 5Hz settings for higher resolution tracking if the user so desires. The GPS feature is compatible with all known GNSS systems. This kit was missing an adhesive mounting pad for the back.
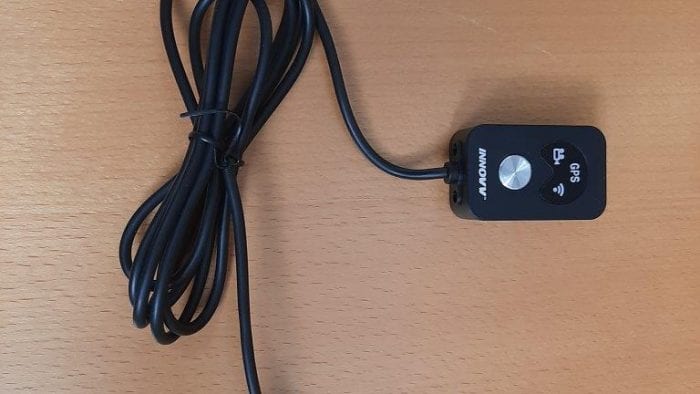
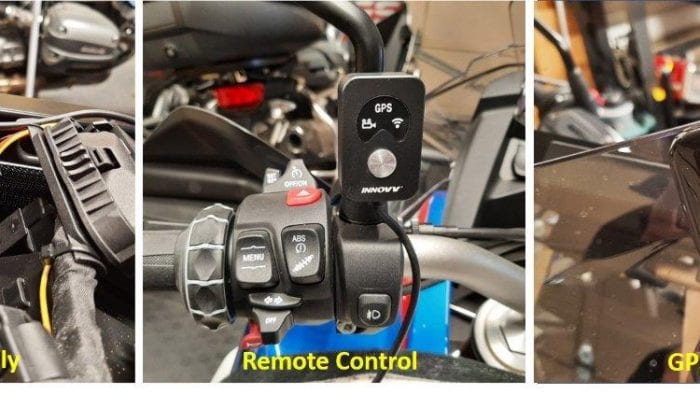
Remote Control (RC) Module – a small, sealed box housing with integrated cable and 6-pin (M) waterproof connector. The face of the RC has a stylized 3-LED display in the top half for the Recording, GPS, and WiFi functions with a Function Button sitting below the LEDs.
The module has a 6mm threaded insert on the back for mounting to either the supplied handlebar clamp mount, considering space and safe access or, one of the supplied L-brackets as a left mirror or right mirror mount – a potentially better placement solution with minimal real estate needed and ‘at-hand’ regarding access.
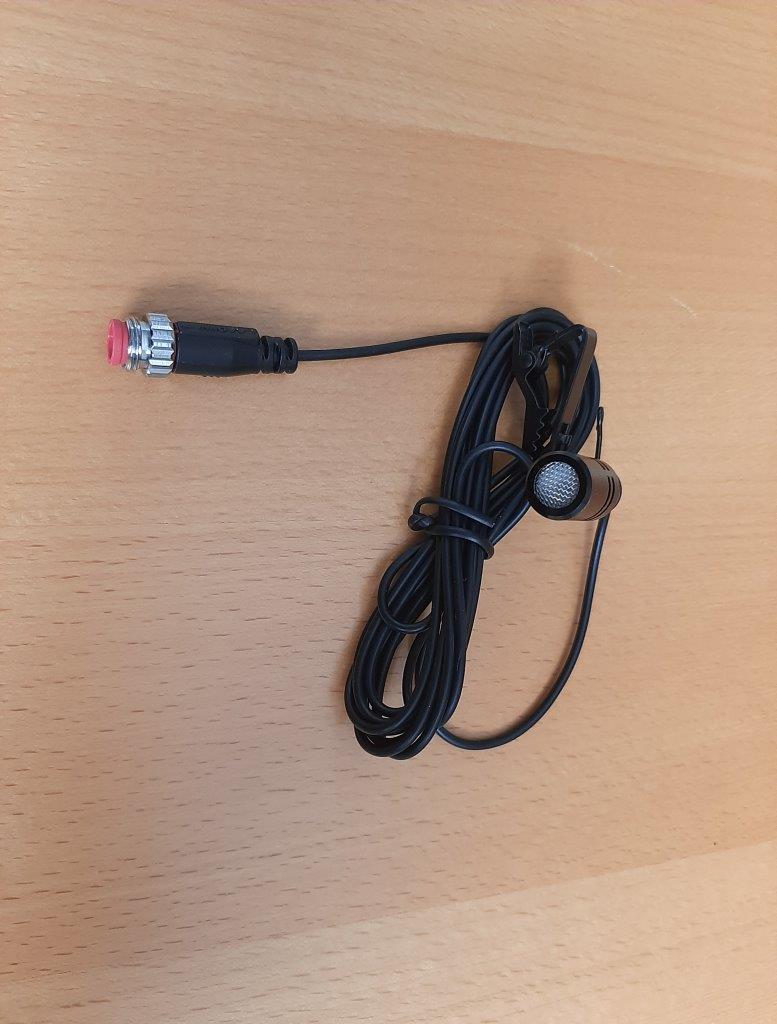
External Microphone – mini-microphone on a long lead with a small crocodile clip right-sized for tank bag, collar or helmet strap fastening or without the clip, secured to the inside of the helmet chin guard or… No windsock or cover is provided, but it should be; it works to protect the microphone from moisture ingress while minimizing external noise including wind…
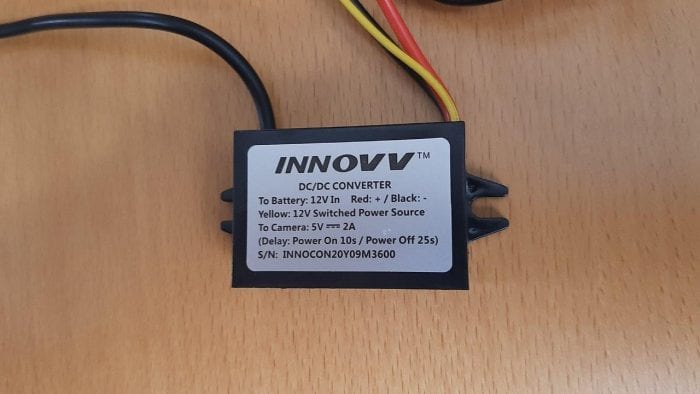
Power Supply Module – a small, sealed power 12V/5V DC management module like the one used for other INNOVV systems. The input harness consists of Red (2A in-line fused) and Black power connection lead set with ring terminals and a Yellow wire for the (SW) ignition source.
The output harness is a sturdy shielded cable terminated with a 3-pin (F) waterproof connector. Note – a small Blue LED provides an ‘always-on’ indication that the 5.3V supply is good and as this power module is switched, parasitic drain will not or should not be an issue and I suspect that INNOVV has a minimum voltage shutoff threshold as well – its just not identified.
This small module, once outside or inside placement is determined, is easily mounted with the adhesive pads in the kit or alternatively, 3M Dual Lock or hook-n-loop pads, both being plenty strong and less permanent.
INNOVV K5 Installation
As is the norm for INNOVV retail products, everything needed is included. INNOVV does modify or add new mounting pieces in their kits from time to time in response to feedback from users and this is an activity currently being worked through for the (pending) K5 release in an effort to develop generic and specific mounting solutions for all sorts of motorcycles.
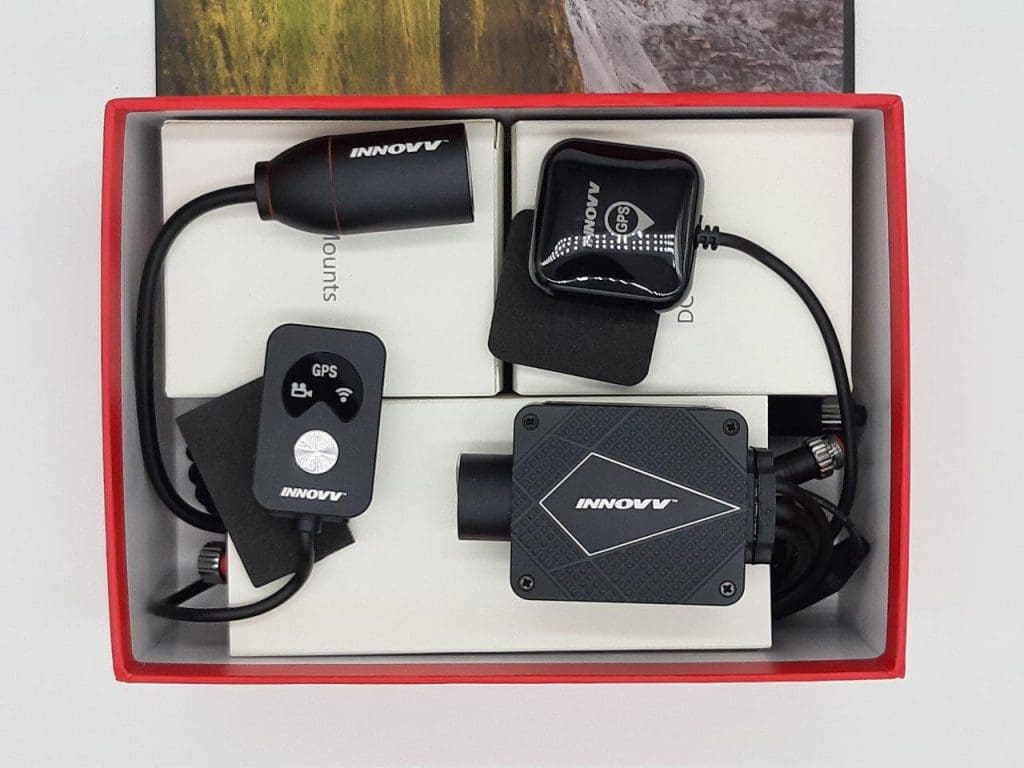
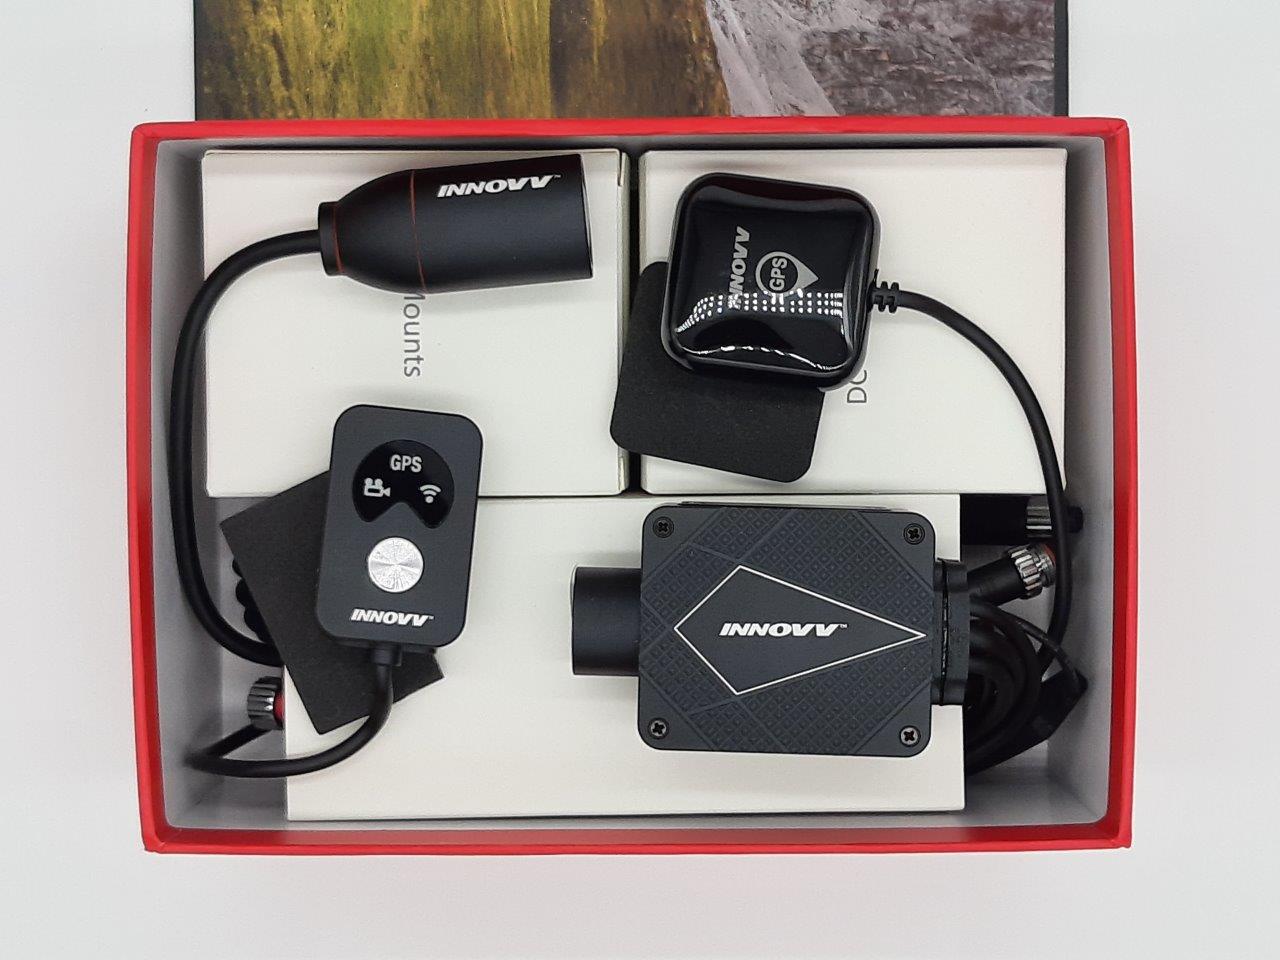
In the Box
- 1 x K5 DVR module with integrated front lens/camera, five integrated flying lead cables with keyed colour-coded multi-pin M/F waterproof connectors and WiFi antenna housing
- 1 x Rear lens/camera module with 6-pin female connector
- 1 x Remote Control module with 6-pin male connector
- 1 x GPS module with 3-pin male connector
- 1 x Power Cable harness with Red/Black round terminal connectors, 2A in-line fuse module and Yellow ignition (SW) lead with 3-pin male connector
- 1 x Microphone on small clip, with 3-pin male connector
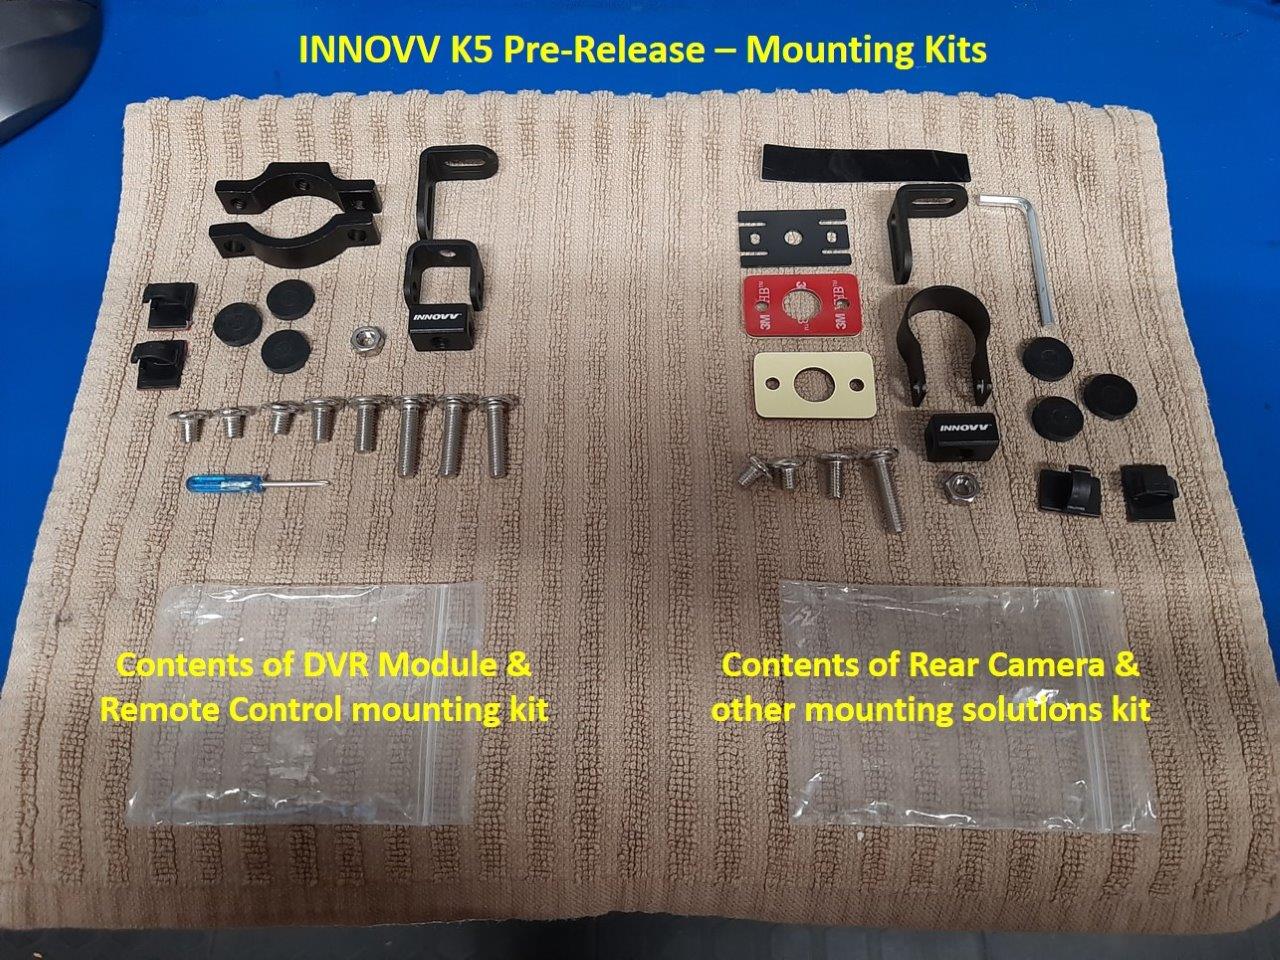
- DVR and Remote-Control Mounting Kits
- Rear Camera Mounting Kit and spare hardware
- 1 into 3 Micro-USB to A/V/Micro-USB interface cable
- Storage Card Reader
- Fold-out User Guide
Bench Testing – didn’t bring any surprises, but it did generate a number of positive observations regarding how well the system goes together and works together as a system; and the WiFi local network connectivity works first time, all the time. With this connection made, the INNOVV App is launched for the first look at everything via the user interface.
Installation Assessment & First Hosting
The arrival of this pre-release K5 kit came about a week before the F 900 XR was traded for a 2020 F 850 GS Adventure (Rallye version), so it only seemed right to put the newest INNOVV camera system on the newest member of the home fleet; that’s my story anyway…
This is the fourth F850GS-based model in the home fleet since their release and along with their outstanding ADV travel versatility, they make great accessory platforms, especially for test purposes where change is indeed a constant; they have lots of usable space under the seat and a few minutes spent in removing the primary plastic pieces provides full access for installations.
Another plus – knowing that the INNOVV K5 connection cables were likely to be long enough for virtually any layout. Component cable length, durability and connection quality is something that has seen constant improvement as INNOVV expands and evolves its product line.
However, in laying out the K5 system components on three different motorcycles – one sport, one touring and the ADV-oriented motorcycle, the loss of some placement flexibility given the integration of the front camera and DVR module components.
This integration also means that component cables now all run to a front-mounted location rather than a more centralized positioning as allowed by other products – like the INNOVV K2 and VIOFO MT1. As such, in acknowledging some loss of overall installation flexibility, it becomes even more critical that optimal or longest path connectivity be provided for.
A recommended change – in working out median cable runs from both the module and the individual components, increasing the module’s flying lead lengths by 10 to 15cm or alternatively, lengths of the individual component cables, would provide extensibility and flexibility (literally) to better route/secure/hide the connections cables.
Both temporary and permanent mounting observations are made in the following paragraphs based on the fact that once the riding season ends up here other accessory work on the table (literally) will be undertaken with multiple electronic systems awaiting installation; the newest ride is a true work in progress…
DVR Module/Front Camera – in getting early insight into the K5 form, some initial concerns over the (potential) size and weight of the DVR module with an integrated front lens were expressed, along with (potential) placement issues. But the resultant form factor is small, light, and easy to work with although it does require more real estate and a strong mounting point.
For the K5 retail product, INNOVV has added more brackets and additional hardware to allow even more fitment flexibility of the components; all these pieces are bundled in two well-packed plastic bags.
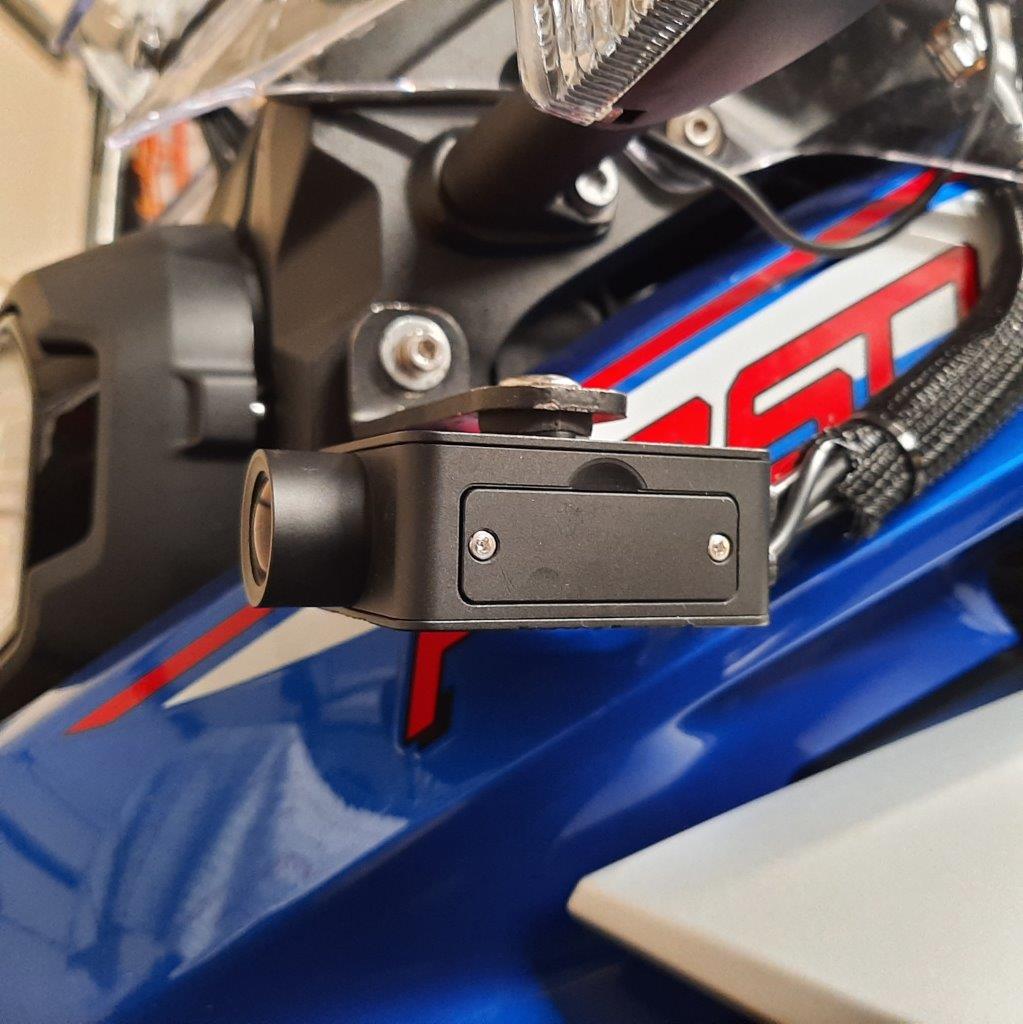
While a higher and perhaps more centred placement is better for many reasons, an often-used side mounting point just below the left signal light provides a suitable initial mounting spot, with a longer M5 x 25mm screw replacing the OE M5 x 16mm piece and a 5mm spacer used for clearance between the plastic and the small L-bracket from the kit.
But after viewing some first-run video and inspecting the mount closely the M5 hardware layout seemed strong enough but overall, the bracket flexes more than desired, something that isn’t likely to be satisfactory for use on a wide variety of travel surfaces…good suspension or not.
The K5’s integrated camera/DVR module is indeed larger and heavier than the standard camera module, so a heavier duty platform seemed to be in order as a test. The only one on hand, a 2.5in steel L-bracket is heavier than needed but it seemed to be a good piece to try for assessing scale, strength, mounting and stability and, it is.
Using this L-bracket with the module turned over and mounted in drop-down fashion works well; a benefit of this orientation is that direct access to the cover plate is provided for accessing the storage media or micro-USB port.
As always, a rubber cushion washer from the kit sits between the mounting block of the module and the bracket with an M6 screw securing the two pieces together. This layout works well with far less flexing evident.
The resulting video reveals better stability and less vibration or bouncing even on gravel/dirt surfaces, but more testing is needed regarding suitability for prolonged off-road use, especially as there no (apparent) stabilization feature (yet) installed.
A bracket with the lightweight strength of the INNOVV pieces but with slightly larger overall dimensions seems to be the ideal solution and in submitting this (and other) observations to the team lead, it was only a couple of days later when initial drawings for a new stronger but lighter bracket were provided for comment. Hopefully, it will be in the release kit.
Rear Camera – the included bag of mounting pieces provides lots of options for securely mounting the lightweight rear camera using two main approaches, both well described and visualized under the Installation Guide section of the K5 foldable handout; these solutions work very well for C5 and K2 components and now, for the K5 installation.
GPS Module – the original GPS module found with earlier INNOVV systems tended to be a bit weak receiver-wise and a clear line of sight positioning worked best – as when mounted to the windscreen or another high point on the motorcycle.
But the newer K2 systems have a more sensitive receiver and placement is as much of an issue and, the K5 GPS component performs extremely well – even in the garage it syncs up to the minimum number of satellites quickly and the small icon on the live view screen goes Green. As such, placement under plastic or the seat is likely to be fine.
But I still prefer an open view – so the K5 GPS module resides on the upper left front edge of the windscreen, secured with 3M Dual Lock rather than the two-sided adhesive. Enough slack is left in the cable routing to accommodate the Lo and Hi settings of the adjustable windscreen.
Remote Control (RC) – the small lightweight L-bracket in the DVR/RC mounting kit bag just needed a slight modification to provide the ideal fitment – the end of the elongated cutout on the short arm of the bracket is enlarged with a step-drill bit until the 10mm threaded insert of the BMW mirror mount adapter is accommodated.
The 16mm wide bracket now has less edge width, but the RC module is an absolute lightweight so there are no load or strength concerns with this modification and as oriented it is well protected by the mirror stalk.
A modification like this shouldn’t be needed for the release version as INNOVV design drawings forwarded for information show some of the L-brackets with V-shaped cutouts so that hardware from 6 to 10mm can be accommodated – slick.
Power Supply – this small module with its input & output harnesses is mounted using 3M Dual Lock to the left wall of the under-deck area, a location providing for expedient routing of the input leads to the battery housing area and the output cable that runs along the left upper frame and up along the left side of the fuel cell centre panel to the collective gathering point.
The Collective – as this is the ‘temporary’ mounting, the connection bundle comprising the five flying leads from the DVR module and the incoming rear camera, GPS, RC and power supply cables all come in from their (temporary) external runs, congregating between the upper front side panel plastic and the outer shape of the left side windscreen spoiler.
This grouping isn’t tidy, but it is functional and accessible. A large section of 2-inch heat shrink and a couple of zip ties keep this bundle together and secured, with the WiFi antenna housing on its short thin cable sitting by itself, nestled between the bundle and side plastic.
Looking ahead – once the plastic is removed all the component leads will be properly routed under the plastic along frame or sub-frame runs to keep everything out of the way and hidden.
The DVR/Camera module is likely to remain where it is for now although a higher and more central location between the LED headlight housing and windscreen assembly appears to be a good option but requiring a custom mount of some sort – another activity that INNOVV also has underway.
INNOVV K5 Feature Settings & Functionality
The K5 system is or can be pretty much ‘hands-off’ once the required media storage is installed and formatted, but leveraging all its features and performance requires that the user interface or UI provided by the INNOVV App be downloaded and installed; its’ worth it.
K5 User Interface – the INNOVV App
The new INNOVV App is for all INNOVV products including the current C5 and K2 models, the pending K5 and models soon to be released. The App is available for iOS and Android. iOS users with other devices (like the iPAD Mini 4 here) may need to select the ‘iPhone’ compatible category to get the INNOVV App listed.
With the App installed, power the K5 system up and once the Blue WiFi LED is flashing on the remote control, turn the smart device’s WiFi OFF, then back ON (or initiate a new search) so the K5 WiFi is detected.
Unless any local or home network connection automatically reconnects (this can be changed), a 2.4G or 5G_INNOVV_K5_xxxx ID listing appears on the device – select this and enter the default password ‘12345678’; the connection is (or should be) made.
If some devices experience difficulties in discovering the K5 LAN ID, try putting the device into Airplane or Travel mode to restrict external or internet connectivity and then turn on (just) the WiFi – the K5 LAN ID should appear and be connectable. This approach also works well with the VIOFO MT1 system.
Note – some Android devices may present a message like, “This WLAN network has no internet access. Connect anyway?” Just select ‘connect’ and all should be good… And don’t forget that both the network ID name and PW can be changed by the user under the App.
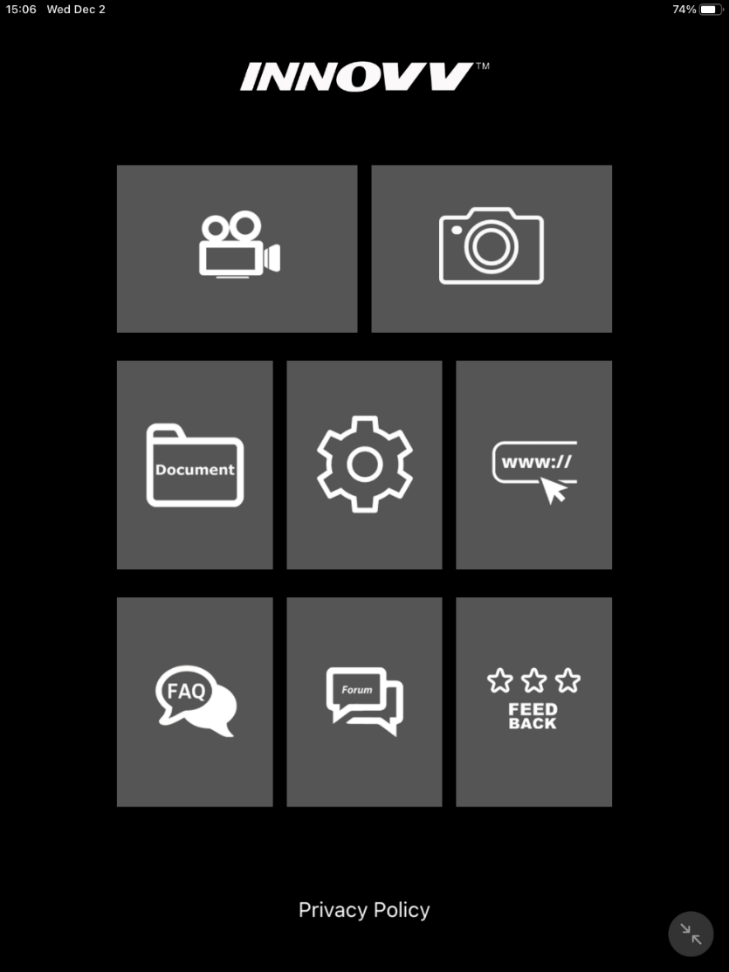
Once the WiFi connection is made, launch the INNOVV App. Current INNOVV users will see a familiar splash screen followed by the main interface or category screen using another familiar layout. But from this point on, depending on the camera system in use, the interface and features screens will vary for the system detected; one stop shopping as they say.
If interaction with the system is the norm, users should familiarize themselves with all the features and their respective settings available with the user interface App. And it is also good to remember that some settings are dynamic (the system updates immediately) whereas other setting changes do not take effect until the K5 is restarted.
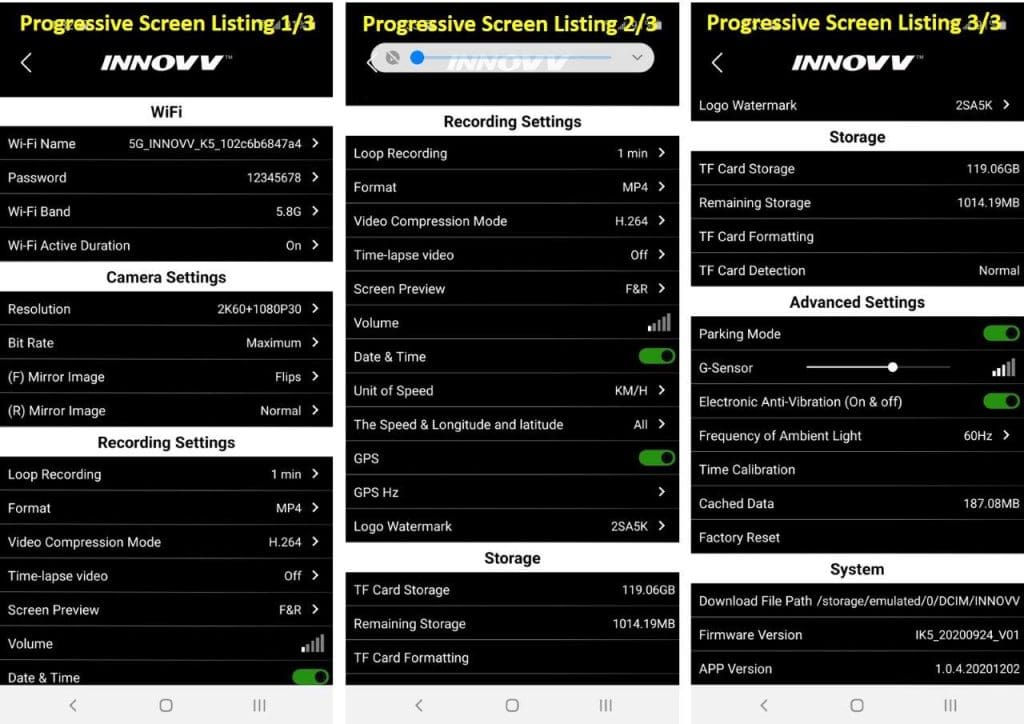
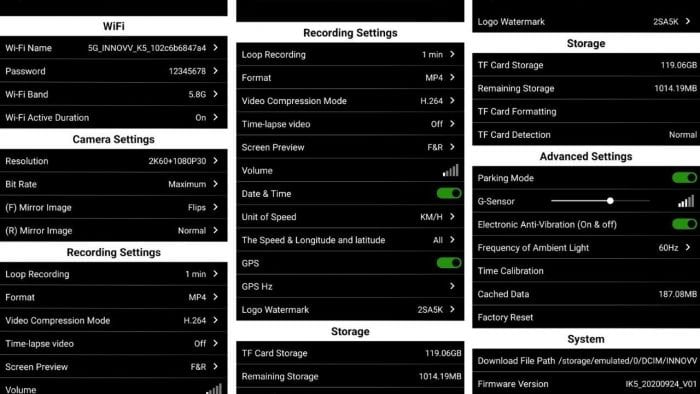
Primary feature settings and options are identified in the following section and grouped as laid out under the INNOVV App. Some features are ON or OFF; if the setting is turned ON, the small Black indicator moves to the right and the background goes Green to indicate an active setting.
For features with additional settings or options, the current setting and a greater than (angle bracket >) is displayed on the right side of the screen – tapping this brings up the options listing.
Additional comments regarding settings and other amplifying information is also provided in the respective sections below.
K5 Settings & Options
WiFi – the dual-band capability of the K5 is a big positive compared to current systems and some other competitive products. Either the 2.4GHz or 5.8GHz setting is available but using the 5.8GHz WiFi setting is better as it provides a (very) fast and stable connection for preview, real-time monitoring and of course, media downloading.
Note – with the latest firmware build the default WiFi setting is 5.8GHz. Some older smart devices (typically pre-2017) may not find this specific K5 WiFi ID, so the 2.4GHz setting may have to be used.
The user can leave the WiFi connection ‘ON’ or set it to 5 or 10 minutes – useful if this local connection isn’t needed or access to an external network is needed. The WiFi name, password and band settings require a restart of the K5 system whereas the WiFi active duration setting is dynamic.
Camera Settings – the first listing under this grouping is ‘Resolution’. The user has eight front & back camera combinations available, as listed earlier in the Camera Resolution Settings section and listed here again for reference. The default is the 4K@30 and 1080P@30 combination. A change made here is dynamic and made immediately on the system
| Front Camera | Rear Camera |
| 4K @ 30FPS | 1080P @ 30FPS or 720P @ 30FPS |
| 2K @ 60FPS | 1080P @ 30FPS or 720P @ 30FPS |
| 1080P @ 96FPS | 1080P @ 30FPS or 720P @ 60FPS |
| 720P @ 96FPS | 1080P @ 30FPS or 720P @ 60FPS |
Bit Rate – the (video) sampling Bit Rate (bits transmitted per second) is also selectable: Low, Normal, Height (High) and Maximum – the setting currently used. This setting has more of a resource bill, but (can) provide better overall video capture.
Bit Rate adjustability is a good thing when looking to reduce resource requirements or find a desired median for video/audio quality – this feature is still being played with…
Front/Back Mirroring – both front and back mirror images are selectable as Normal, Mirror or Flips (180-degrees. Given the current orientation of the module, the (F) Mirror Image setting is checked for ‘Flips’ and the Rear Mirror Image for ‘Normal’.
It would be great to have a 90-degree interval setting, but this would involve redesign and resizing of the module to accommodate everything, but one could hope.
Recording Settings (including User Selectable Data):
- Loop Recordings – options are OFF, 1, 3, 5 or 10 minutes
- Video Format settings are – MP4 or TS (requires a restart when changed)
- Video Compression Mode settings – either H.264 (Advanced Video Coding) or H.265 or High Efficiency Video Coding (HEVC) are selectable; both have advantages and disadvantages
- Time-Lapse Video settings – if continuous recordings are desired, then this setting is set to OFF, otherwise frame intervals of 100/200/300/500ms or 1s are provided for
- Screen Preview layout – selectable with either F, R, F&R or R&F layouts, with the secondary view residing in the upper left corner
- Microphone volume settings – OFF or 20/40/60/80/100% are provided, this is a dynamic change feature although it does not ‘save’ any change and reverts to default (20) on the next startup (firmware fix needed here)
- Date & Time – ON or OFF
- Units of Speed – KM/H or MPH
- The Speed & Longitude and Latitude settings – Off, All, Speed or Coordinate
- GPS Hz (cycles per second) update rate – current setting options are 1Hz to 4Hz or 1, 2, 3 or 4 samples or updates per second, but the K5 Release Kits will provide 1Hz to 5Hz settings for faster sampling and finer-grain tracking resolution
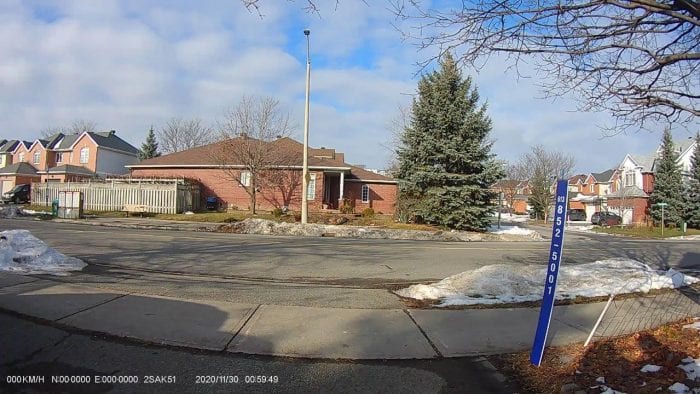
- Logo Watermark – is left blank unless a default ID or unique watermark entered, e.g.’2SA5K’
Storage – displays the formatted capacity of the installed media and remaining storage space on the media card. The user can also format the installed media from this grouping and check to see if the media is properly detected, needs formatting or if any error exists.
Advanced Settings:
- Parking Mode = ON or OFF
- G-Sensor Slider (sensitivity) setting – scale of 0 to 10 (0 = less, 10 = highest)
- Frequency of Ambient Light – either 50Hz or 60Hz, a setting that can help reduce the flickering or strobe effects of lighting from road users or road-side lighting
- Time Calibration = ‘Cancel’ to leave the default system (GPS) synchronization or ‘Confirm’ to have the K5 system use smart device time
- Cached Data – shows the size and clears the cached data on the smart device, if applicable
- Factory Reset = returns all settings to factory defaults.
System – under this grouping is found the default File Path setting for files downloaded to the host device, along with the current Firmware and App versions.
K5 Firmware Updating
INNOVV continues to tweak or add enhancements to the INNOVV K5 system in preparation for its formal release and as such, a firmware update was anticipated and with the provided link action, now installed (FW IK5_20201204_V05.5hz). The steps below detail the process.
- The download file is typically a zipped .RAR file and extraction is needed using a compatible extract app (WinZip or multiple other PC extraction apps)
- Copy the resultant .bin file to the root directory of a FAT32 formatted storage card (make sure the files copied over have the original download name and no other extensions appended, like (1) or (2) if downloaded or copied multiple times
- Pass 1 – load this SD media card into the K5 DVR, power the system and let it run for two minutes or so, then turn the system off
- Pass 2 – power the system up again and on this second pass you should see the GPS and WiFi LEDs on the remote control pulse for a few seconds, the GPS blinks a short sequence, the system appears to reboot, then all three LEDs come back to life; the new FW is now resident – indicated by the fact that the WiFi Password, if changed, is now back to its default.
Note – the default WiFi PW (12345678) needs to be used to establish the WiFi connection and the user will/may find that all settings are now (back) to the factory defaults; any changes made by the user need to be set again. But on the positive side, it does give one the chance to go through all the feature settings and see what is new…
K5 Video Performance
With almost three months of use, the INNOVV K5 in pre-release form has been ultra-reliable, recording front and back video, or photos, at all selected settings. And being able to select between eight discrete front/back combinations is an excellent capability.
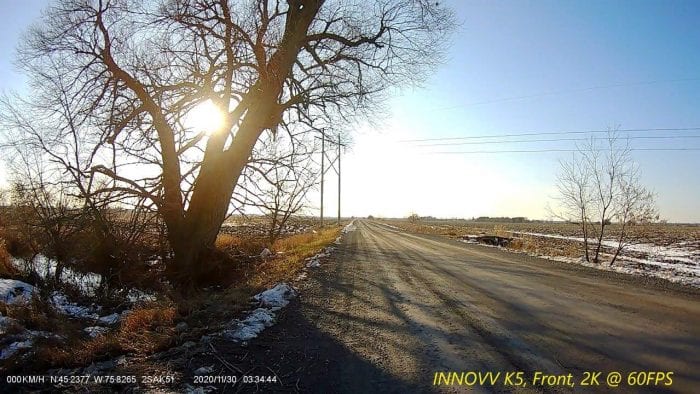
Video Quality – None of the resolution setting combinations on the INNOVV K5 are ‘bad’, quite the opposite. And while others may scoff at having a 4K capable front camera, you won’t hear me complaining; being able to change camera resolution settings dynamically is a great feature to have in being able to tailor the video capture environment for any activity.
The 120-degree lenses introduce some distortion, but much less (often) viewed when using even wider-angle systems. But overall, distortion is minimal, especially over the longer deeper views. Close-up focus is excellent front and back, no matter the lighting conditions.
In not knowing if the INNOVV K5 has or will have WDR (Wide Dynamic Range) or EV (Exposure Value) features with user-selectable settings, as found and used to good effect with another dual channel camera system recently reviewed, it seems the INNOVV K5, even with its front camera versatility is or could be at some disadvantage here.
The adaptation or compensation differences between the WDR and EV features of the other system when viewing video recorded on both systems travelling over the same terrain in almost exactly the same weather condition is most telling; the other camera shows virtually no transitions whereas the K5 copes, but the video is darker.
Front lens wise, using the 4K @ 30FPS and 2K @ 60FPS resolutions are the go-to settings, although the 2K @ 60FPS generates the best median video – excellent video with very good overall lighting and minimal artifacts observed over any terrain or any speed.
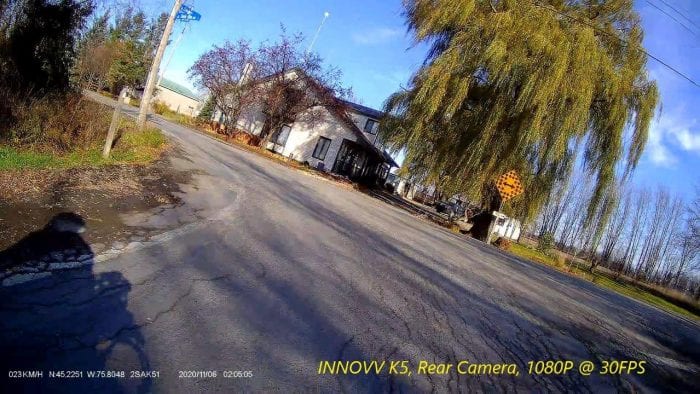
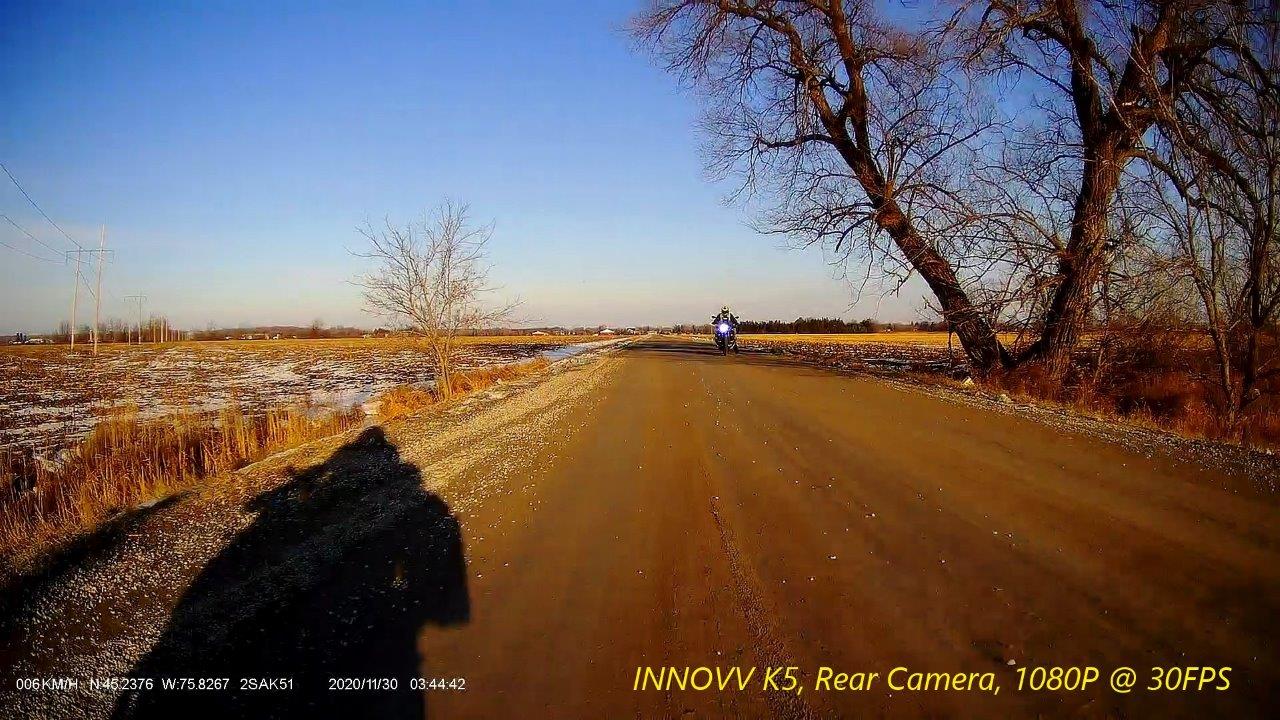
From a rear lens perspective, video from either the 1080P @ 30FPS or 720P @ 60FPS resolution settings is also excellent – far better than the K2 units and, better than the fixed 1080P @ 30FPS of two other systems here.
Only a couple low light or night-time runs were made with the K5 (my fault) but this system, like the current K2s used, performs extremely well with minimal loss of clarity from the front or back cameras in discerning distanced objects and focus is very good in traffic under virtually any lighting condition.
Storage Media – a 128GB SD card currently resides in this pre-release K5, with 256GB and 512GB cards on the Santa request list. Functionally, a 256GB media card can provide five (5) hours of recording in the 4K + 1080p (front/back) mode with a 512GB media card providing up to ten hours. Using other camera and recording settings can impact file size.
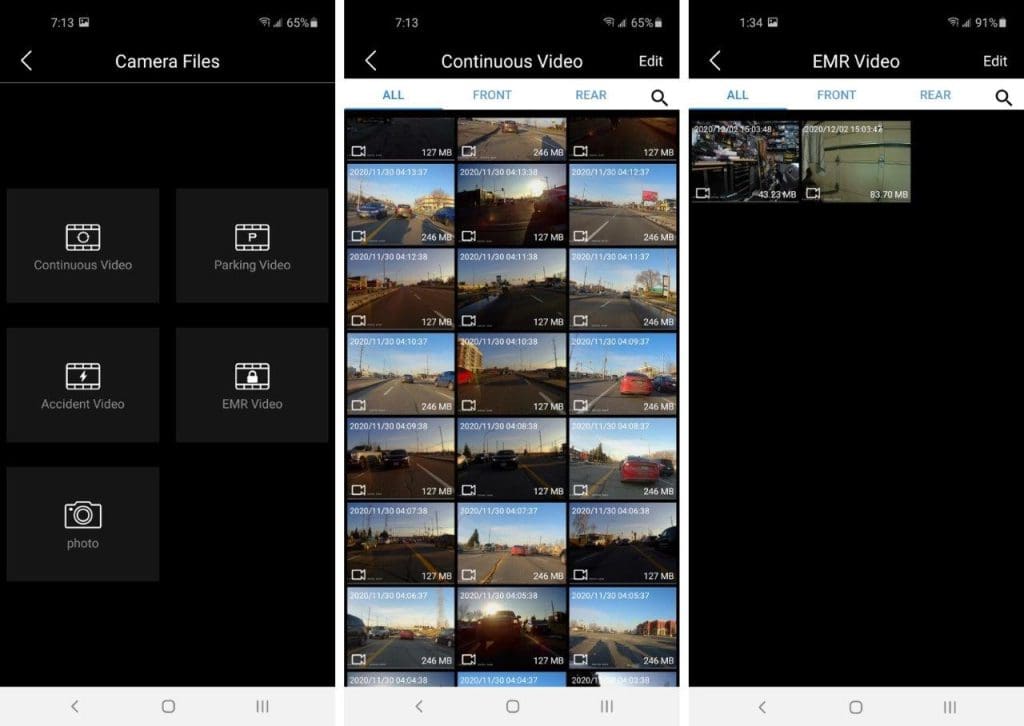
Photos – can be done from the Live View Screen with a single quick press of the Function Button or from the main menu screen in activating the Camera icon. Photos are 12MP and stored under the Photo Folder accessed from the Camera files screen.
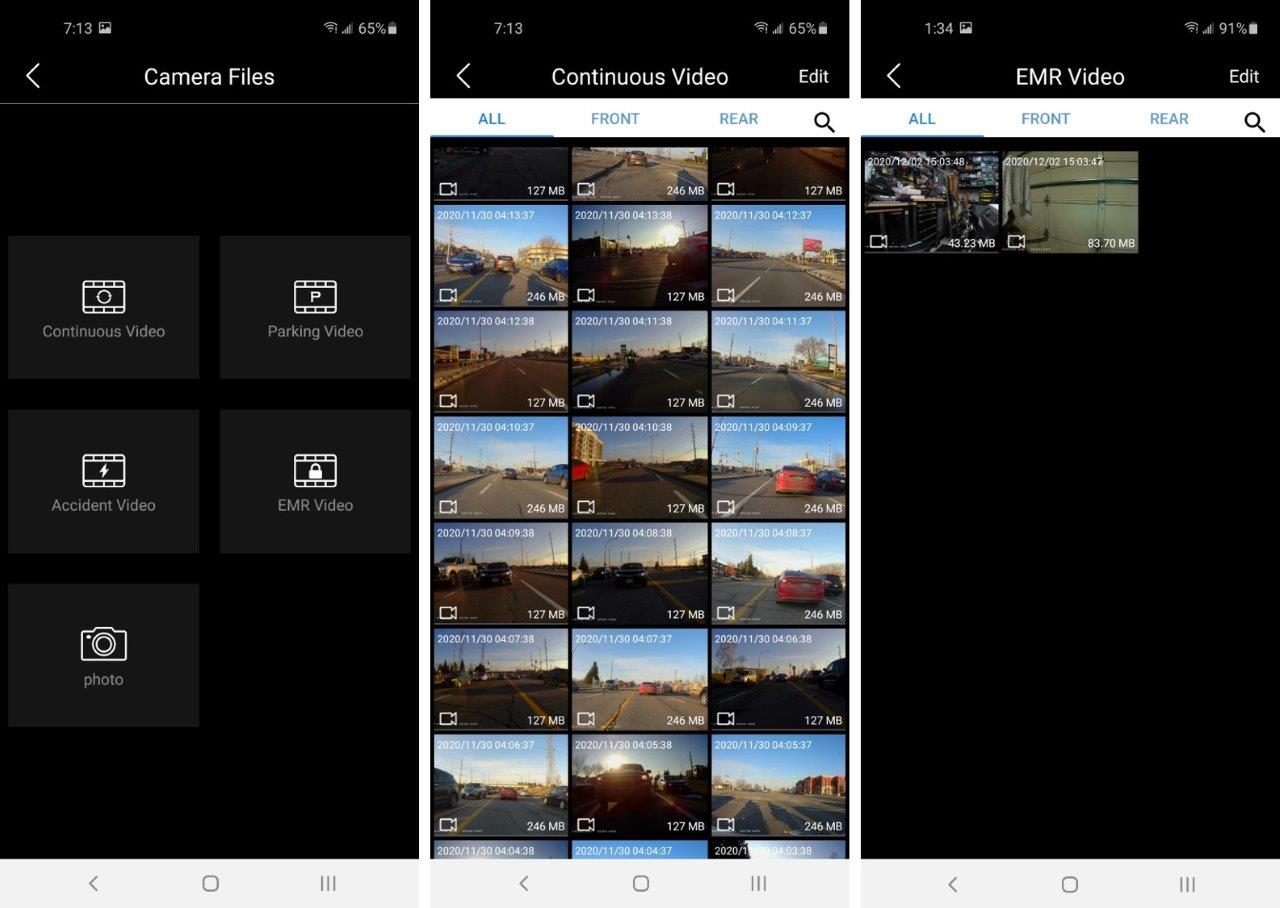
Media Viewing & Downloading – recorded media on the K5 storage card is viewable by selecting the Camera Files screen and selecting the desired folder (Continuous Video, Parking Video, Accident Video, EMR Video or Photo) to access a specific file.
To download a file or files to the smart device, the system will need to powered up and the WiI connection made. Go to the desired storage folder under the App menu, select a file or files – a pop-up screen with Play, Download, Delete or Cancel options appears. In usually sticking with 1, or 3 min loops and only using longer loops for road use, downloads just take seconds.
The largest file downloaded so far has been a ten-minute 4K @30FPS loop and it took about 100 seconds to download using the 5GHZ connection. That might seem slow when given the local area network connection, but one needs to appreciate there are other factors at play like system, transfer rate or interface (USB port) limitations.
To access the storage card, or micro-USB port, access the cover plate and remove it using the (supplied) small Phillips screwdriver (the screws will not fall out). Push the storage media in slightly to activate the spring-loaded release and remove the card.
Files downloaded to the smart device are typically stored on the device under the default /storage/emulated/phone/DCIM/INNOVV ‘DCIM/INNOVV folder (rather than to the device’s external (removable) storage media if present).
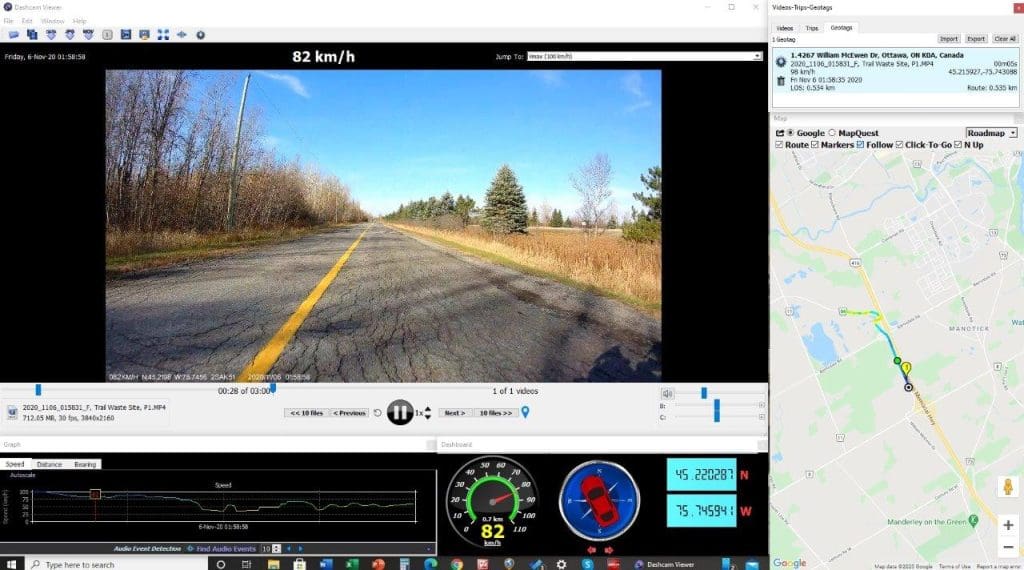
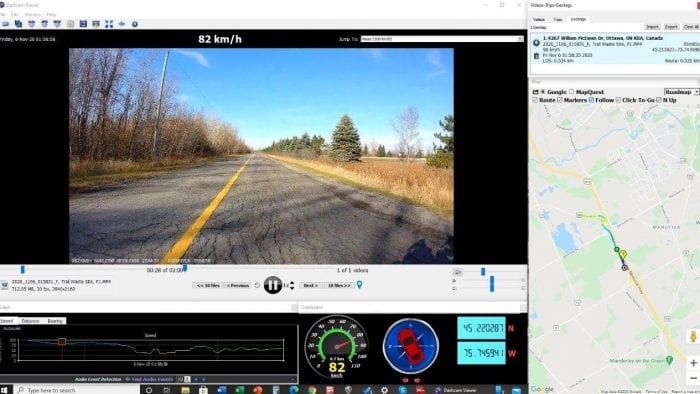
Media Playback – there is no shortage of playback applications available. But the list is a bit shorter regarding applications with the ability to playback multi-channel video/audio recordings along with encoded data like speed, heading, position, etc. and, have everything presented in one dynamic screen display.
A long-term favourite is Dashcam Viewer by Earthshine Software. Available in three flavours – Free, Standard or Pro. The Free version provides a basic feature-set that is then built upon for the Standard and Pro versions.
The screen snippet below shows a standard Dashcam Viewer screen with mapping and other discrete displays for the decoded data.
INNOVV K5 System Observations
Documentation – is in the usual INNOVV form and standard – succinct but good, but the somewhat complex component and connectivity diagram and the motorcycle installation layout view need to be larger and more colour detailed. Once the product is formally released all this information and more will be available on the website…but the handout needs some changes.
Cable lengths – in using three different styles of motorcycles for layout, working out median cable runs between (probable) positioning of the module that is both the front camera and the ‘go-to’ point for all component connections reveals that the current lengths can be just adequate or somewhat short, forcing installation compromises (see Change Summary below).
As such, increasing the module interface leads by 15 to 20 cm or the individual component leads by the same amount would provide far more installation and routing flexibility.
Media Downloading – this observation is certainly not unique to INNOVV systems, but with the K5 coming to market and being touted as an advanced system, it seems like a good time to identify what I feel is a valuable but missing feature.
Most camera systems now utilize a high-speed WiFi connection between the camera and the smart device for downloading and/or streaming; all good.
But if just wanting to use this effective and speedy means (especially the 5.8GHz connection of the INNOVV K5) to download large media files, the motorcycle ignition needs to be on to power the module, possibly for an extended period of time (with or without a charger being necessitated); even though the target device does not, being a truly portable device.
And its seldom that these camera systems don’t have externally accessed media storage and some form of USB interface – an interface that is capable of providing not just the data interface but the standard voltage required to power the module, so the system’s WiFi feature is usable without having the ignition on or the motorcycle running.
Another solution is to make these USB-enabled options available as a separate or multi-purpose cable (as used for the external microphone) allowing a direct connection to a USB power source to power the module and, make a direct data connection, without having to directly access the system.
Recording (Protected) Mode – in not (yet) having done a detailed time analysis between recorded media saved to the separate folders, an outstanding question regarding Protected Mode concerns whether only the current loop video is saved off or if both the last and current loops are saved off or if some overlap or bridging time is added.
An overlapping or bridging approach maintains the ‘before-during-after’ video capture timeline for what could be a critical event or series of events. A query regarding this has been submitted and acknowledged by INNOVV, so the matter will be looked at.
Pre-Release to Release Version – Change Summary
As identified earlier, the INNOVV K5 ‘Action Cam’ provided for this review was a pre-release but fully functional version and with the INNOVV K5 Team busy with modifications, updates and tweaks to hardware, firmware and the INNOVV App, a summary of the (known) completed or pending changes for the release version is provided below:
- DVR Module – top cover no longer separate piece, but integral part of the housing for increased strength, less seams, seals, and hardware for better elemental protection
- Module Access Port – M3 thumbscrews now used for easier removal of cover plate
- GPS Feature – supports 1 to 5Hz (or 1.0 to 0.2s tracking resolution)
- Default WiFi setting is now 5.8GHz (2.4GHz is still available)
- Electrical interference issue mitigated for better audio recording
- Microphone & WiFi Antenna cables made stronger and reinforced
- Cable lengths increased: Rear Camera now 3m, Mic & GPS now 2m, Power Supply now 2M and there is an additional 3m extension (available) for the rear camera if needed
- INNOVV App – update pending, but presumably before formal release of the K5
Conclusion
The INNOVV K5 ‘Dash Cam’ (a poor moniker), whether in pre-release form or as will be available soon in release form is indeed more of an “Action Cam” than anything else, despite the fact that it does have some mobility limitations; although that depends on the platform it is mounted on and of course, the user.
From feature, function, and performance perspectives the INNOVV K5 “Action Cam” has lots of positives and very few negatives. Yes, integration of the front 4K camera into the DVR module, which is also the main interface for system components will necessitate a slightly different approach to how the system is laid out; but, INNOVV has now addressed virtually all the early concerns raised and made changes to mitigate the installation observations.
Two of its best features are the 4K capable front camera and eight front/back combinations. Accessing the system via the INNOVV App and making resolution changes, literally on the fly, provides dynamic tailoring of the video environment; a front camera setting of 2K @ 60FPS is by far my absolute favourite.
With the formal announcement from INNOVV regarding ‘release’ of the new INNOVV K5 (for pre-ordering), the focus shifts from the pre-release to the release variant. As always, working through a review of an early or pre-release product remains an interesting but always rewarding experience and, I thank the INNOVV K5 team for their ongoing support; we all gain.
The Bottom Line – the INNOVV K5 (Dash Cam) or new “Action Cam” as it should really be labelled, is a great new product and very much ups the ante regarding a dual-channel high-resolution powersports oriented ‘action cam’ product. With a 4K capable front and 1080P rear camera, eight resolution combinations and a long list of valuable features that all work as advertised (with more to come), the ruggedized waterproof K5 system has proven itself to this user and is worthy of a close look by anyone considering a dual channel system for their motorcycle. A highly recommended product.
Pros
- Small light-weight component well-made & ruggedized
- System is IP67 rated to withstand the elements
- Eight front/rear video capture combination settings available
- Front 4K UltraHD camera provides superb stable video
- 120-degree view lens front & back with minimal distortion
- G-Sensor provides movement and impact sensing
- Continuous or time-based capture modes
- Protected storage folders for movement, impact or manually tagged video
- Separate WiFi antenna module for signal strength and performance optimization
- Dual band WiFi is very stable with fast media downloading
- Feature-rich INNOVV App is usable with all INNOVV systems
- Water-proof connectors & keyed colour-coded connectors simplify installation
- Comprehensive mounting kits for components
Cons
- WiFi antenna module is great feature but longer stronger cable needed (now addressed for release version)
- DVR module cables or component cables need lengthening for installation over wide range of motorcycles (now addressed for release version)
- Better documentation needed regarding specific feature capabilities and attributes
- Pricing might seem high, but investment is offset by 4K abilities and system features
wBW Specs:
- Manufacturer: INNOVV
- Pricing: $458.00 USD (Pre-orders)
- Made In: China
- Warranty: One-year warranty
- Review Period/Date: mid-Oct to early-Dec 2020
- Submission Date: 11 December 2020













Are you able to upload a clip with the raw audio? I mean unedited audio.
What is the bit rate is the audio or mic recording?
Thanks.
Louis, we will hopefully get some K5 4K, 2K and 1080p video clips uploaded in the near future. Re audio, the bitrate is 63kbps, single channel recording, 16kHz sampling.
I see from the file names the clips run in 3 minute lengths. If the K5 front camera is at 4K @ 30FPS and the rear camera set at 1080P @ 30FPS, what would you estimate the respective file sizes to be for 3 minute clips with no audio? How is the audio stored and sync’d?
Martin, with the 3min clip setting, the K5 front camera at 4K and 30fps generates a nominal file size of 712,049KB (MP4, H.265) and the K5 rear camera at 1080p and 30fps generates a nominal file size of 368,150KB, for a total of 1,080,199KB or just over one GB. I didn’t do a detailed file table for the K5, but will make sure one gets done, and do them going forward as it is indeed good information particularly regarding systems that have capture versatility. Cheers, Bruce
Great a review of a camera with no video why bother.
3 months and nothing to show.
I want one but no video, really
Chros, if you do a search, there are some INNOVV K5 4K/2K and rear lens 1080p video clips on YT. But while I have lots of 4K/2K video, getting it processed and then posted via wBW resources is taking some time – me bad, but it will be done. Trust me, the K5 works as advertised and produces great media…although audio is still a bit weak, but updates to the app are addressing that… Bruce
Three short INNOVV K5 Videos, VIMEO hosted, now posted after the Conclusion section to show basic performance. More raw footage to be edited and added going forward. Cheers, Bruce
Confirmed from INNOVV now that you do not have to format the card with FAT32. exFAT is ok.
Are you sure you want to use this product?
I’m a US citizen and SAR. I’m also married to an immigrant wife and multilingual–I’m not a Xenophobe. This product is explicit that your video is stored in China–**Within China.** China Laws are Very Different from the US or Europe–everything is under control and accessible by the Chinese government per the privacy policy. This is a perfect way for China to observe and train their people to understand the US. No Party Affiliation–this is a danger to the US.
Good catch. Sounds worse that Facebook or Google. It would take a lot of snooping to setup all the blocks you’d need on your network for protection, and once done you might not have a functional product if handshakes are needed from the mothership. Damn it was looking good for a hot minute
I am very suprised that the K5 4K front camera Houses now all the hardware/plugins… it’s to big / bulkiness to mount it slim on the front of the bike. For what reason? Just to plugin the microphone? The rest worked fine by the K2, 1 central unit placed under the buddyseat.
By all means, due to the length of the FRONT camera (2.5M) i had my Lens attached to my helmet already.
Again, i can’t get the reason behind it why the central unit has been moved to the Front camera…
Known that the K2 had a SLIM design, as the K3 has i hope it evolve with 4K/2K lenses.
Hello, I can install INNOVV K5 Camera in Scooter: Honda Forza 2015 ????
Thank You
I’m not concerned that this product is made in China. I don’t even care if my videos are stored on some server in China (assuming this is true). What does concern me are the reports that *if* I’m unlucky enough to need a warranty claim or other work, the unit needs to be serviced in China. I don’t want to deal with the hassle or delay of shipping a ~$500 product to China. It’s a shame there isn’t support in NA.