BMW C 650 GT Battery and SAE Battery Tender Harness
The new BMW C 650 GT scooter is covered in hectares of good-looking plastic.
So where’d they bury the battery? And how about the engine?
The latter will be explored in an upcoming article, but for now, it’s easy enough to find the former.
Here’s how…
One thing is sure different about the BMW C 650 GT scooter — or any scooter, for that matter: engine accessibility.
Let’s hope this thing is built to last, because I can see a $300.00 bill for labor before the mechanic — excuse me, “technician” — is able to tear off the plastic to get into the guts.
Actually, we’ll be doing some surgery along those lines ourselves. But in the meantime, at least the battery is easy enough to access…more or less.
Why mess with the battery first?
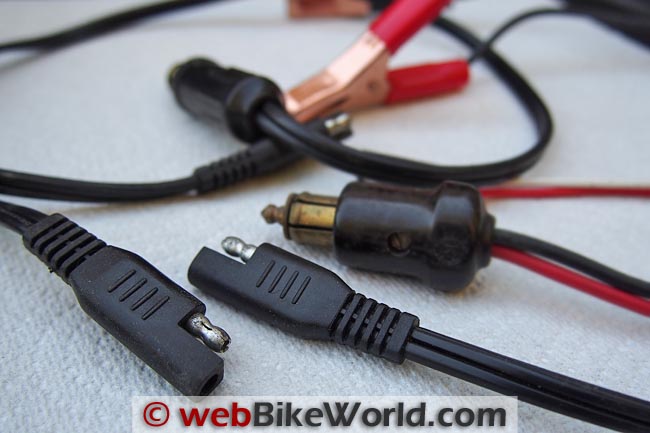
Whenever a new two-wheeled conveyance enters the webBikeWorld garage, the very first thing it gets is an SAE Battery Tender harness
I’m a huge believer in the power of the simple Battery Tender to keep a motorcycle’s battery in tip-top shape.
There have been two Battery Tenders running in my garage for 12+ years straight, 365 days per year, 24 hours per day.
The same Battery Tenders, by the way — they have never been replaced.
Every time a motorcycle comes back into the garage, it gets connected, and the best way to do that is with the simple SAE connector.
Where to Buy BMW C 650 GT Battery
See More: Motorcycle Accessories, Motorcycle Tire, Motorcycle Helmets
Battery First?
As it turned out, I was in luck. The scooter was purchased from Battley Cycles and they add an SAE Battery Tender harness to every bike that’s sold. Does your dealer do that? It’s a very nice touch…
I sort of knew this — the Ducati GT1000 (blog) project bike from 2009 had an SAE harness installed, and that came from Battley also. But I guess I figured that a scooter would be different.
But in the case of the C 650 GT, you can also make your own SAE Battery Tender harness with a male accessory outlet plug on one end (photo above) and simply plug it in to the accessory outlet in the left-hand storage cubby.
Just make sure you get the hot lead (it’s the protected side) wired correctly!
In any case, I wanted to find out how hard it might be to access the battery on the C 650 GT, because I plan on adding accessories like auxiliary lighting, heated clothing, GPS and more.
Removing the Side Panel on the BMW C 650 GT
So far, BMW has not released a shop manual for the C scooters.
I sure hope they do sometime soon, because the owner’s manual is pretty slim when it comes to anything other than very basic maintenance, such as checking the oil, coolant level and tire pressure.
Funny how things have changed — the owner’s manual for the 1961 Heinkel Tourist I referenced in the BMW C 650 GT review is so complete, you could literally rebuild the entire engine using it and a set of basic hand tools. Well, almost…
The battery on the C scooters is located under the right-hand fairing side panel. The owner’s manual tells you that there are actually four fasteners, but the information is split across two pages, so read carefully.
BMW has employed Torx fasteners for almost everything on the C scooters.
So if you’re buying a scooter, make sure you get a nice set of Torx bits and screwdrivers (review)from about size T15 to T50.
The side panel and backrest use T25 Torx bolts. I’m a big fan of Torx fasteners, because it avoids those messy stripped screwdriver heads that I know oh-so-well.
Here are two photos indicating the location of the four Torx bolts that must be removed to access the side panel:
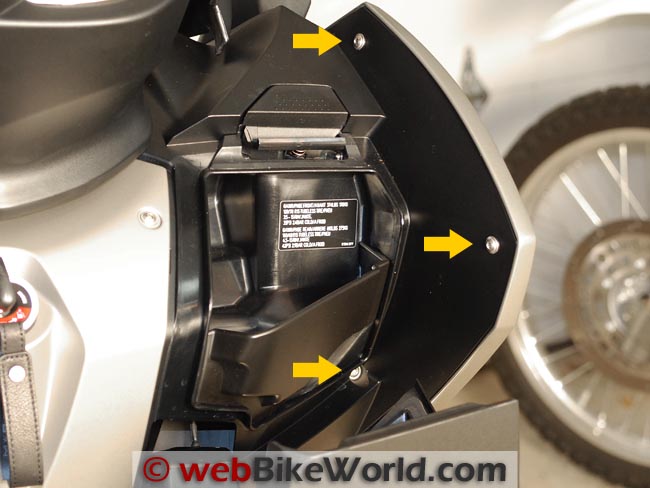
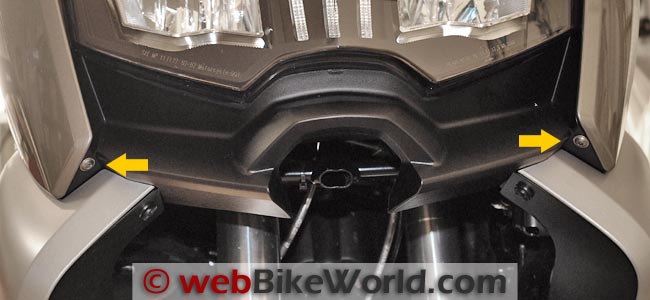
Remove the four Torx fasteners, then pull up and out on the panel.
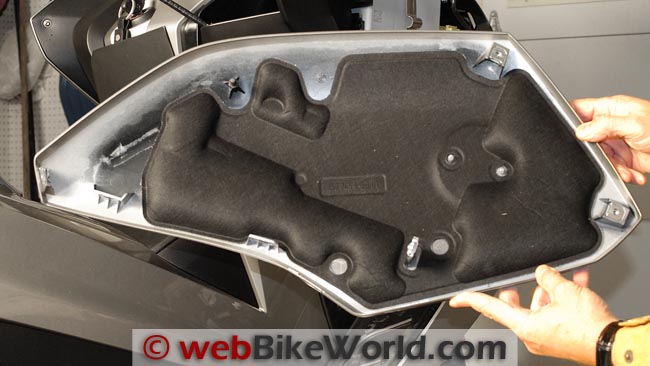
Be very careful, because it’s plastic and held by a couple of plastic tabs on the inside at the lower edge; you can see them at the lower left in the photo below.
You do not want to break the tabs — you really don’t. Who knows how much that would cost to replace? After all, this is a BMW…
Here’s a photo of the flip side of the panel, which has a sound-deadening material glued on:
Where to Buy BMW C 650 GT Battery
Once the panel is removed, the battery is visible and readily accessible. This is when I discovered that Battley had already installed the SAE Battery Tender harness.
The SAE connector end hangs out the front, just under the right-hand side of the fairing, above the wheel.
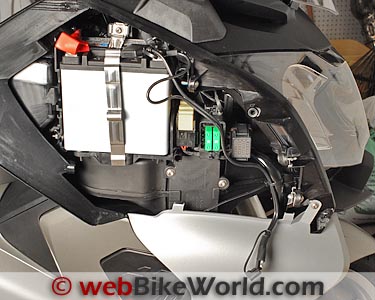
Here’s a photo of the battery with the panel removed:
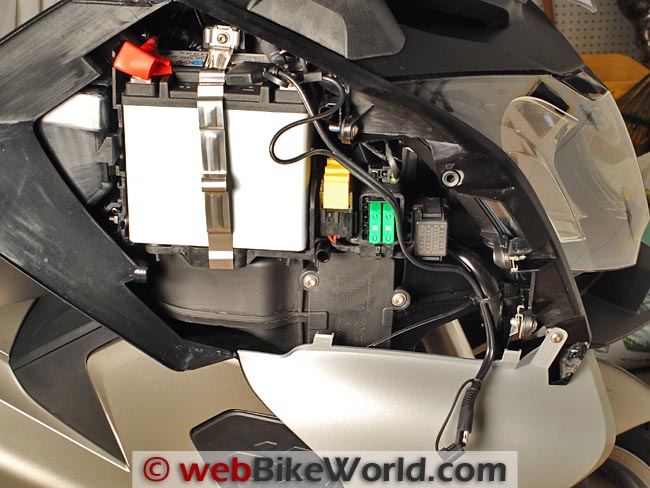
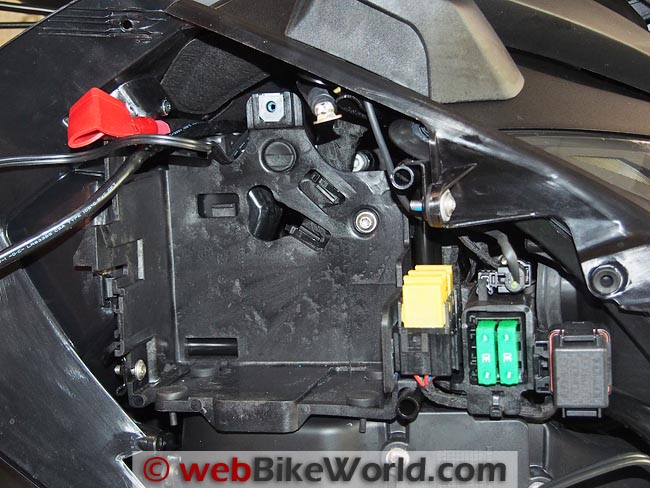
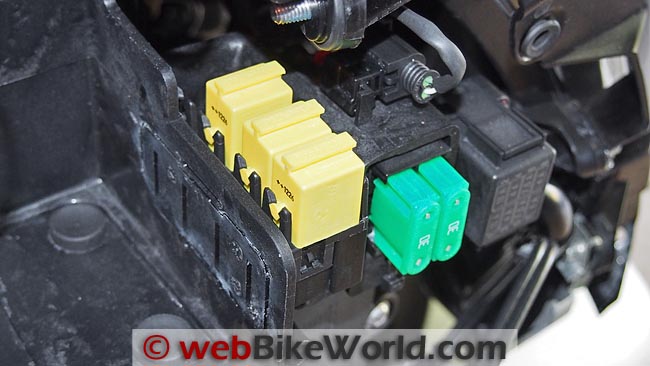
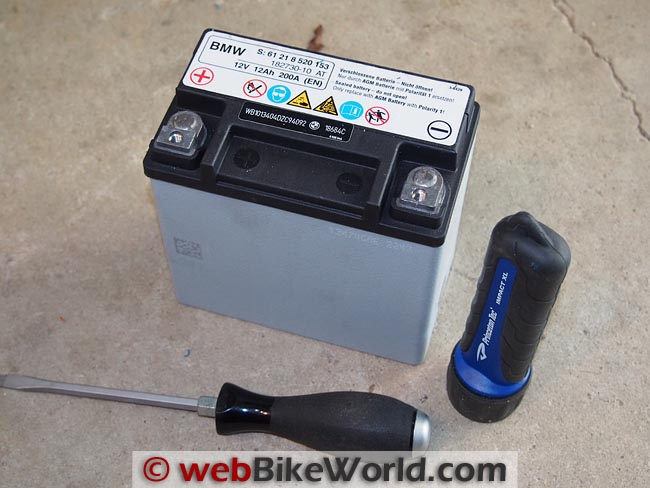
It’s a made-in-Germany AGM “maintenance free” battery, held by a metal strap. Notice in the photo that the red rubber cover for the positive terminal is loose; this is due to the connector for the SAE harness.
There’s plenty of room left on those terminals for all sorts of accessories, and the electrical system should be able to handle them with no problems, as it puts out 588 Watts, according to BMW. Can’t wait to start farkling it up!
The fuse blocks are also located in this section, just in front of the battery.
Otherwise, there’s not much else to see and it all looks packed pretty tight. It’s my understanding that Kymco partnered with BMW on some aspects of the C series scooters; I’m not sure what at this point.
Conclusion
So that’s all there is to it; a simple maintenance procedure — simple, at least, once someone shows you how!
ut since there are so few of these scooters out in the “real world”, I figure that any little bit of information might be useful to other owners or potential owners.
More: BMW C 650 GT Review | The wBW BMW C 650 GT Blog
Publication Date: November 2012
Where to Buy BMW C 650 GT Battery
See More: Motorcycle Accessories, Motorcycle Tire, Motorcycle Helmets
Owner Comments and Feedback
See details on submitting comments.


Hi Rick, while attempting this, I broke of the perpendicular plastic part on which the clip fastener for the front screw is mounted (the one below the headlight). I’ve tried all sorts of epoxy glues but nothing seems to be able to repair the bronken plastic part. So in desperation, I broke off the remaining plastic, filed that area flat, bent the existing metal clip backwards and epoxy glued it onto the flat surface. Didn’t work as well and I’m out of ideas. Any suggestions?
Hi Rick, very well presented instructions. I followed them and fitted a charger lead in about 20 minutes. Previously, I had been using a Canbus sensing Ctek charger attached to the “cigarette lighter” socket in the glove box. I found out that that doesn’t work when my second battery died after being left for 2 months.
Hi Rick, I recently connected a usb socket direct to the battery terminals for charging a mobile phone while riding whilst listening to the radio as I have found I do not get any electrical noise over the radio with the phone under the seat.
I have a problem with the rear seat heating under the guarantee and BMW Spain say the usb socket is drawing too much current when standing idle and causes the heating to fail and should be connected to the contact switch.
I find this difficult to understand why 1 usb socket can draw so much power the seat heating fails.
Can this be true? as you have stated one can add accessories. Is the standard battery 588 watts? as BMW say my battery is 144 Watts