The Breakdown
Pros
Cons
Introduction
It’s not often that I write a multi-part review but I felt it was necessary in the case of the Cousin Jeremy suit. I wanted to be able to not only describe the details of the suit but also be able to report on how the suit it breaks in and how this impacts comfort and fit.
This installment will also take a look at the protective features of the Cousin Jeremy as well as details on how Aerostich worked with me to adjust the fit of the suit I was sent.
In that initial review, I offered a detailed look at the suit and took a deep dive into the construction details of the pants and jacket. If you missed the initial installment of our Cousin Jeremy two-piece suit review you can check it out here.
Now let’s take a look at how the suit fit when I received it, and what happened after that in order to get the fit right for me.
Fitment
When the large box containing my new Cousin Jeremy two-piece suit arrived I was quite excited to get the package open. Once I managed to unpack everything and carefully place tags and documents aside I tried on the jacket.
Initial Flexibility
The first thing I noticed was that I couldn’t bend my elbows. It was late December and the box had been sitting outside for a while. As such, the included TF3 armor had become stiff as a board and I immediately took it back off (more about this armor later).
I impatiently waited for the pieces to reach room temperature and tried on the jacket again an hour later. With the armor now pliable I was able to get a sense of how the jacket fit and I found it to be, in a word, excellent.
TF2 armor I received for cold weather riding. Appearance is similar to the TF3 but TF3 is green.
Waist Sizing & Design
Aerostich had asked for measurements when we first discussed performing the review and they got the jacket spot on. The chest, arms, and overall length were exactly as I like them with a little extra length at the arms that was taken up when in the riding position. With such a great showing from the jacket fit I was quite surprised when I got out the pants and tried them on.
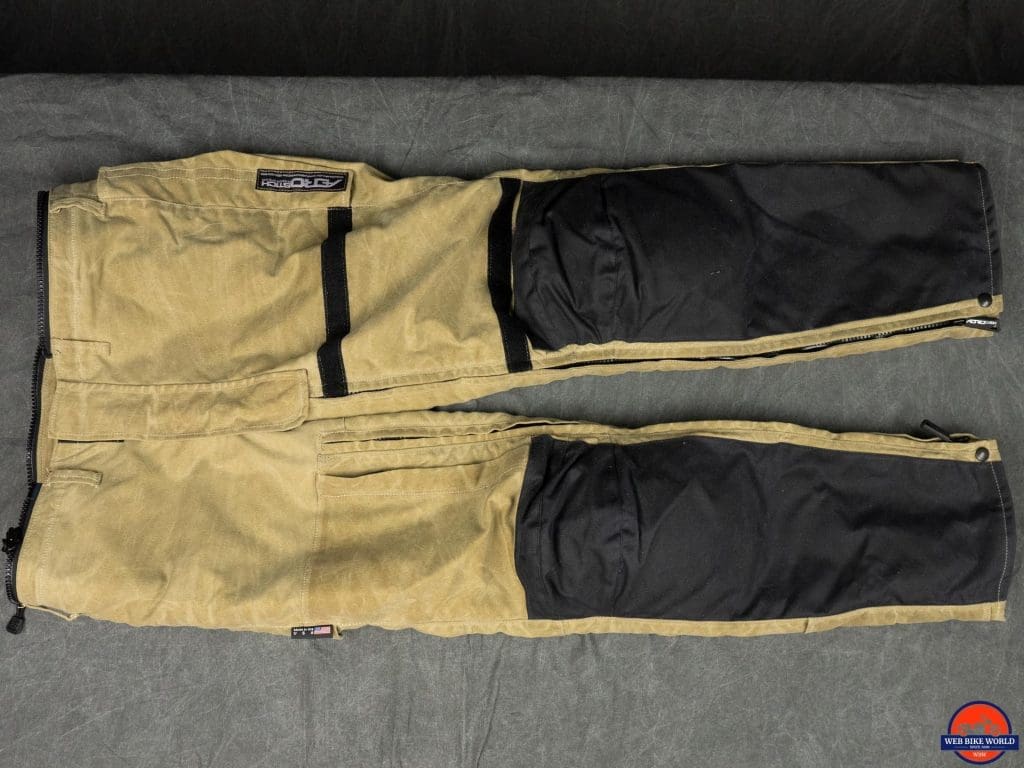
As I pulled up the pants I found they were nowhere near my size in the waist. In fact, they were marked “44” and I believe that is about what I measured at the time. Considering my waist is 36 inches one can imagine I was a bit confused. Not only was the waist extra-large, but the thighs were very generous in circumference too.
Needless to say, I reached out to Aeorstitch to find out what had happened as well as reviewed my email correspondence with them to confirm the sizing discussed. In true Aerostich form, they responded as quickly as they had with Kathy and her questions about the R-3 One Piece Suit. I was told that this was by design and that the pants and jacket, when zipped together, are supposed to fit like overalls.
Note: I recently received a response from a reader of my initial review that experienced the same issue with the pants they received so I have no doubt this is by design.
I explained how I felt these were still too oversized for me to feel comfortable wearing them and they immediately agreed to address this. I sent the pants back and I received a new pair (or modified version of the originals) that “fit” in the way I like.
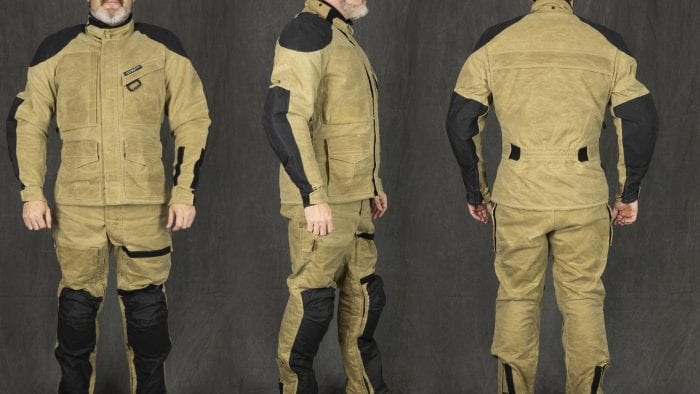
Cousin Jeremy Pants “round two”. These fit me perfectly.
I prefer my riding gear to fit relatively “close” as I feel it keeps the armor in place better in the event of a crash and I just prefer a close fit in general in what I’m wearing. The replacement/modified pants fit much better and in line with how I had just described it. I could wear them over a thin base layer as well as over jeans and they “fit” without being too tight.
Unexpected Issues
Now that both the jacket and pants fit as I wanted it was time to install the back protector that I had asked for to see how it all would come together. This turned out to be a bit of an issue that I want to make sure readers should look out for.
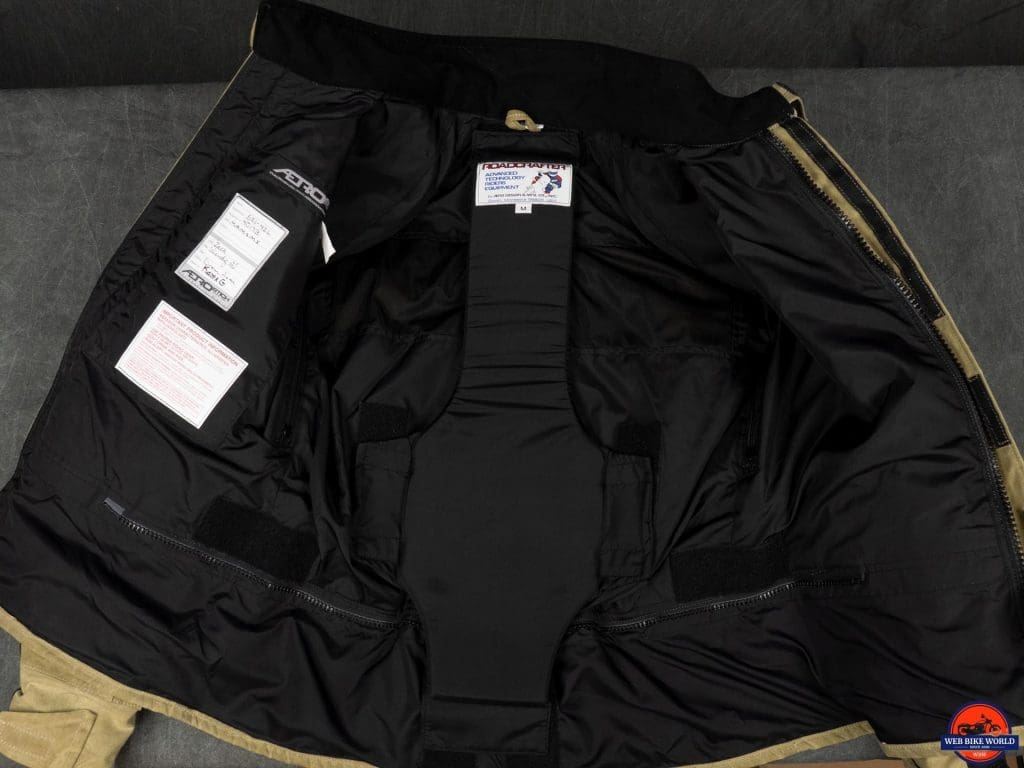
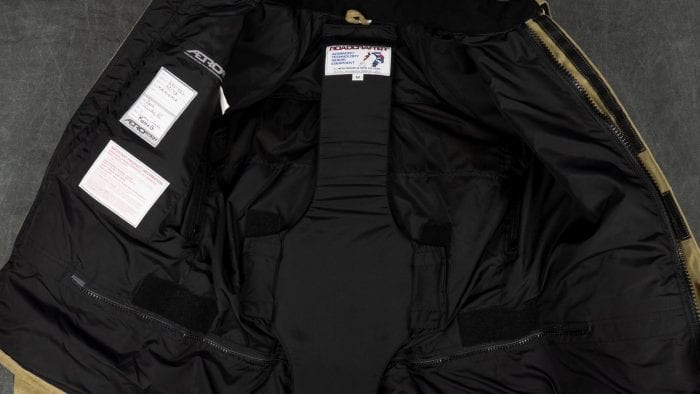
The Aerostich back protector installs in the jacket and is designed to go inside the pants when the two pieces are zipped together. Unfortunately, I hadn’t considered the extra space needed for this in my waist measurements. With the protector installed the pants were too tight to fasten.
Aerostich back protector installed in the jacket.
I had two different ways to deal with this. One, modify the protector so it didn’t go down so far or two, not zip the pants and jacket together as the protector can attach to the jacket alone. In the end, I chose option three which was none of the above.
I ended up using a back protector added to my HitAir vest which got me around the entire problem. It also makes the suit more comfortable overall as the Aerostich protector is quite robust. In fact, I need to send back the protector to Aerostich since I’m not using it now.
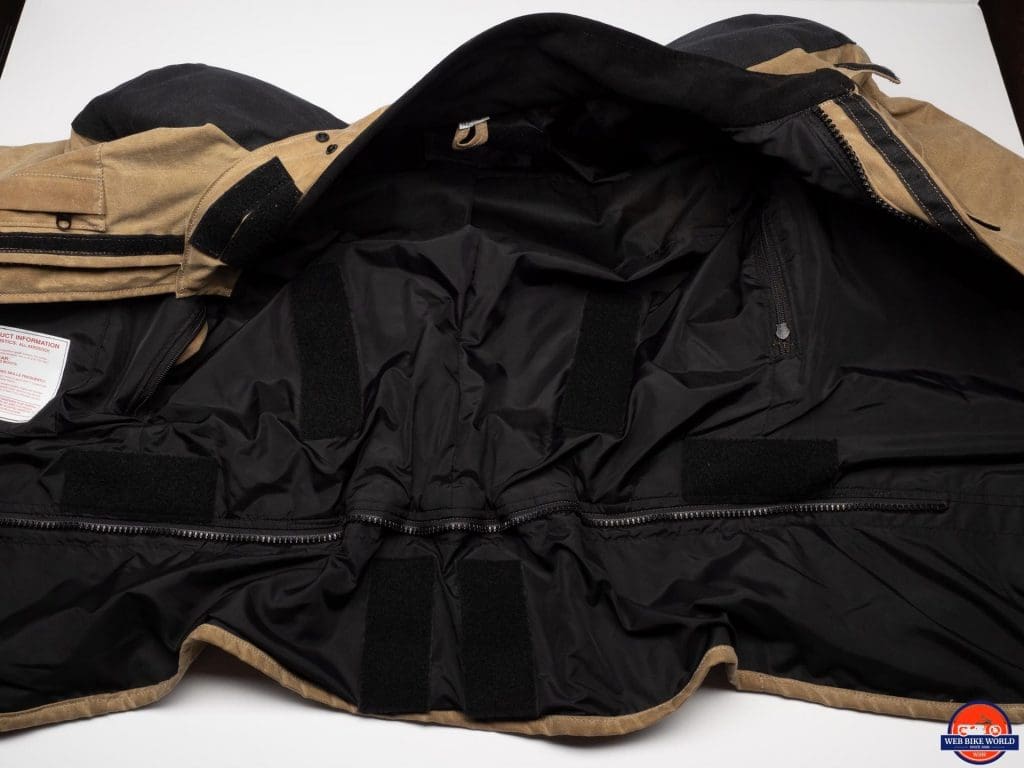
I also will be sending both the jacket and pants back to them soon in order to have them investigate an issue that happens when I zip the two together. As I mentioned, the jacket and pants fit very well now but for some strange reason, zipping the two together makes the waist very tight.
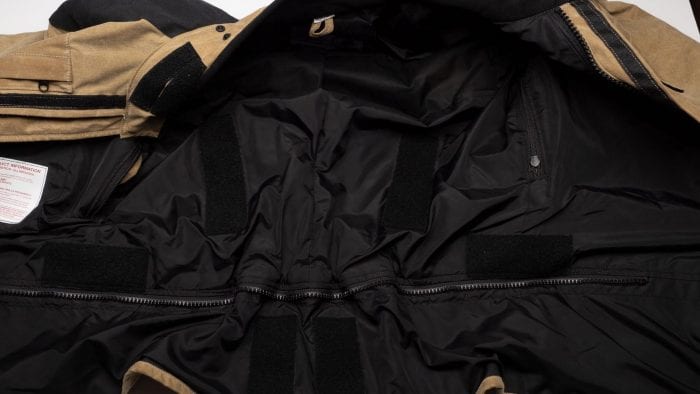
The possible culprit to the sizing issue when zipping the jacket and pants together.
This is confusing to me and to Aerostich. Since the zippers are the same length there should be no reason for this to happen. I can still connect the two by having only a few inches connected at the rear (since there are two zipper pulls) but I would like to be able to fully connect them as intended. Aerostich has already agreed to look at this so my next installment of this review will follow up on what happens.
This all might sound like some hassle but apparel like an Aerostich suit isn’t like buying typical “off the rack” apparel. The staff at Aerostich made it very clear that they want customers to be happy with their products. And we at wBW are no stranger to trying and reviewing Aerostich gear.
I don’t think it is unusual for some changes to be made to fit the purchaser’s expectations. I’m also hoping that this review will help readers understand that they should be very specific about how they like their gear to fit when placing an order.
All that said, let’s look at what it’s like to ride in the Cousin Jeremy.
Comfort
As mentioned previously, the Cousin Jeremy is not a lightweight piece of gear. The material is heavy and robust with extra layers of material in potential impact areas. Add to this the large and thick armor used in this suit and I was prepared for what I expected to be a cumbersome outfit for motorcycle riding. The reality was much better than the expectation.
What I’m about to say next is going to sound like the typical review of a very large and heavy motorcycle. “Once underway the (insert touring/cruiser/bagger motorcycle here) feels very light on its feet”.
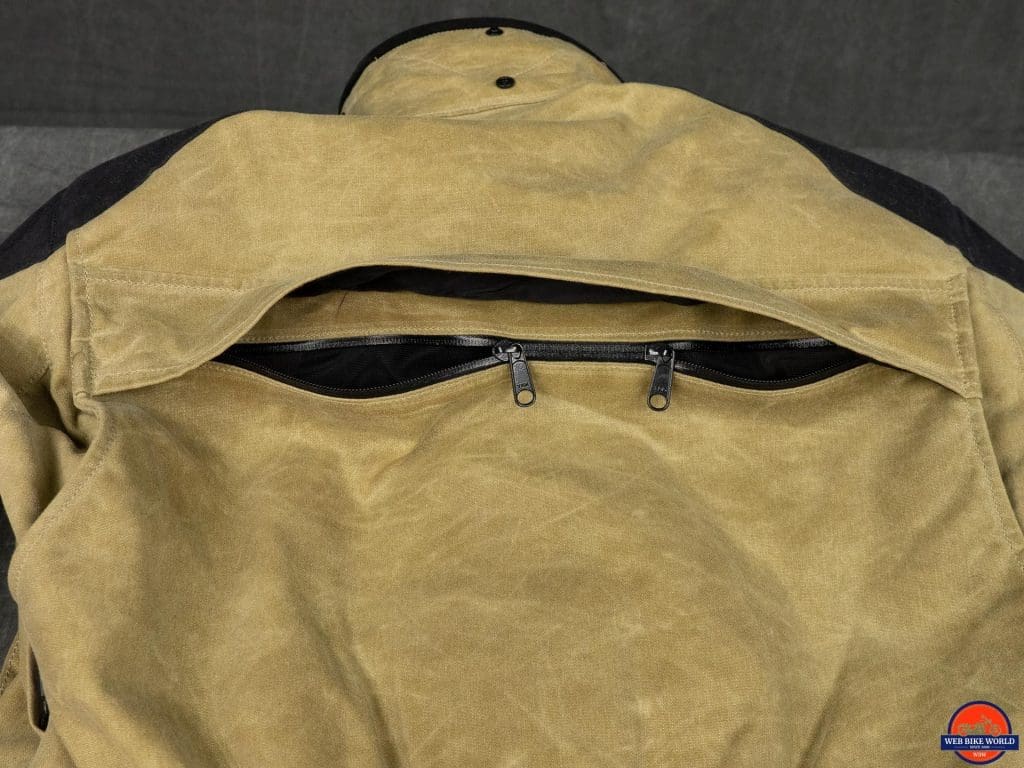
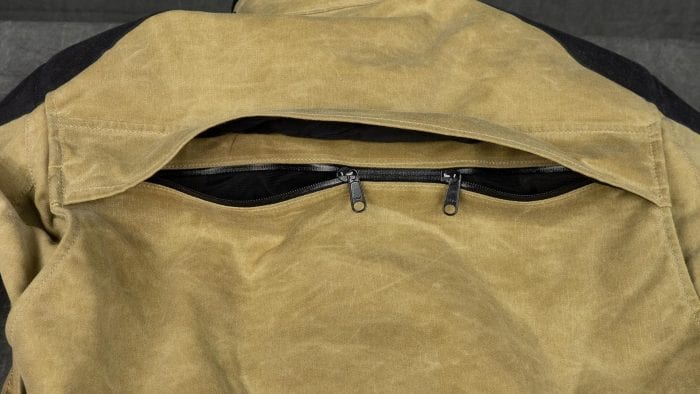
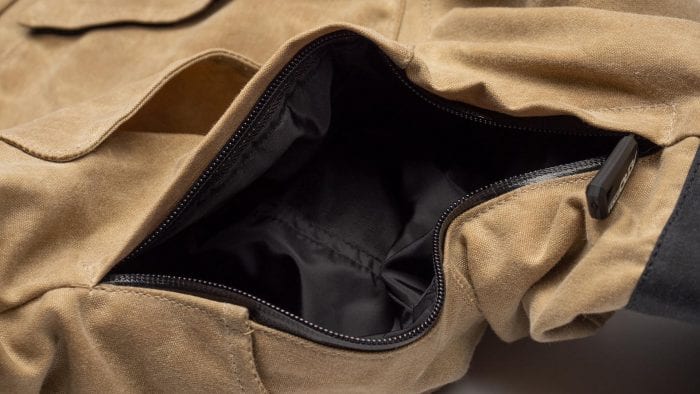
Rear vent on the Cousin Jeremy jacket.
A cliche’ for sure, but it is true of the Cousin Jeremy suit experience. The suit starts breaking in on the first ride and a few hours of riding has one feeling quite at home in this gear. What I was really surprised about was how unobtrusive the large armor pieces are. They are pliable enough to move with the rider and I think the placement in this custom suit helps them melt into the background.
The waxed cotton that seemed pretty stiff in some places at first soon gave way and began to behave. It’s interesting the difference between just standing in the Cousin Jeremy and seated in the riding position. I feel like it would be a great companion for several hours of riding, under the right conditions of course.
Ventilation
One of those aforementioned conditions would be the climate. Even though the jacket provides a large vent in the back and two large underarm vents the overall ventilation is middling. Opening the main zip a few inches helps but the Cousin Jeremy suit is likely not going to be the best riding gear for hot weather.
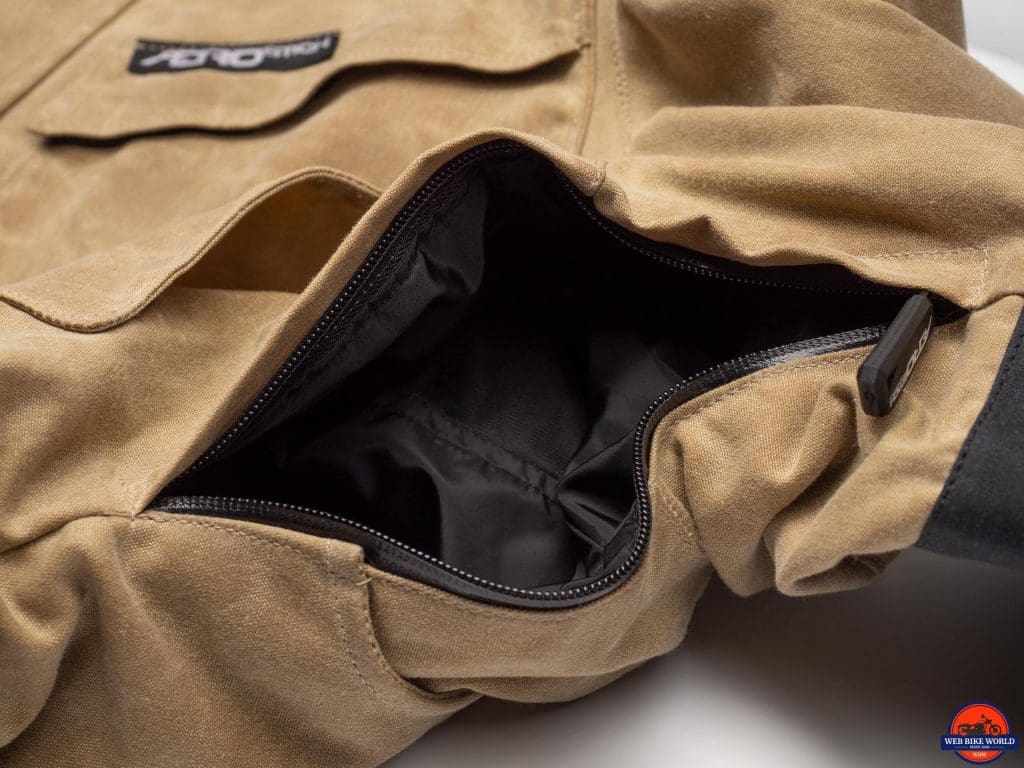
The lack of strong airflow from the underarm vents was surprising to me. These open directly through the shell to the interior with no mesh or other fabric between the outside air and the base layer one is wearing. As such, I expected to feel quite a breeze once in motion.
Cousin Jeremy underarm vent fully open.
I could tell they were open but it wasn’t the rush of air I expected. My 2013 Ninja 1000 is a sport-touring bike with the emphasis on “sport”. It has an upright riding position but doesn’t offer much wind protection and has a small windscreen by sport touring standards. I think they will certainly help evaporating moisture escape and perhaps that what they are designed for rather than pulling in air from the outside.
It should be pointed out that my own experience with the venting may be different from other riders. The style and shape of the motorcycle, as well as build of the rider, will all have an effect on how air flows so as the saying goes, your mileage may vary.
The pants don’t offer any sort of venting so it’s a non-starter on the lower half. I will say that at least the material breathes well as the pants never got stifling or stuffy during a warm ride. Overall, “The ‘Cuz” can do OK in warm weather thanks to its breathable nature and the modest ventilation but hotter days are not where it shines.
Protective Features
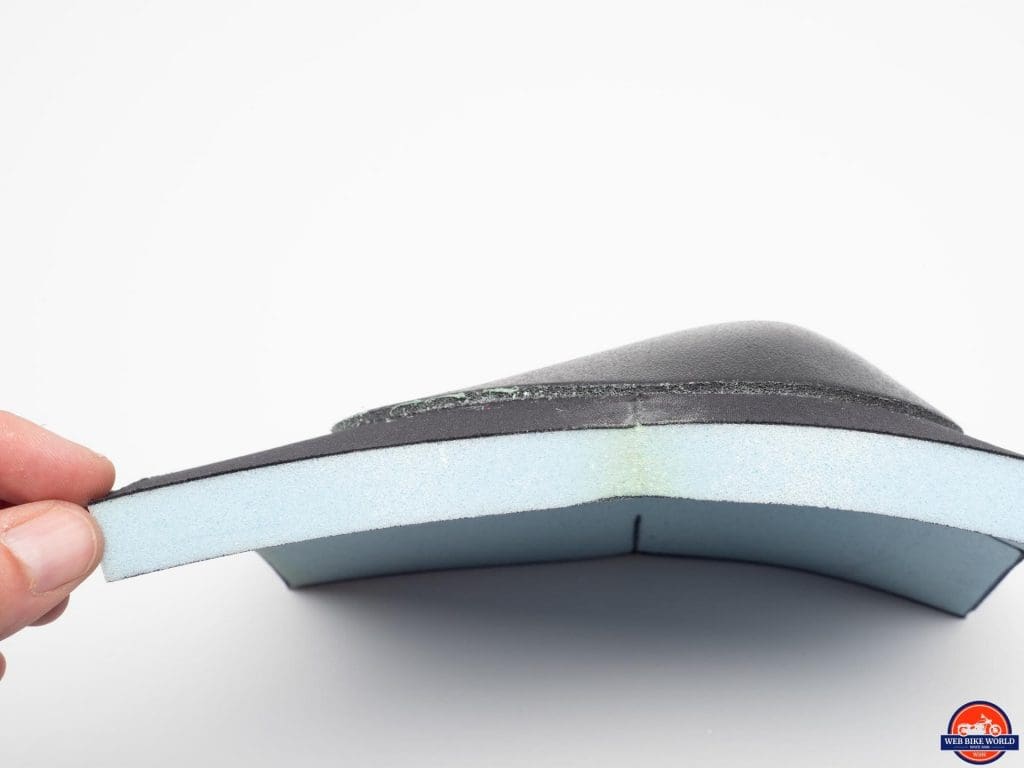
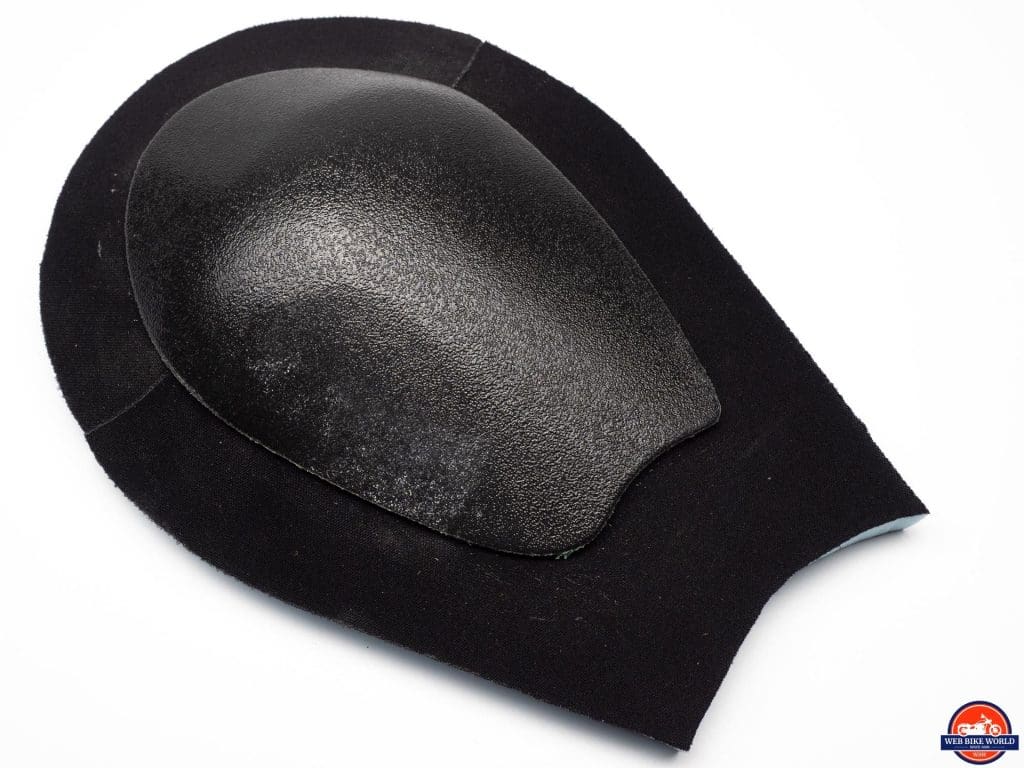
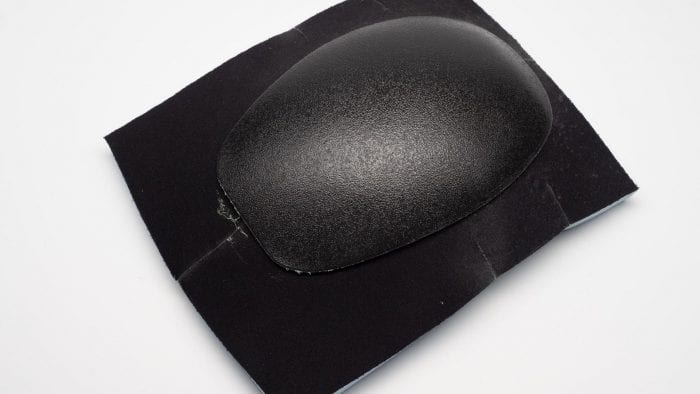
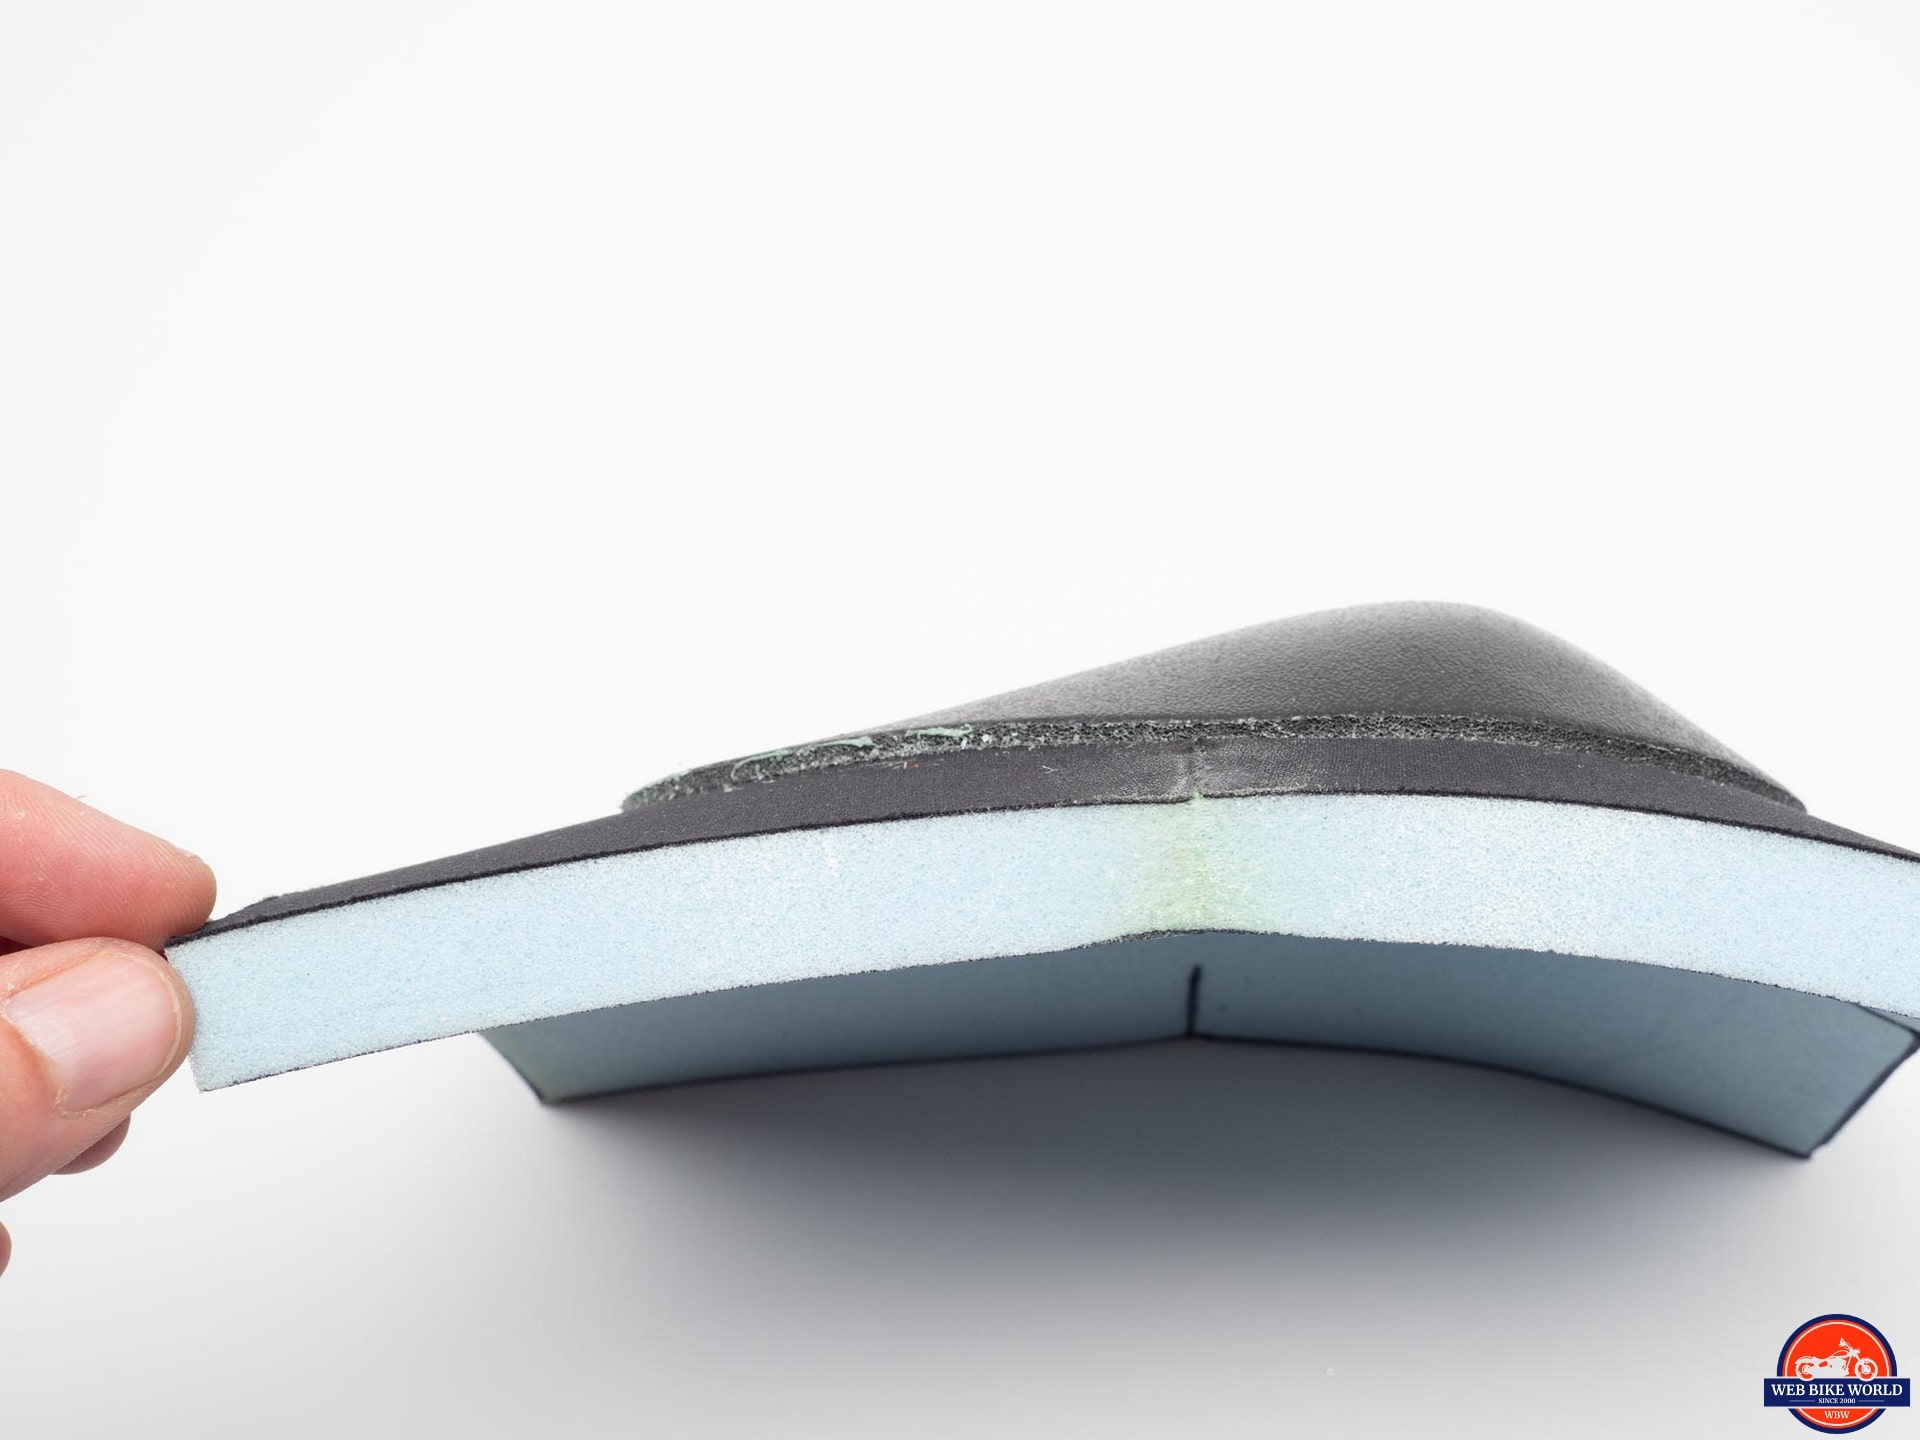
The Cousin Jeremy suit, as well as the Roadcrafter, R-3, Darien, Falstaff, and AD1 gear, ships with Aerostich’s TF3 hard shell armor. This armor is a combination of a contoured, plastic “hard shell” piece glued onto a piece of a ⅝ inch (16mm) thick viscoelastic foam.
Being viscoelastic, the foam will be flexible when pressed on slowly but harder/faster impacts will not deform the foam as easily. This allows the armor to move with the rider but still provide impact resistance in a crash.
The addition of the tough and flexible plastic shell helps mitigate sharp object penetration as well as helping to disperse sharp impacts. The armor is available from Aerostich without the hard shell if the rider would rather not have it. Personally, I’m all for the extra protection.
Some riders might have concerns, as I did, that there are no CE ratings on this armor. Aerostich has provided the information on why this is the case on their website but the important thing is that Aeostitch does test the armor. The company uses the same type of machine that CE uses for testing and the armor actually does perform better than CE Level 1 for impact transmission.
TF2 Elbow armor with hardshell
Handling the armor in person I have no doubt that it can provide robust protection but one does need to consider the climate when choosing which armor to get with their ‘Stitch. Their TF3 armor was developed quite some time ago and has changed very little. As such, the performance of the foam portion of the armor is sensitive to temperature changes.
As I mentioned earlier, the TF3 armor I received in December of 2018 was stiff as a board when I first brought the box inside from hours in the cold outside. The standard TF3 armor works best in temperatures between 45ºf and 75ºf (7 to 24C).
If one plans on riding in colder weather the TF2 armor works best in ambient temps from 30º to 55ºf (-1 to 13C). There is also a TF5 and TF6 version that reach their optimum performance between 65º and 95ºf (18 and 35C).
Seeing as I wanted to test the suit out as soon as possible I contacted Aerostich and got some TF2 armor suitable for winter riding. This foam in this armor is significantly softer and worked well for me when riding in the high 30’s (F). I didn’t ride in the cold much but it was enough time to ensure the armor remained flexible.
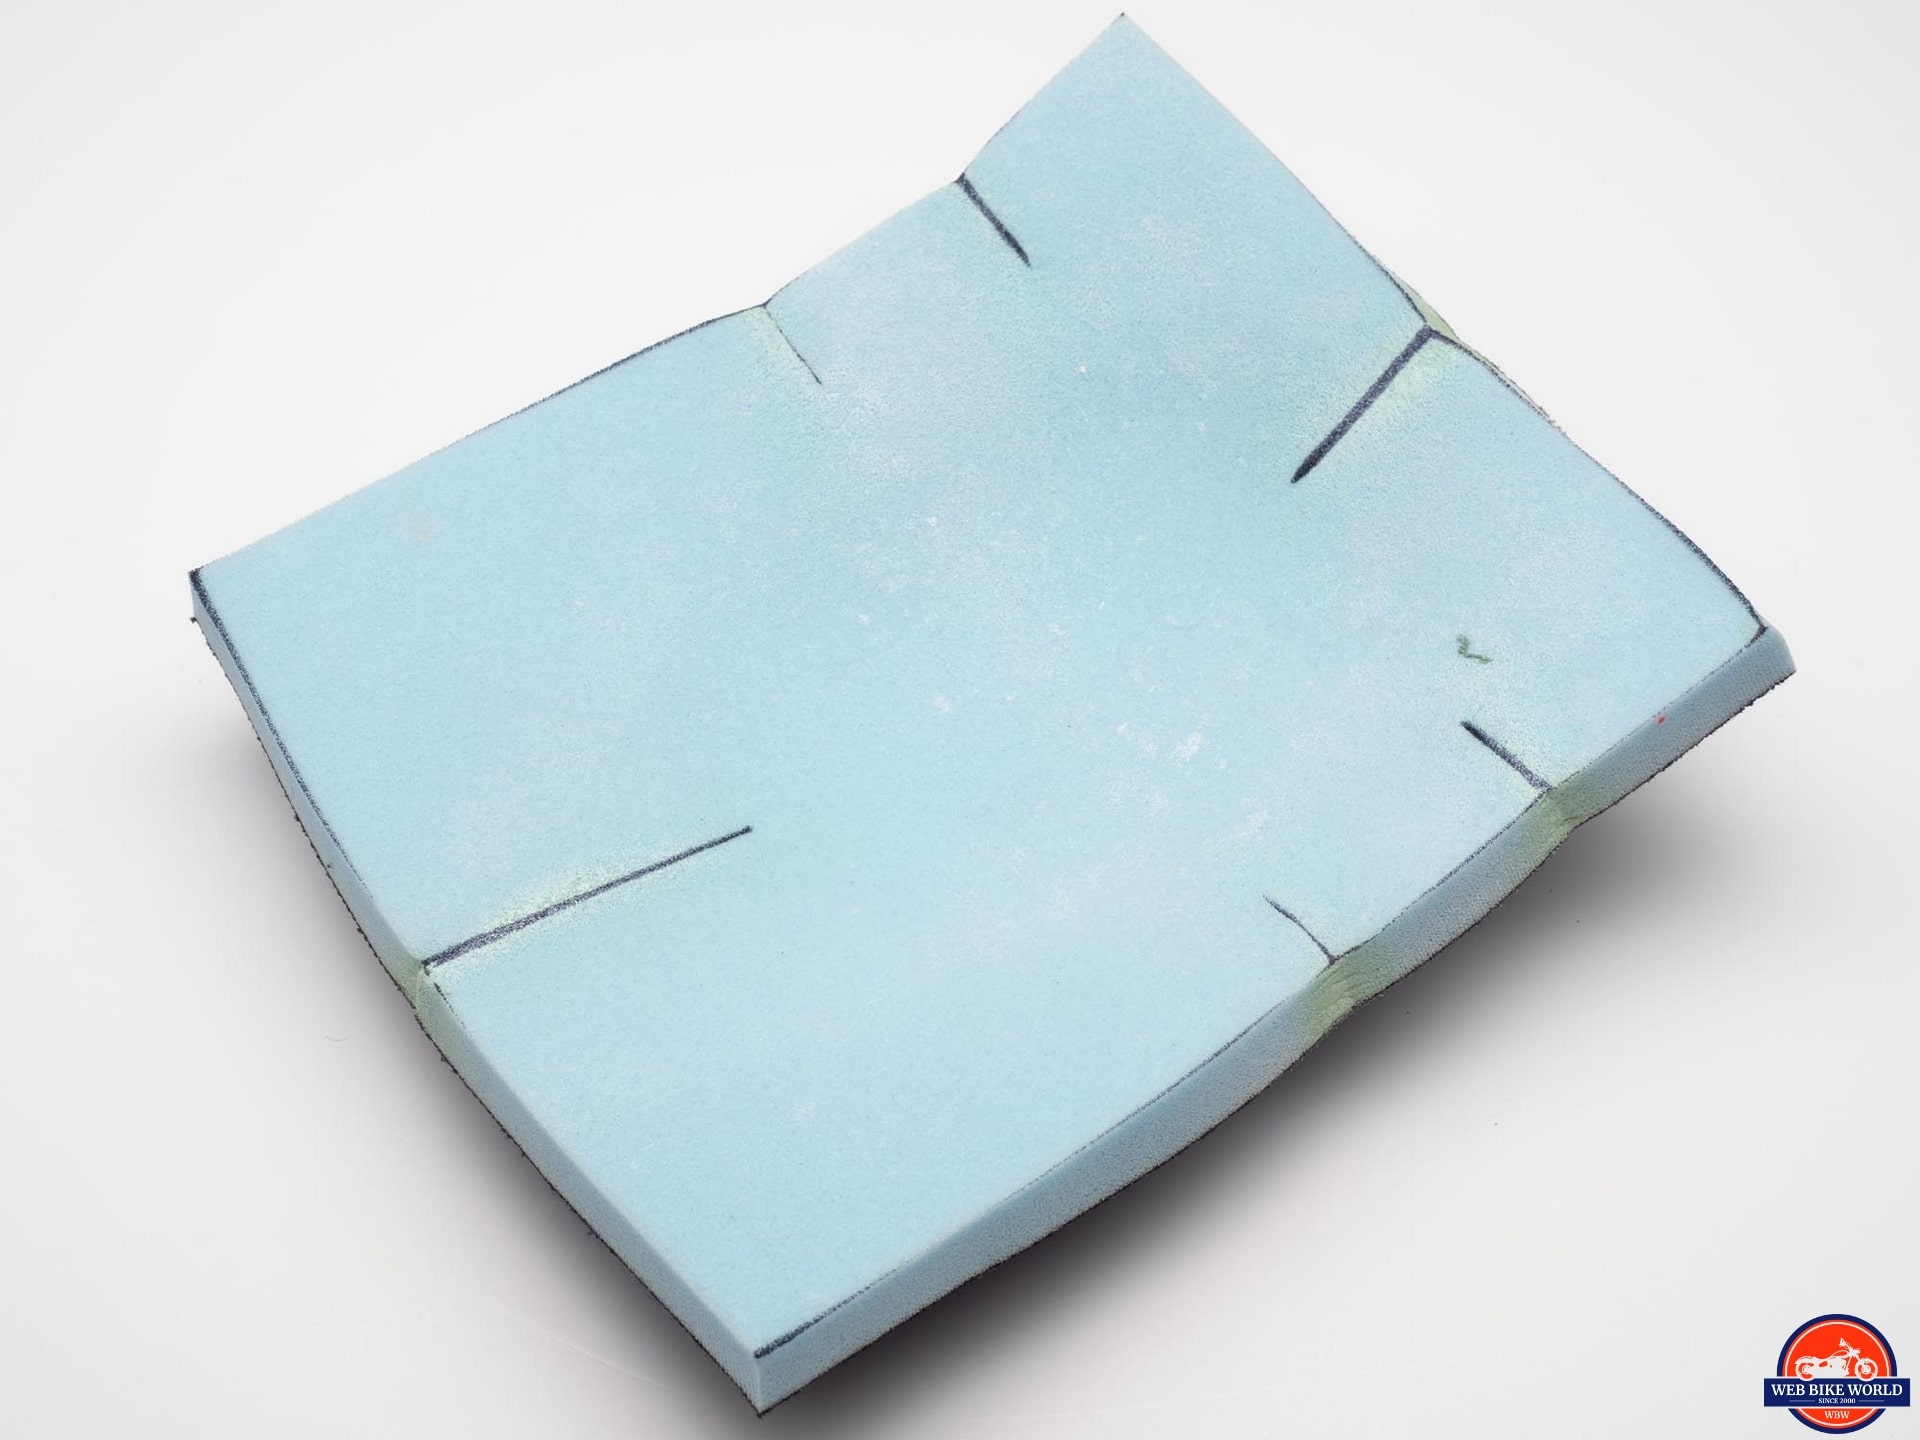
Note: Photos shown are of the TF2 armor. TF3 armor is identical in appearance and size but viscoelastic foam is green on the TF3 where the TF2 is a light blue.
Armor Finish Quality
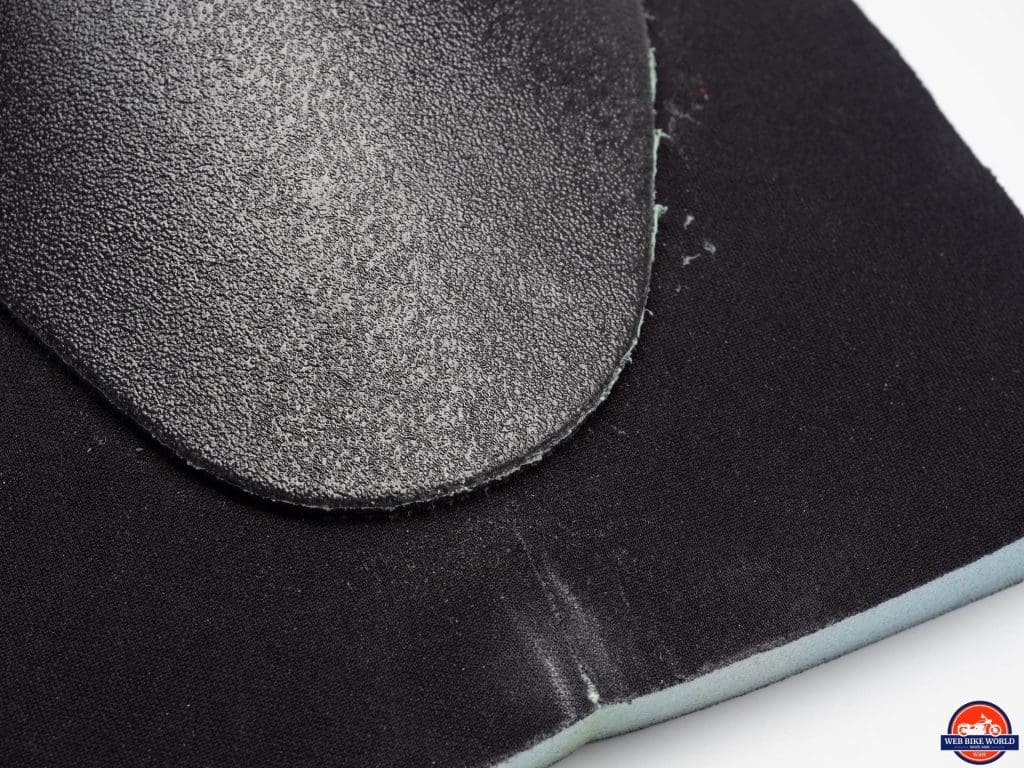
The finish quality of armor is not something I’ve ever discussed in detail before (that I recall). In this case, feel it needs some attention here so that potential buyers have an understanding of what to expect.
 |
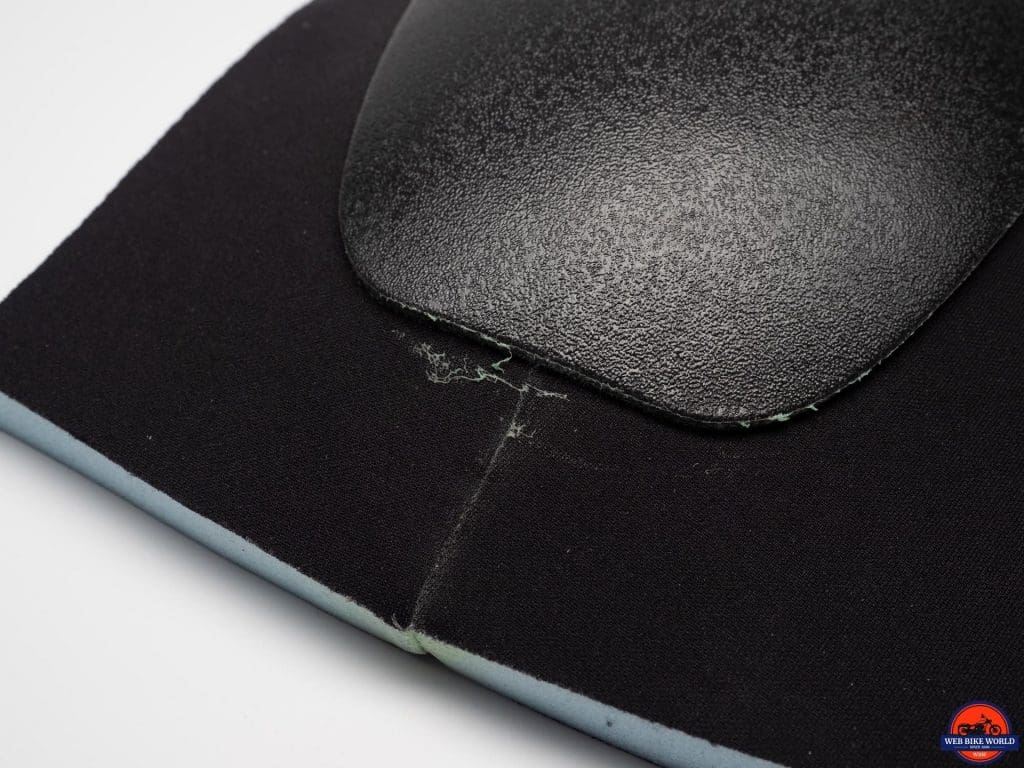 |
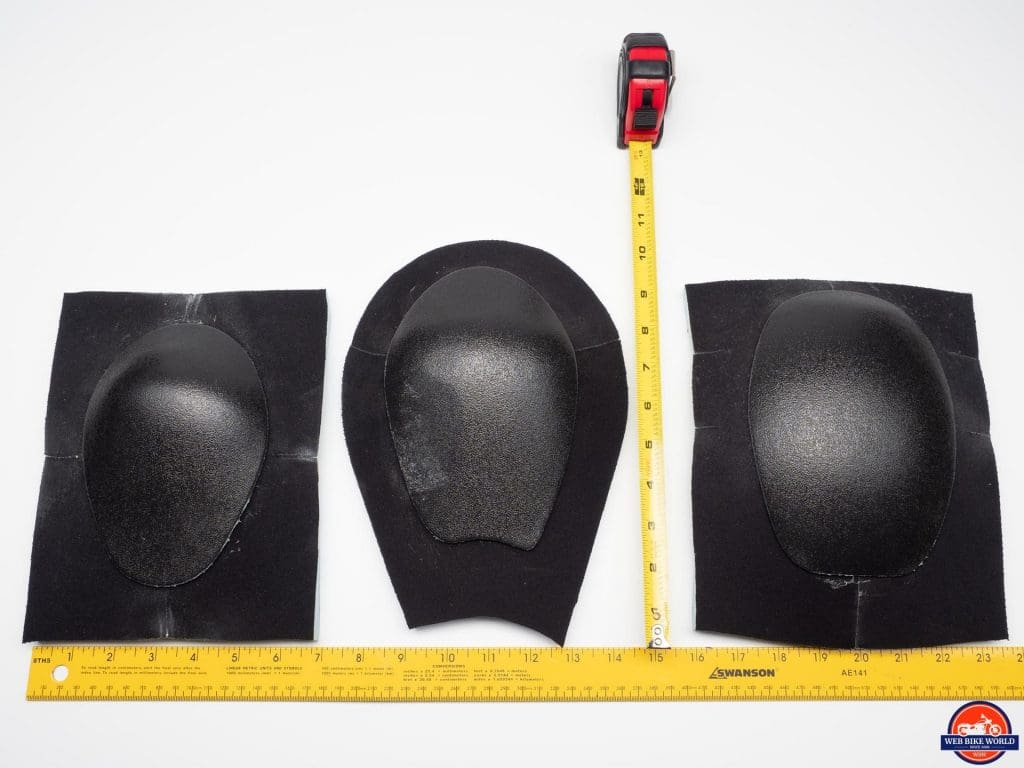
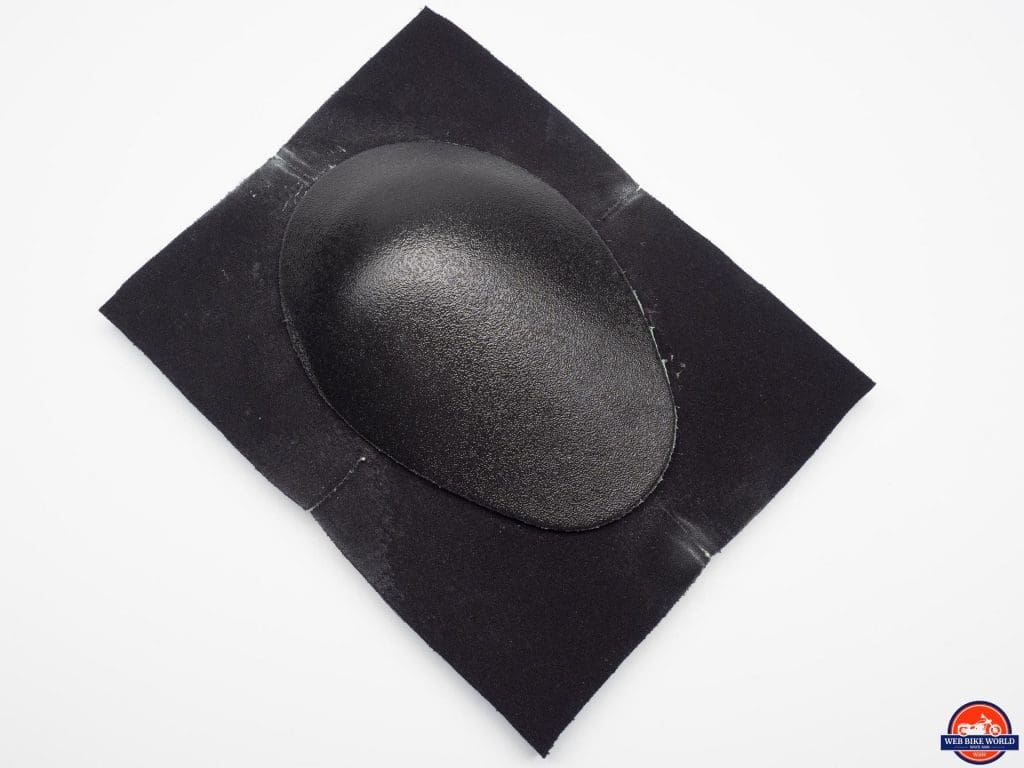
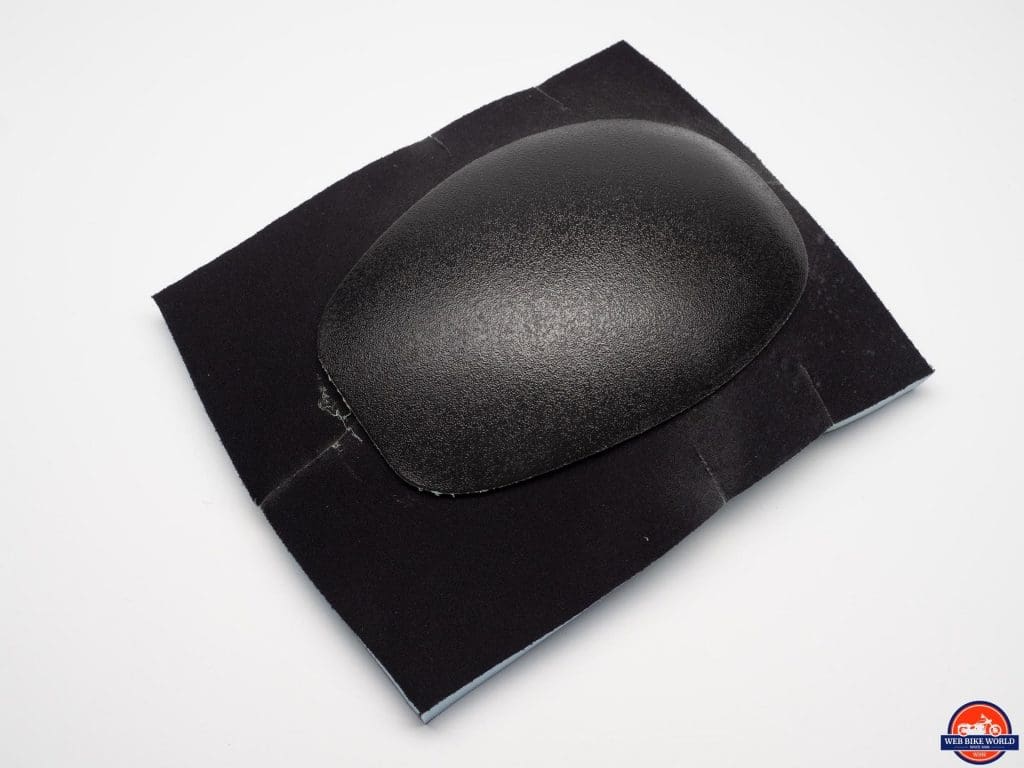
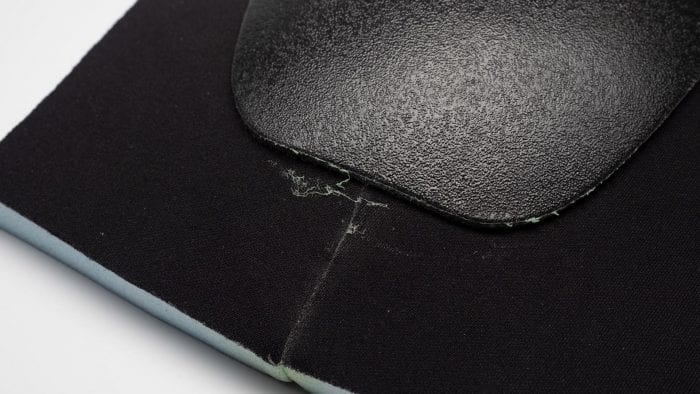
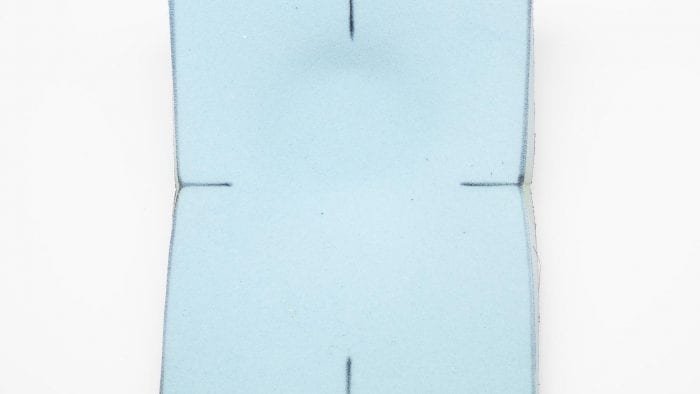
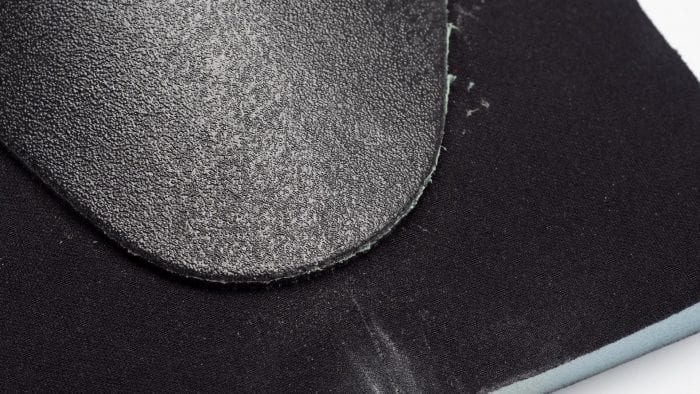
Not the neatest construction & excess glue residue on the TF armor foam
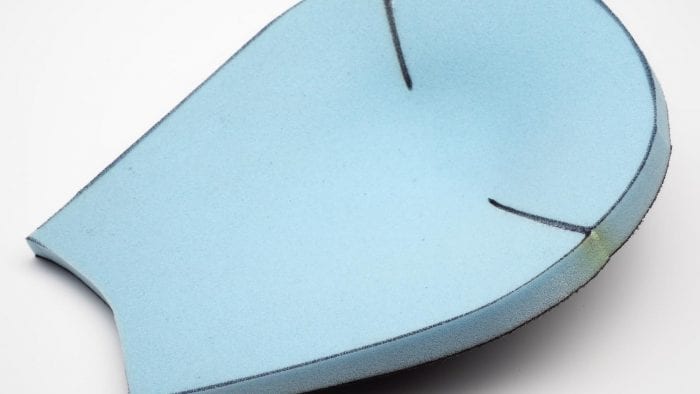
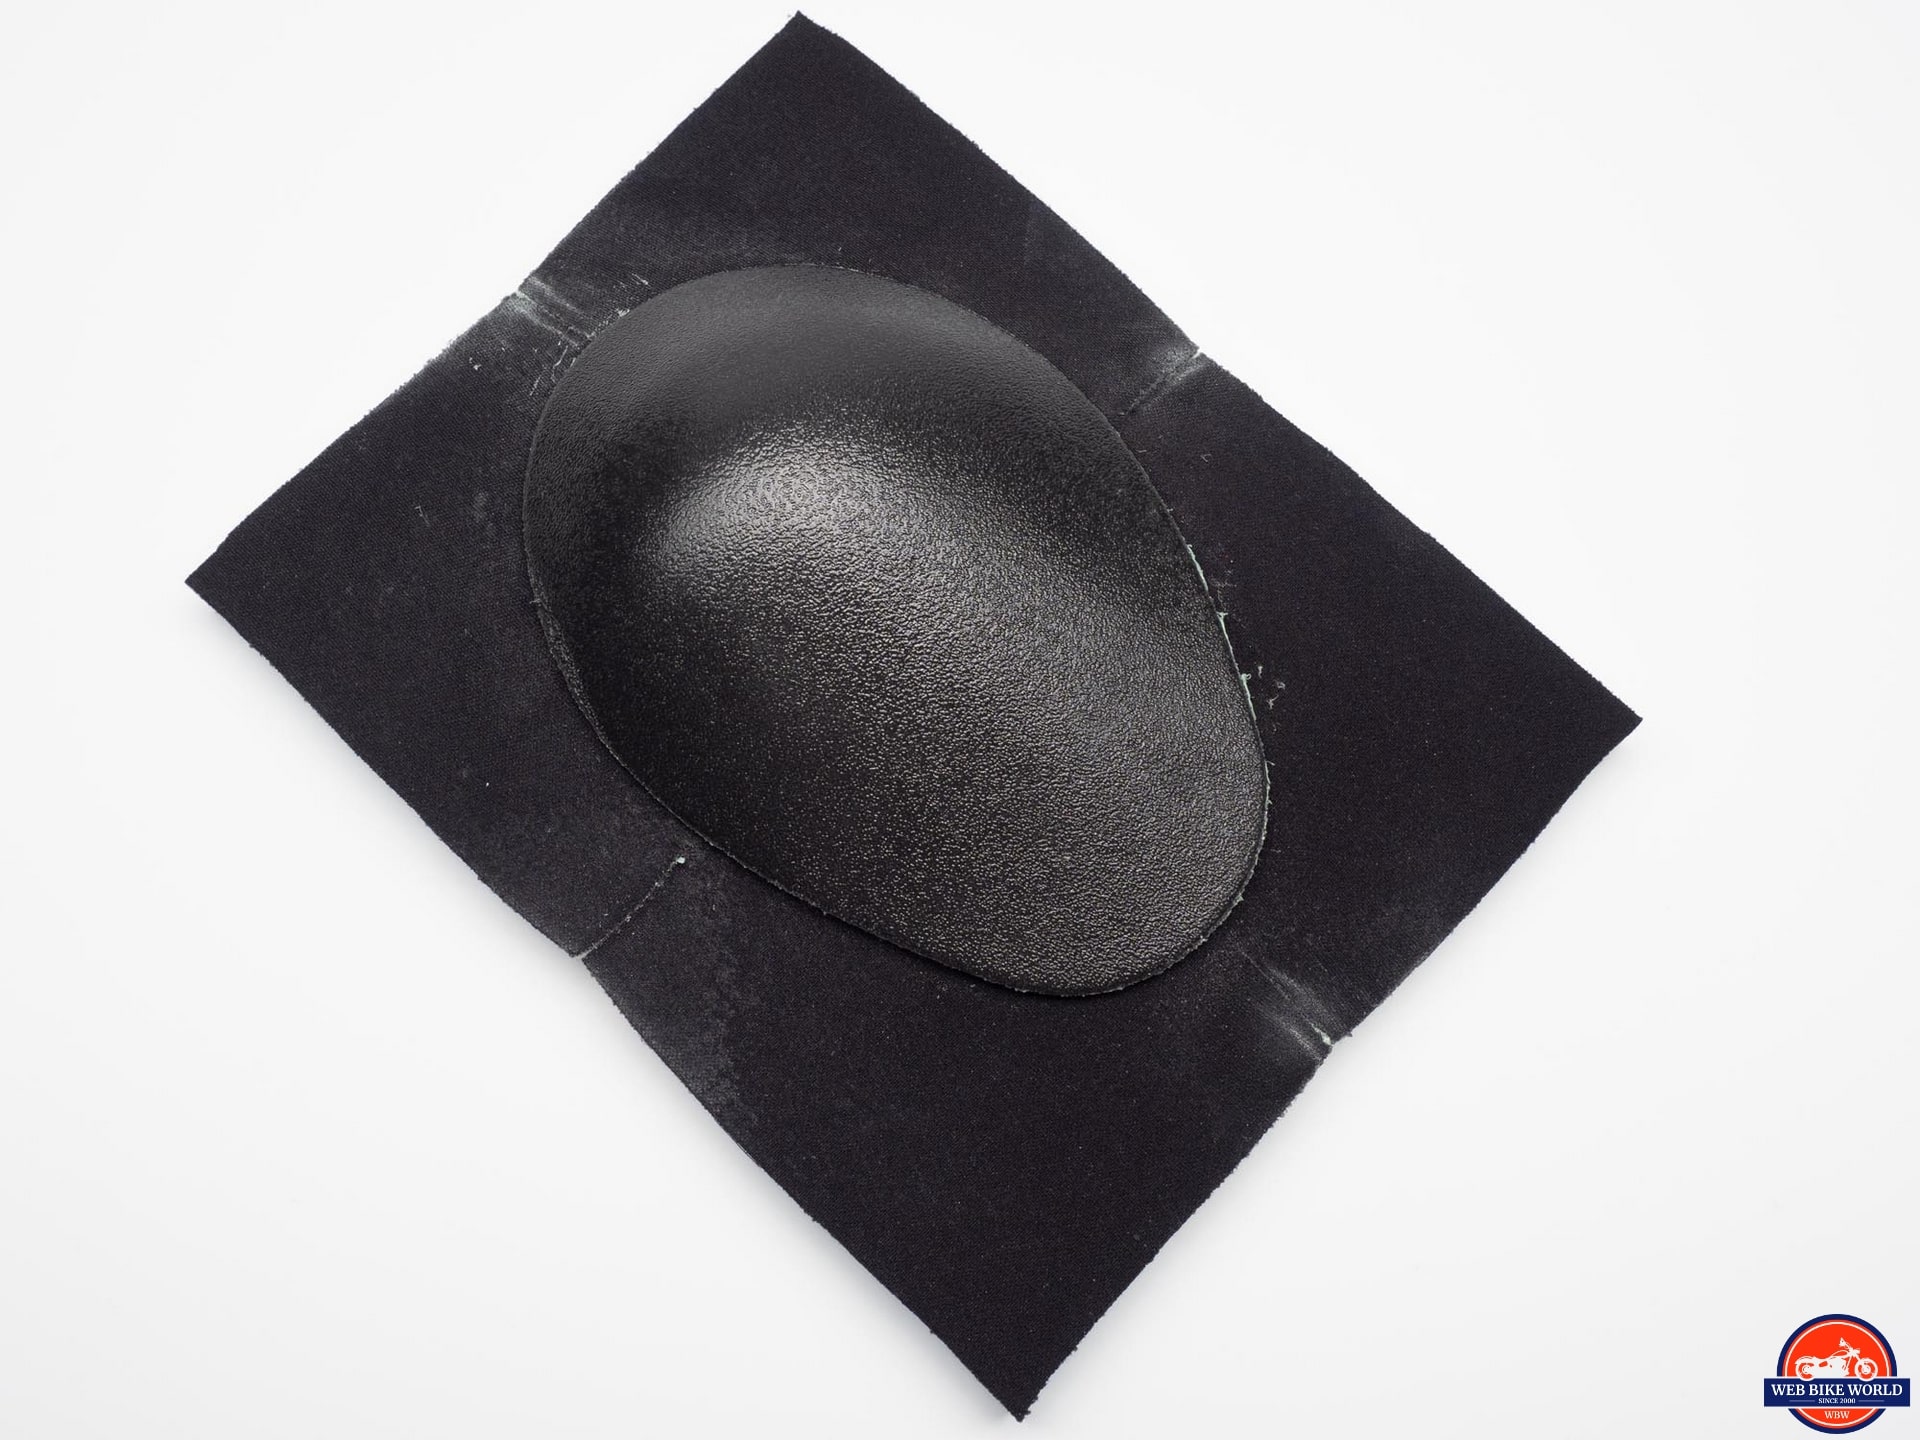
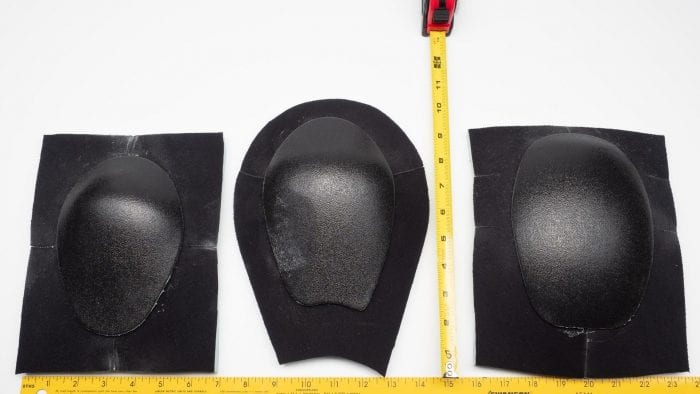
The armor pieces appear to be hand-cut squares of foam in the case of the knee and elbow armor and a sort of egg-shaped piece for the shoulders (see the photos). I say hand-cut because the cuts are not very straight or consistent. Uniformity does not appear to be a consideration here and perhaps it wasn’t even considered.
TF2 shoulder armor shape
I get that the armor is not something that is expected to ever be seen except when installing or removing it. However, the inconsistent cuts and the occasional spots of glue on the surface of the foam suggests a lack of attention to detail.
TF2 knee armor (Note: Extra cuts on the edge allow the foam to conform better to the knee)
I don’t believe that it affects performance (I hope it doesn’t) but when quality and attention to detail are of such a high standard in the suit itself, the appearance of the armor lets the suit down a little.
On the other hand, the armor bits are pretty inexpensive to purchase individually. At just $14.00 apiece at least the price reflects the look here. By comparison, the newer generation TF5 hip armor is $50.00 for the pair but is much slimmer and looks like a machine molded/crafted part much in line with most in apparel armor seen in other manufacturers’ riding gear.
Other Protective / Safety Features
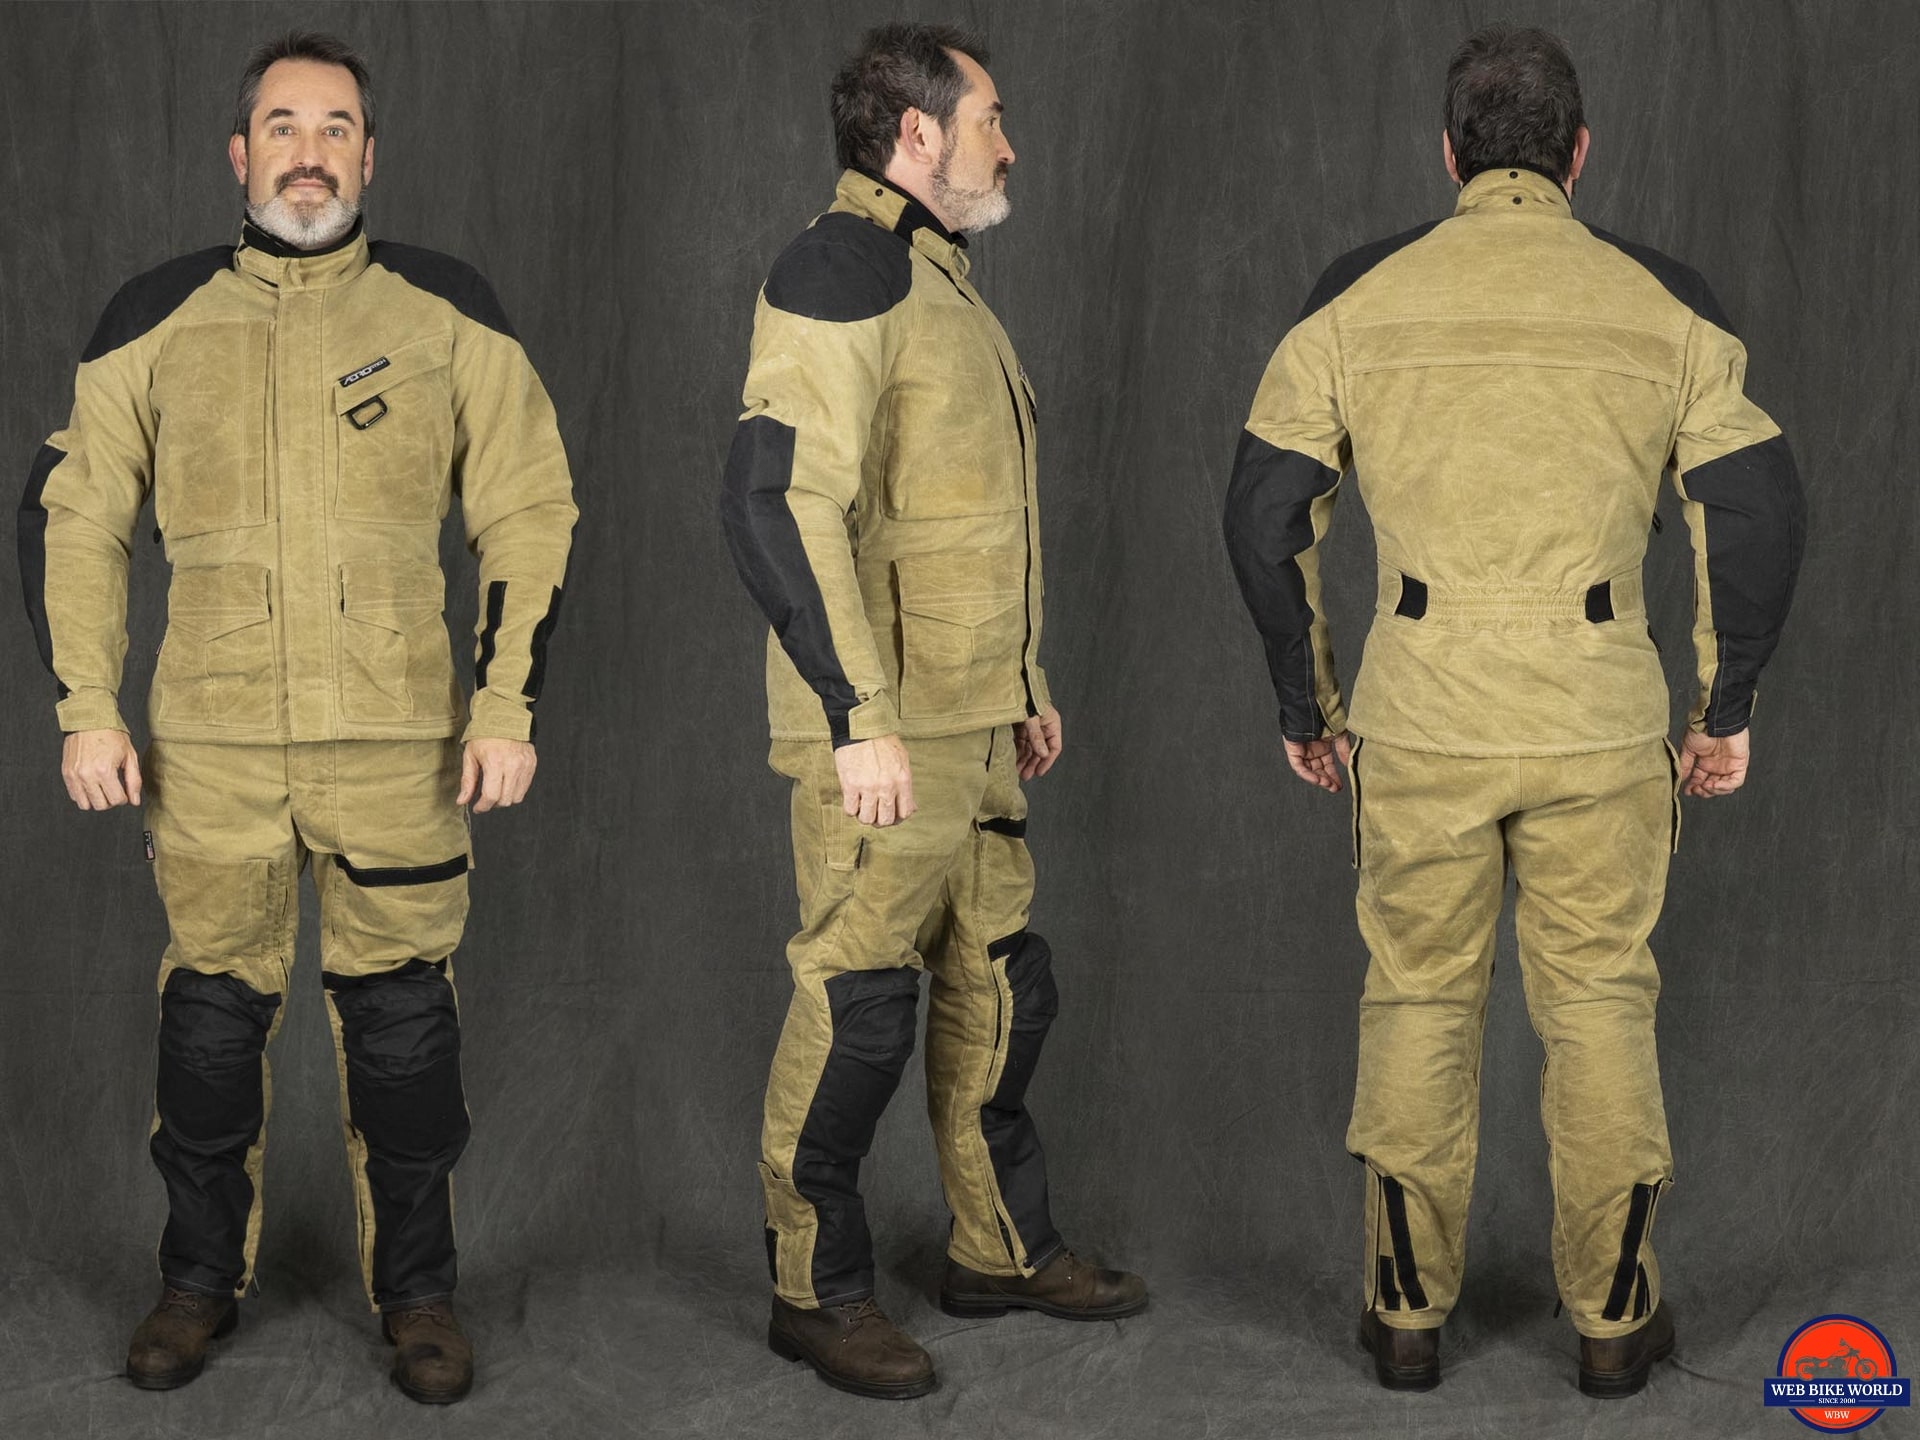
In addition to the armor, the Cousin Jeremy suit has an additional layer of waxed cotton in several areas. The elbows, shoulders, and knees have a second layer in black while the seat and back of the thighs have an additional layer in the same brown as the rest of the shell.
Keep in mind the Cousin Jeremy is not a “crash suit” so while the areas with armor will help mitigate impacts the waxed cotton of the shell will abrade away quickly when sliding on a paved surface. If higher speed protection is what you’re after, then one might consider something like the Roadcrafter as its Cordura shell offers very good abrasion resistance.
Of course, it is up to every rider to manage their risk. I ended up calling Aerostich to discuss my expectations of protection from the suit. They are very happy to discuss these details to get riders into the right product for their riding needs and style.
Conclusion… or What I Think So Far
Having spent some real-world seat time with the Cousin Jeremy two-piece suit I can say I have really enjoyed it. I was quite surprised how quickly this suit broke in and how well its “bulk” disappeared once on the bike and underway.
The comfort overall is very good as long as one respects the weather. Hot and humid weather will likely be a challenge for the Cousin Jeremy to contend with for those who like to stay cool. Of course, this all depends on rider preferences and the type of riding.
For me, stop and go commuting traffic on a July afternoon in Middle Tennessee is what I would term “sub-optimal” for spending time in the Cousin Jeremy suit.
Since that is the current state of climate where I am right now, it is the perfect time to send the suit back to Aerostich to see if they can address the shrinking waistline effect mentioned earlier. I would really prefer to be able to zip both pieces together fully rather than just a few inches at the rear. I’ll be reporting back on that in my next installment.
One last thing to note is that the waxed cotton surface does pick up marks and scuffs pretty easily. On one hand, it does help give the suit “character” but it also means my tank grips on the Ninja 1000 leave black streaks on the thighs of the pants in short order.
I’m looking forward to getting the suit back in preparation for the Autumn riding season. I think this will be the ideal time of year in my area for this suit to be a frequent riding companion.
Pros
- High-quality construction
- Tons of storage
- Sharp looking waxed cotton shell
Cons
- Price can be a barrier
- Sleeve zippers work their way open
- Cotton is not very abrasion resistant





What happened with that fitment issue. I ran into the same issue. Jacket 42r and perfect. Pants 36L and rocking. Zipped together and I can’t button them. What did they tell you?
Your question is quite timely as I just received back my CJ suit recently. They ended up sending me one of their “Forward Lean Elipses” [https://www.aerostich.com/suits/suit-accessories/aerostich-roadcrafter-forward-lean-ellipse.html] which adds some extra “room” by zipping between the jacket and pants. This did help but the suit does still shrink some in circumference when zipped together with this piece. At least I can actually zip it up now. Now that I have it back I plan to take it to a local seamstress who has done some work for me in past on my gear and see if she can examine this. I’m interested to see what her thoughts are on this. There is a follow up review coming this fall.