Increasing the Rear Visibility of a Yamaha FJR1300
Part 2 of 2
The installation of the 3M Scotchlite reflective tape kit is the second part of an overall plan to increase the visibility of my new 2006 Yamaha FJR1300 from the rear.
My reasons for performing the improvements are detailed in Part 1: Installing Hyper-Lites.
I read about 3M Scotchlite reflective tape in advertisements in several motorcycle magazines.
Although I never had the occasion to use it until now, I always kept it in the back of my mind as something I might want to use some day.
3M’s “Scotchlite” brand characterizes a family of reflective materials.
These range from the SOLAS (Safety of Life at Sea) grade, used in the marine environment, to various levels and colors of retro-reflective tapes, fabrics, stickers and even reflective paint, used in or on clothing and other gear.
After searching for the product, I found a CycleGadgets ad for a vinyl reflective tape kit in black.
Although I’ve never purchased any of their products, CycleGadgets is well known in the motorcycling community as a purveyor of interesting products, including including auxiliary lighting, GPS units, mounting brackets, rider comfort, communications and much more.
Where to Buy Motorcycle Reflective Tape Kit
Check Reviews & Prices on AmazonSee More: Motorcycle Accessories, Motorcycle Tire, Motorcycle Helmets
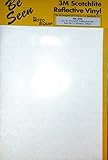
3M Scotchlite Reflective Tape
3M Scotchlite reflective tape is available in white and black, but CycleGadgets sells only the black version. It’s the heavy-duty “engineer-grade”, 7 mil (0.007″ thick), seven year, black reflective tape.
The black tape is nearly invisible when affixed to a black surface, like a saddlebag, so you needn’t worry about ruining the looks of the bike.
But when a light source hits the reflective tape, as from a vehicle’s headlights, it becomes a brilliant white that really stands out.
(Editor’s Note: Some riders prefer to use white reflective tape, which has the potential to improve visibility during the day also).
My search for what causes the product to react to light like it does resulted in minimal information other than that it is an “enclosed lens, reflective film”. 3M must want to closely guard the secret of how the product works.
Applications for this material include commercial vehicle graphics, railroad graphics, commercial signs and road striping, although it’s best applied to flat surfaces or those having only moderate compound curves.
Although CycleGadgets had precut pieces for specific models and applications available, I opted to purchase two 8” x 11” (200mm X 280mm) sheets and cut them to size and shape myself.
I had a notion of where I wanted to apply it on the FJR, but I wanted the flexibility to use it elsewhere if necessary.
One can really get creative with this product and have fun at the same time. How about a smiley face on the back of your helmet, or your own hand-made arrows on the sides?
The only limits would be your imagination, what’s practical, safe, and of course, the surface you want to attach it to.
After visualizing where the tape would provide the best results yet be nearly invisible, and consulting my invaluable assistant (my wife), I chose to place a piece approximately 5” (126mm) x 7” (178mm), on the backside of each side case.
This would result in an overall span of two feet (610mm) between the two outer edges.
Before cutting anything, I taped the sheets in place with masking tape, turned out the lights and shined a light at the bike to confirm the effect was adequate.
WOW! Does this stuff work!
The tape does not have to face perfectly to the rear to be effective either.
A paper pattern was cut first so as to ensure proper fit and positioning. This pattern was then transferred to the backing paper on the 3M reflective sheet with a pen then easily cut out with ordinary scissors.
Any surface where the paper is to be placed has to be cleaned first with rubbing alcohol a couple of times to ensure any waxes or oils are removed. This helps the tape to adhere properly.
It is advised not to use paper towels since they often have some sort of oil in them, so it’s best to use a cloth, turning it frequently, to be sure there is nothing to inhibit the tape from fully adhering.
Actually placing the tape onto the bags turned out to be a bit trickier than I anticipated. I tried to work from the center out, but once the stuff touches, it’s there for good.
I later learned, from some people skilled in auto detailing work, that had I sprayed the bag surface with a mild soapy water mix, I could have slid the paper around until it was exactly where I wanted and then just gently squeegee the water out from under it.
Ah, the lessons in life! (Note: See Owner Comments below regarding this.)
That’s not to say my application is way off. I’m the only one that knows or will probably notice that one side’s a millimeter or two off compared to the other.
Of course, if I remove the side cases the 3M tape will no longer be on the bike, but I almost always ride with them on.
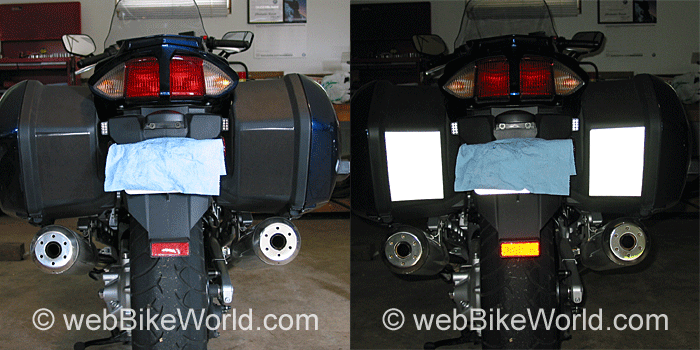
With the tape in place the effect is quite brilliant.
When the headlights of a car strikes the tape from behind, the reflective tape lights up vividly and makes the bike far more visible and appear wider in the dark, which could help in preventing a collision. It certainly demands attention!
Add this to the 3M Scotchlite reflective tape on a riding jacket (you DO wear gear with reflective material or piping sewn into the garment, right?) and the overall effect is greatly improved visibility.
If the side cases were also black on the sides, instead of being color matched to the bike, I would place some tape there, in addition to the reflectors, to make the bike more obvious from the side.
Conclusion
Strategic application of 3M Scotchlite reflective tape to the rear or sides of a motorcycle is another easy, inexpensive improvement that can drastically increase the bike’s visibility to other highway users in the dark, which is when we are probably most vulnerable.
When illuminated at night or in the dark, the reflective tape virtually jumps out at the following vehicle and it’s hard to miss. Imagine what an aid this could be when you’re caught in the rain and/or low lighting conditions?
Let’s face it, we need all of the help we can get!
Master Listing of All wBW Motorcycle Product Reviews
Where to Buy Motorcycle Reflective Tape Kit
Check Reviews & Prices on AmazonSee More: Motorcycle Accessories, Motorcycle Tire, Motorcycle Helmets
Owner Comments and Feedback
See details on submitting comments.
From “I.C.” (March 2012): “The author mentions the possibility of using soapy water (to place the stickers when mounting).
Specific product information for 3M 680-85 says not to do this:
“Application Method: Use a dry method. Do not use a detergent and water or a commercial application liquid to position the graphic.
Positioning: This film has a positionable adhesive. This 3M technology is a mechanical feature, not an adhesive property. Application pressure bonds the adhesive to the substrate and destroys the positionability feature.
This film loses its positionability feature at application temperatures above 38C. Refer to the Instruction Bulletin 5.4 for application details”.
From “G.W.” (05/11): “I read your article on the 3M reflective tape and then … purchased two 4″x9” sheets of 3M Black Reflective tape for $6. Cut it to the shape for my bike and applied it. Here is a shot of my bags with the tape applied:
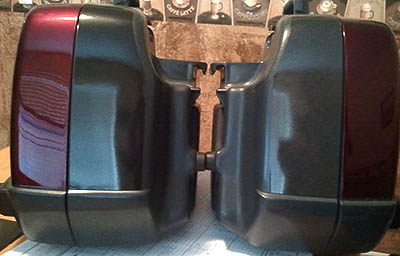
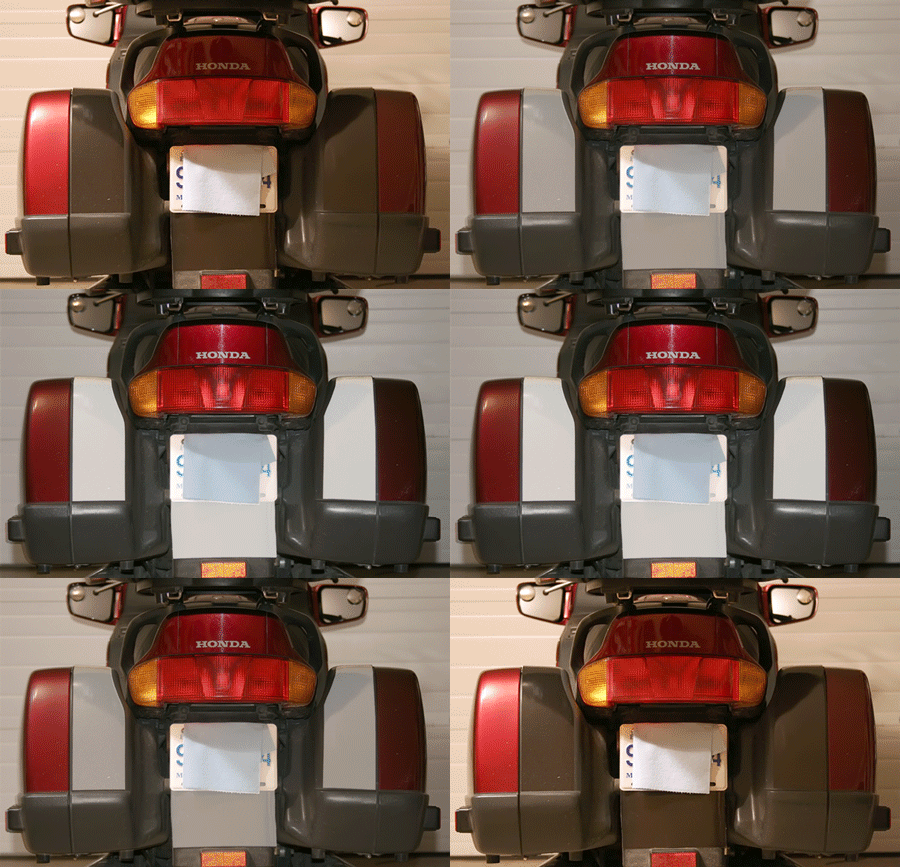
From “B.L.”: “I wear an all black, full-face helmet. I wanted to increase my visibility, but the silver/black reflective kits didn’t really appeal to me, for the price.
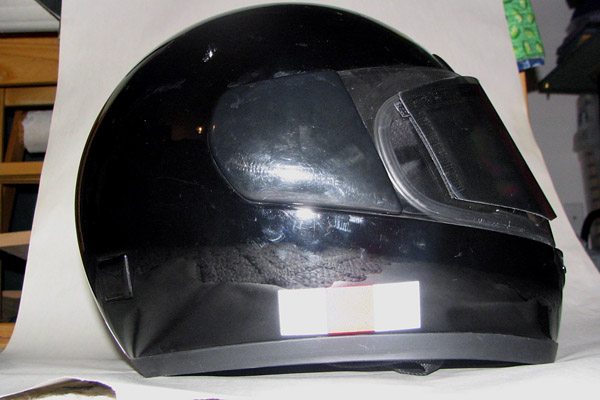
I thought about the red and white reflective tape strips I see on utility trailers, and semi-trailers. They are highly visible, both day and night, so I purchased a roll of 3M red, and 3M white, reflective tapes from a local auto parts store.
For $10, I got three feet of each color ($5 per roll), with a one-inch width on each roll. I cut 1″-squares, two white, one red, for the front, and both sides. I held them in place, at the bottom of each side, and the rear, to see if I liked the look. Being satisfied, I peeled and placed the tape segments.
They are not obnoxious, but they do make quite a difference in visibility! As you stated in one of your articles, the head is high, and it can attract a lot of attention from other motorists, IF your helmet is highly visible.
Your comments inspired me to give this technique a try, and I am very satisfied with the results. My wife was very skeptical, at first, but she has since asked me to do the same with her identical helmet. Thank you for the inspiration!”
From “M.S.”: “To clean areas before applying adhesive products, use an alcohol prep pad and allow to air dry. They come in boxes of about 100 for around $4.00.
Plus they are great for cleaning scraped knuckles after working on your bike – just a little sting…”
From “S.”: “Glad to see some articles on the FJR 1300 – I’ve had an ’05 since Feb of 05 and it’s a great piece of machinery.
Regarding the 3M on the bags – a great idea, but I have another supplier for you – if you check on eBay for a seller named Deanoko, he sells the 3M sheets custom-cut for the FJR saddlebags (and several other bikes as well).
He’s been selling for several years, and is a fellow FJR owner. I have one of his sets on my bike and the fit is perfect – looks factory.
Also, for more great FJR info, check out the FJR Forum. It’s a very busy site for owners, with all sorts of great info, both on the bike and all the fun farkles you can add to it. Thanks for the great site.”



No Comment