AltRider Headlight Guard Review
The AltRider Lexan Headlight Guard Kit is an example of what experience, knowledge and involvement in the motorcycling community can deliver: clean simple design, visual appeal and durability for the long haul.
AltRider makes headlight guards and auxiliary light guards and both are worth considering for safety and protection.
My experience installing the AltRider Crash Bars (review) on my BMW F 800 GS was very positive.
So when the Editor asked if I wanted to evaluate another AltRider product, there wasn’t any hesitation on my part.
About a week later the mailman delivered a package containing the AltRider Lexan Headlight Guard kit, along with the accessory AltRider Glare Guard.
Everything was packed in two plastic bags; one containing the Lexan-based headlight guard components and a set of instructions, with the second holding the shaped polymer Glare Guard and the instructions for mounting it.
My two BMW F 800 GS motorcycles have hosted other plastic headlight guard systems.
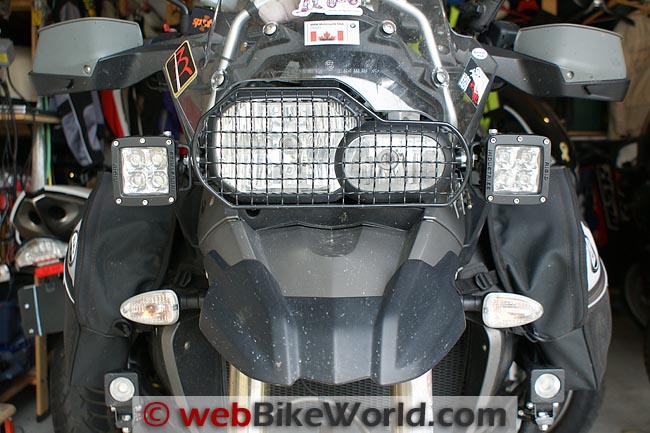
Although both bikes were currently adorned with wire-mesh guards, which may be more suited for off-road use because they avoid some of the concerns in using a solid transparent shield under widely varying conditions (i.e., mud, dirt and stones).
But all arguments aside regarding which type of headlight guard to use, the timing was right to remove the wire guard on one bike and install the Alt Rider kit in its place.
Where to Buy AltRider Headlight Guard Accessory
Check Reviews & Prices on Amazon Check Reviews & Prices On RevZillaAlso Shop for: LED Lights and Bulbs, Auxiliary Driving Lights, Motorcycle LED Headlights
In the Package
The AltRider Headlight Guard is another very functional set of components, based on proven concepts and using sound design principles with a focus on functionality.
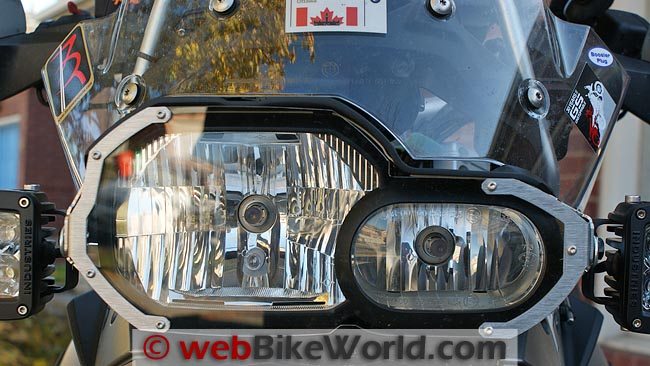
The front or face plate is a thick “bullet-proof” Lexan plastic piece, cut to emulate the shape of the motorcycle’s headlight module (in this example, the BMW F 800 GS), albeit scaled up for increased frontal coverage.
Thin stainless-steel frames are fitted to each end and secured through the Lexan headlight guard with small Torx screws.
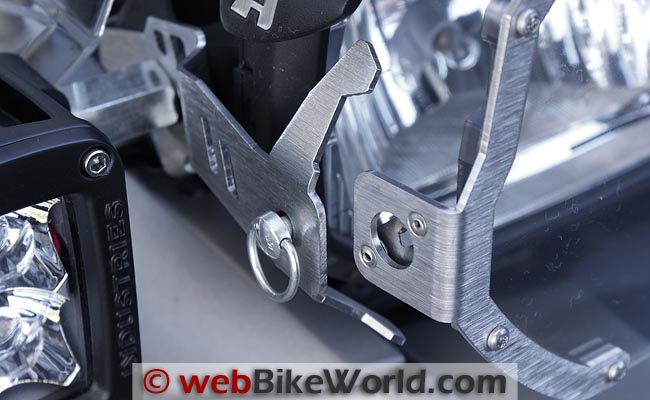
This partial framing reinforces the Lexan face plate at the ends and provides the reinforced engagement receptacles (holes) for the quarter-turn “Dzus” fasteners mounted on the side arms.
For size estimation purposes, the BMW F 800 GS face plate is 12 inches wide and varies from 6 to 4 inches in height (Lo to Hi beam side). The whole assembly weights less than one pound.
Each stainless-steel side arm is precisely and stylishly cut, which presents a clean and eye-catching profile.
The back shape of each arm emulates the shape of the motorcycle headlight supports, while two outer 90-degree bend tabs facilitate alignment and provide strength when everything is tightened up.
The quarter-turn Dzus fasteners make mounting or removing the face plate a three- to five-second process, while the horizontal (slotted) mounting cut-outs provide the ability to adjust the face plate towards or away from the headlight.
This is particularly useful where regulations or riding conditions dictate a change in clearances or angle.
Installing the AltRider Headlight Guard
The AltRider parts installed for this evaluation were the Lexan Headlight Guard Kit for BMW F800GS, PN F809-0-1105, and the Glare Guard for the BMW F800GS, PN F809-2-1112 (bundled or available separately).
Kit components include the Glare Guard, left and right stainless steel arms, Lexan face plate guard, T15 Torx screw (for plastic), 0.5 ml of Loctite 242 thread locker and installation instructions.
Torx T8, T15 and T30 Torx socket bits or T-handle drivers are necessary for installation.
Accessorizing the F 800 GS “test mule” (my favourite ride) is a work in progress, so some preparation time was needed to remove other pieces prior to installing the simple and well finished components of the Alt Rider kit.
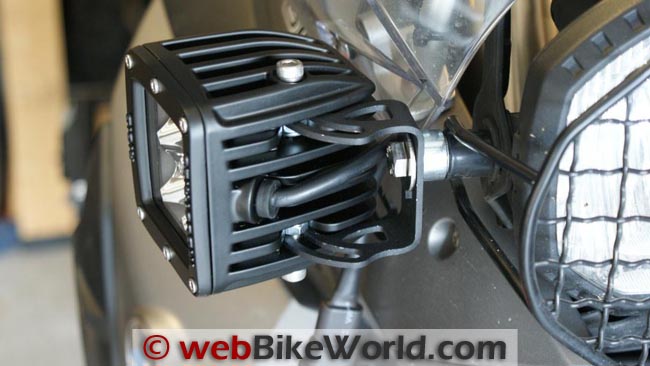
The Rigid Industries Dually LED lights (review in process) use the main headlight mount points, as does the headlight guard (a wire-mesh SW-Motech component).
Thus, longer M8 x 50 mm stainless steel screws secure everything, including the headlight side frames, to the headlight housing.
Before removing the hardware (stock or otherwise), always note the relative position of the “aiming marks” on the headlight module and the headlight supports.
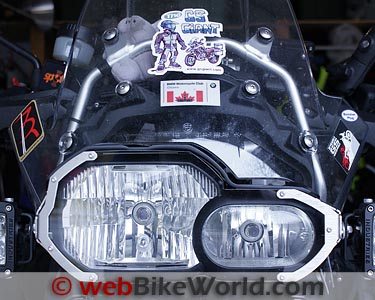
There is a small horizontal indent line on each side of the headlight module and a small plastic pointer molded into the end of each support arm: together these serve to simplify headlight module alignment or aiming.
Hint: taking a close-up photo works wonders here…and elsewhere.
If the headlight mounting points are not used for anything else, the whole installation process is very simple and except for the replacement bezel screw all OEM hardware is reused. Less the minor Torx-screw point noted above, the installation instructions are clear and complete.
AltRider Glare Guard Accessory
The shaped Glare Guard was installed first.
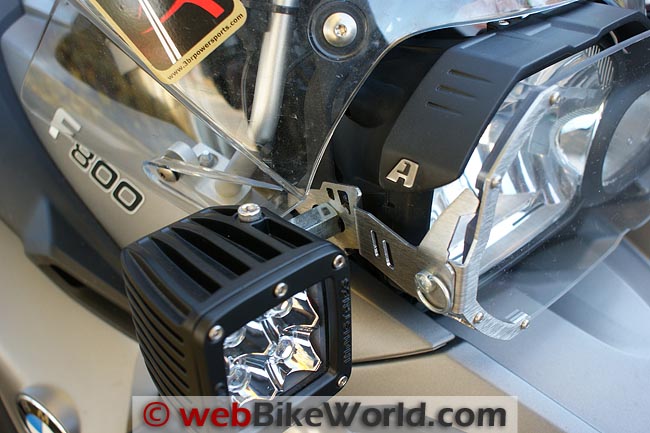
Molded to fit the top shape of the F 800 GS headlight bezel, the heavy-duty but lightweight piece secures to the headlight bezel using the replacement screw included in the kit and multiple narrow strips of 3M VHB adhesive affixed to the underside or mounting surface of the glare guard piece.
Where to Buy AltRider Headlight Guard Accessory
Check Reviews & Prices on Amazon Check Reviews & Prices On RevZillaAlso Shop for: LED Lights and Bulbs, Auxiliary Driving Lights, Motorcycle LED Headlights
Mounting the AltRider Headlight Guard
On to the headlight guard… The instructions recommend installing the Lexan plate before remounting the headlight module but I didn’t want the face plate getting in the way while installing the multiple pieces on each side.
So with everything reassembled, I fitted the Lexan face plate frame, engaging each end and gently twisting the wire rings a quarter-turn.
As desired, or required, the Lexan guard can be positioned one of three ways: forward; flush with the Glare Guard; or tucked in close to the headlight lens.
I deliberately left 10 mm between the Glare Guard and the back surface of the Lexan face plate for now.
If nothing has moved during reassembly, the headlight aiming marks should be in alignment fore and aft (front to back) and proper rotation orientation of the headlight will be close.
After some final photos, I waited until the sun set and then checked the horizontal and vertical aim of both the headlight and the Rigid Industries Dually auxiliary lights using standard test distances and heights.
To simplify the process, I have my driveway and garage door marked accordingly.
Riding With the AltRider Headlight Guard
My first observation is not really about functionality, but appearances — the AltRider Headlight Guard really stands out, in a complementary way. Everyone seeing the assembly has commented positively on its appearance.
It is hard to miss — the Lexan plate, shiny stainless steel frame pieces and burnished arms sit in contrast against the mostly dull and muted surface colouration of the motorcycle.
The next observation, actually made before installing the kit, is really a question: “Why aren’t both the Lexan and wire plate options provided with or offered as an add-on to the base kit?”
For anyone who needs or wants to use both screens on a rotating basis (for on- or off-road riding), depending on the way ahead, this is a no-brainer — the quarter-turn fastener serves to illustrate how simple it would be to mount either type of screen.
Stashing and carrying the other front plate during a trip would be well worth the added convenience of being able to switch screens when riding off-road.
On the road, the AltRider Headlight Guard performs admirably. The Lexan face plate has already passed its first test by stopping several small rocks thrown off a passing (speeding) construction vehicle.
Another brand of Lexan headlight guard that I had installed for a short period of time at one point caused headlight reflections at night and some duct tape was needed to prevent the glare.
Unwanted reflections and glare on a headlight guard is a real safety issue, something the AltRider Glare Guard eliminates completely while looking good at the same time.
Conclusion
Headlight assemblies are not cheap, believe me.
A good headlight guard kit is at least 50 percent less expensive than the cost of replacing a headlight assembly, so it may be money well spent.
The AltRider Lexan Headlight Guard kit is a great addition to the F 800 GS.
It looks good, works as intended and the quarter-turn Dzus fasteners eliminate any excuse for not keeping the face plate and headlight glass clean at all times.
More: AltRider Crash Bars Review | BMW F800GS Review | BMW F800GS Accessories
Where to Buy AltRider Headlight Guard Accessory
Check Reviews & Prices on Amazon Check Reviews & Prices On RevZillaAlso Shop for: LED Lights and Bulbs, Auxiliary Driving Lights, Motorcycle LED Headlights
Owner Comments and Feedback
See details on submitting comments.
From “T.B.” (September 2012): “I was wondering how and what did you use to install the rigid aux lights?”
H.B.C.’s Reply: The Rigid Dually LED lights (the long overdue evaluation is nearing completion) are best positioned, for my purposes, at the headlight level.
So it was a simple matter to use a longer SS M8 screw, spacer (for more BMW Touring Windscreen clearance) and SS fender washers to mount the pivot brackets.
With this done, position the LED modules and install the top and bottom bracket screws into place (replaced supplied hardware with stainless steel pieces).
The pivot slots on the brackets allow the modules to be moved around for adjustment, or to access the headlight mounting screws.
The Dually modules are super strong and heavy, but everything has survived over a year of use including hard off-road pounding.



No Comment